No bread flour due to the pandemic? All-purpose flour lives up to its name.
Due to the pandemic, I go to the grocery store only one day a week. Each time I walk the aisles in my mask, I look in the baking section for bread flour. Unfortunately, in the eight weeks I’ve been sheltering in place there has been scant bread flour. Recently though, there’s been an uptick in all-purpose and specialty flours like spelt, oat, and rye.
Even with no bread flour, you can bake a good loaf.
Since I’m quickly running out of my supply of bread flour, I decided to conduct an experiment–build a bread using only lower-gluten flours. Could it be done? I had hope.
I took my basic bread recipe, which normally uses bread flour, whole wheat flour, and dark rye flour, but replaced bread flour with all-purpose flour and whole wheat flour with spelt. These flours don’t have high gluten content.
Sloppy Baker’s Tip: For the uninitiated, spelt is an ancient wheat, cultivated since about 5000 B.C. and a food staple in Europe from the Bronze Age through Medieval times. Don’t expect to find it in a big paper package like typical flours; it’s often in the specialty/natural foods section of the grocery store and comes in a pouch about the size of a bag of candy.
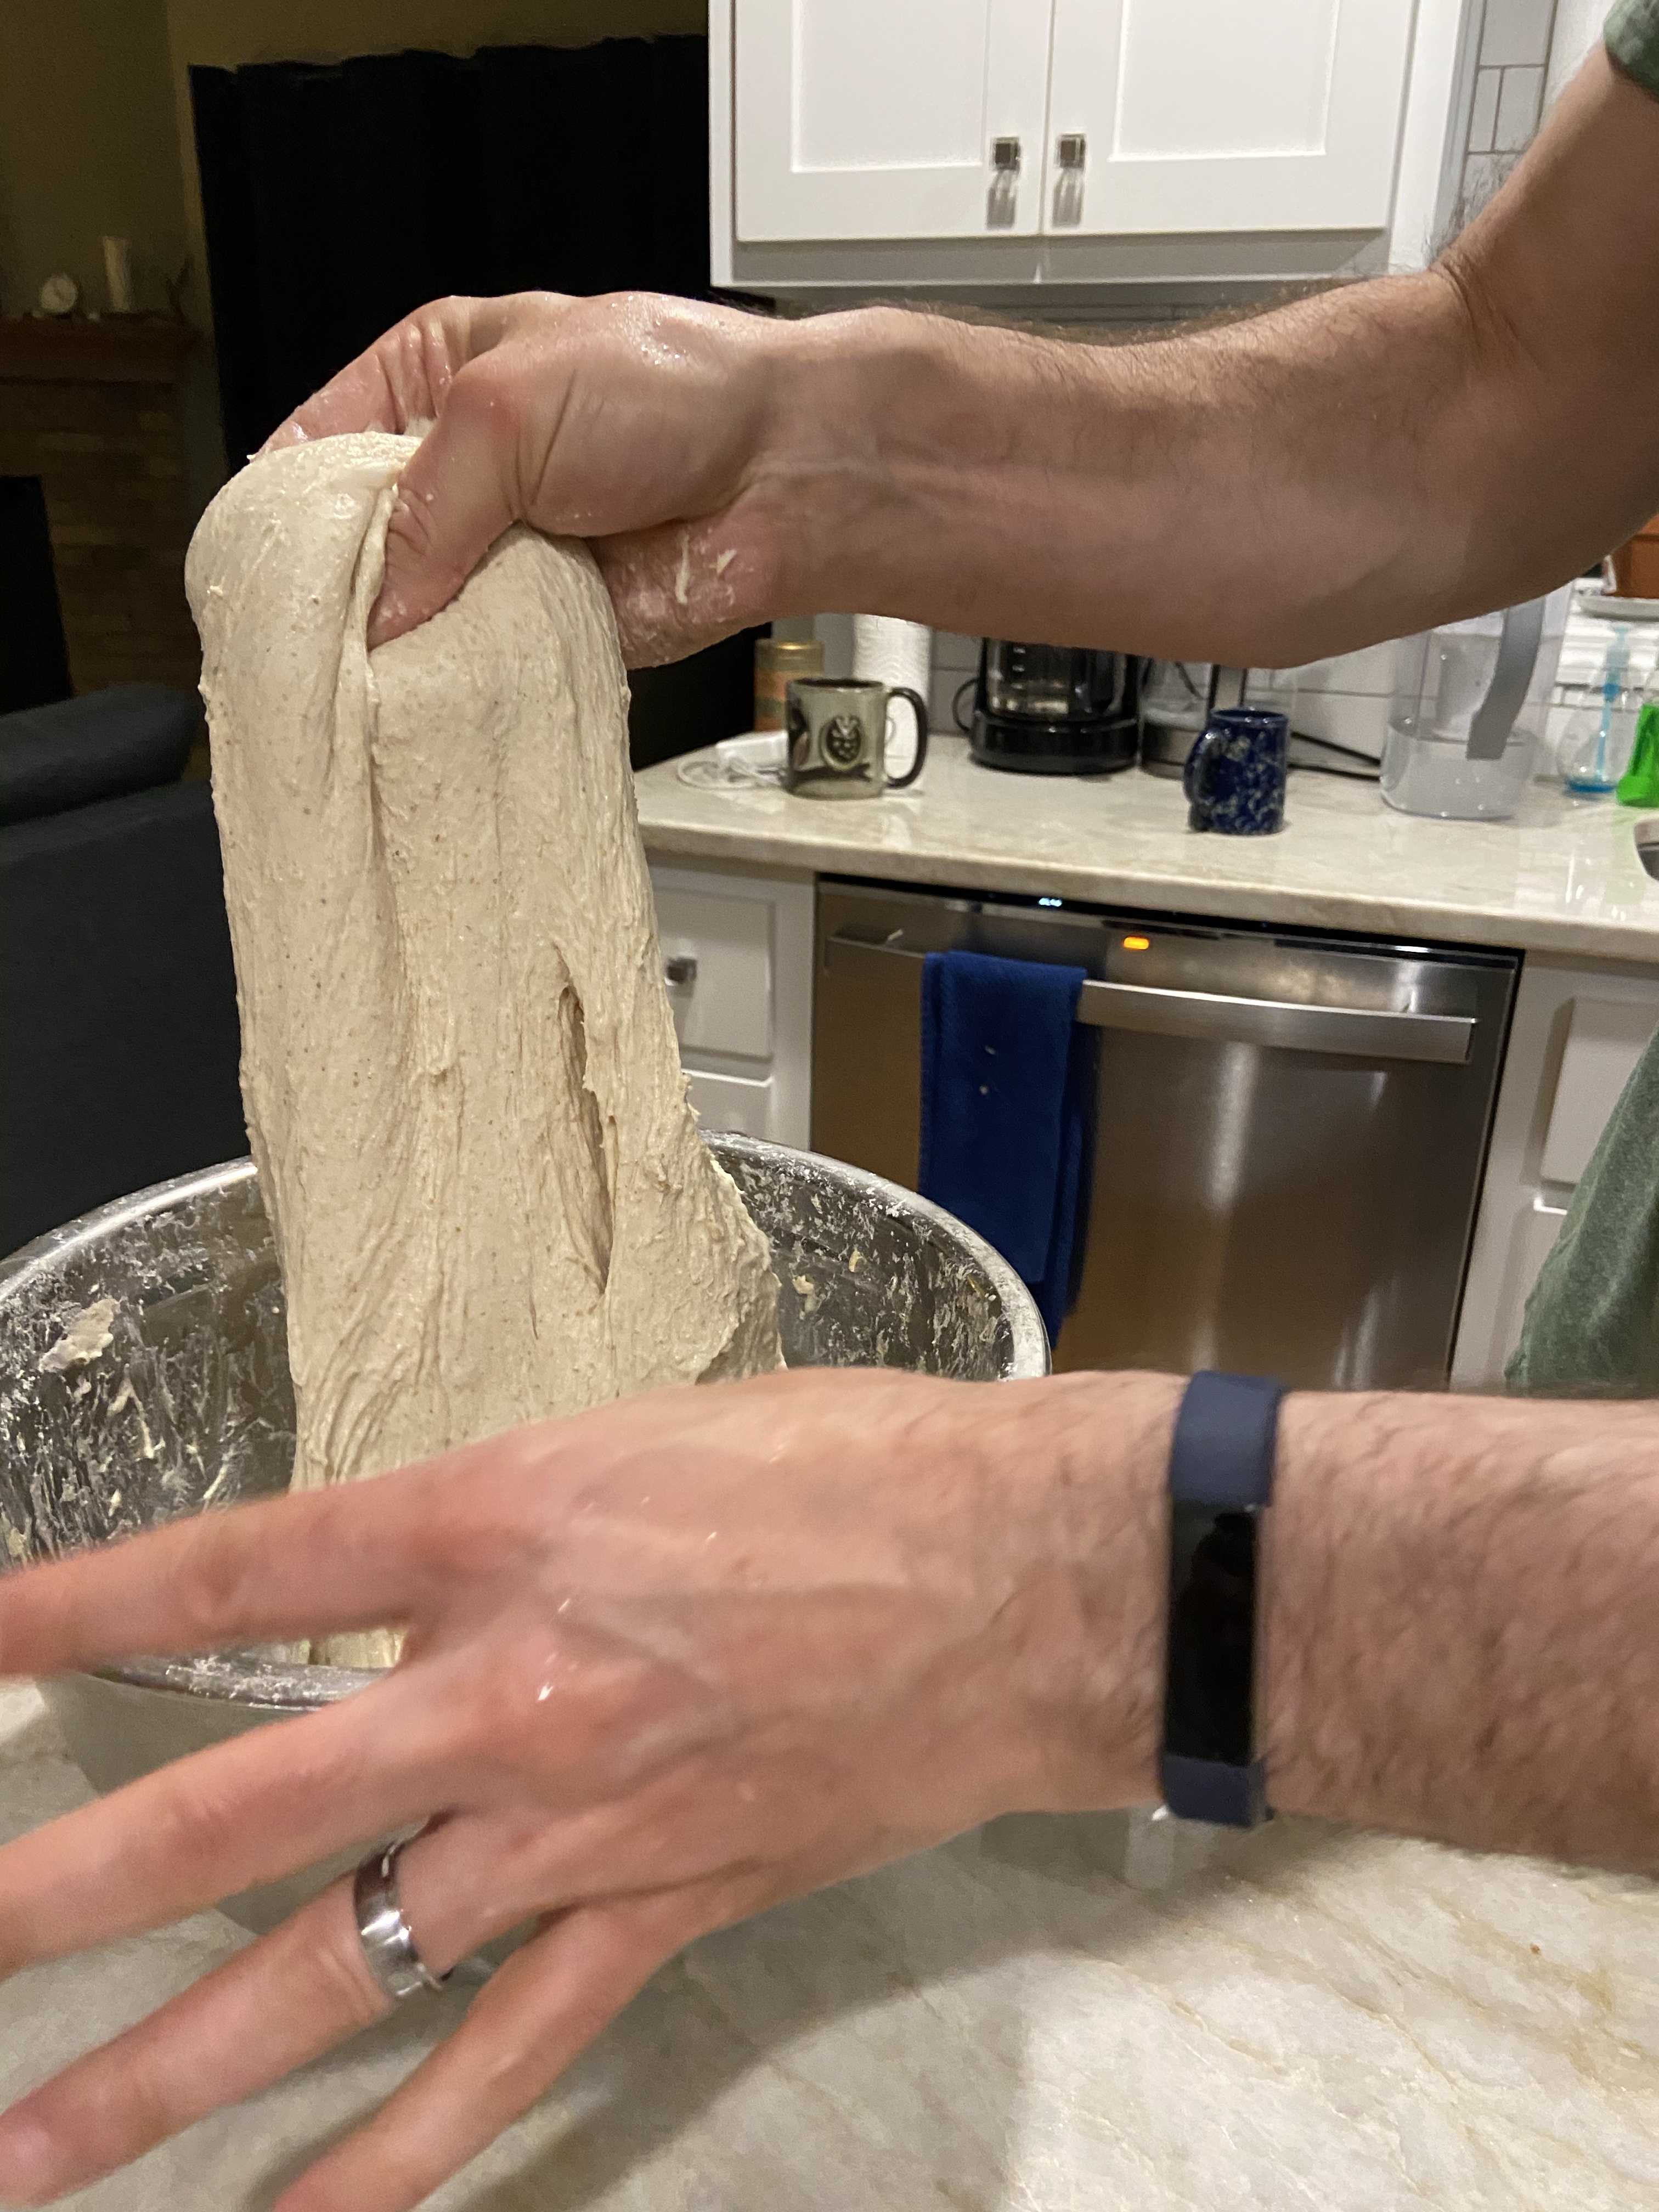
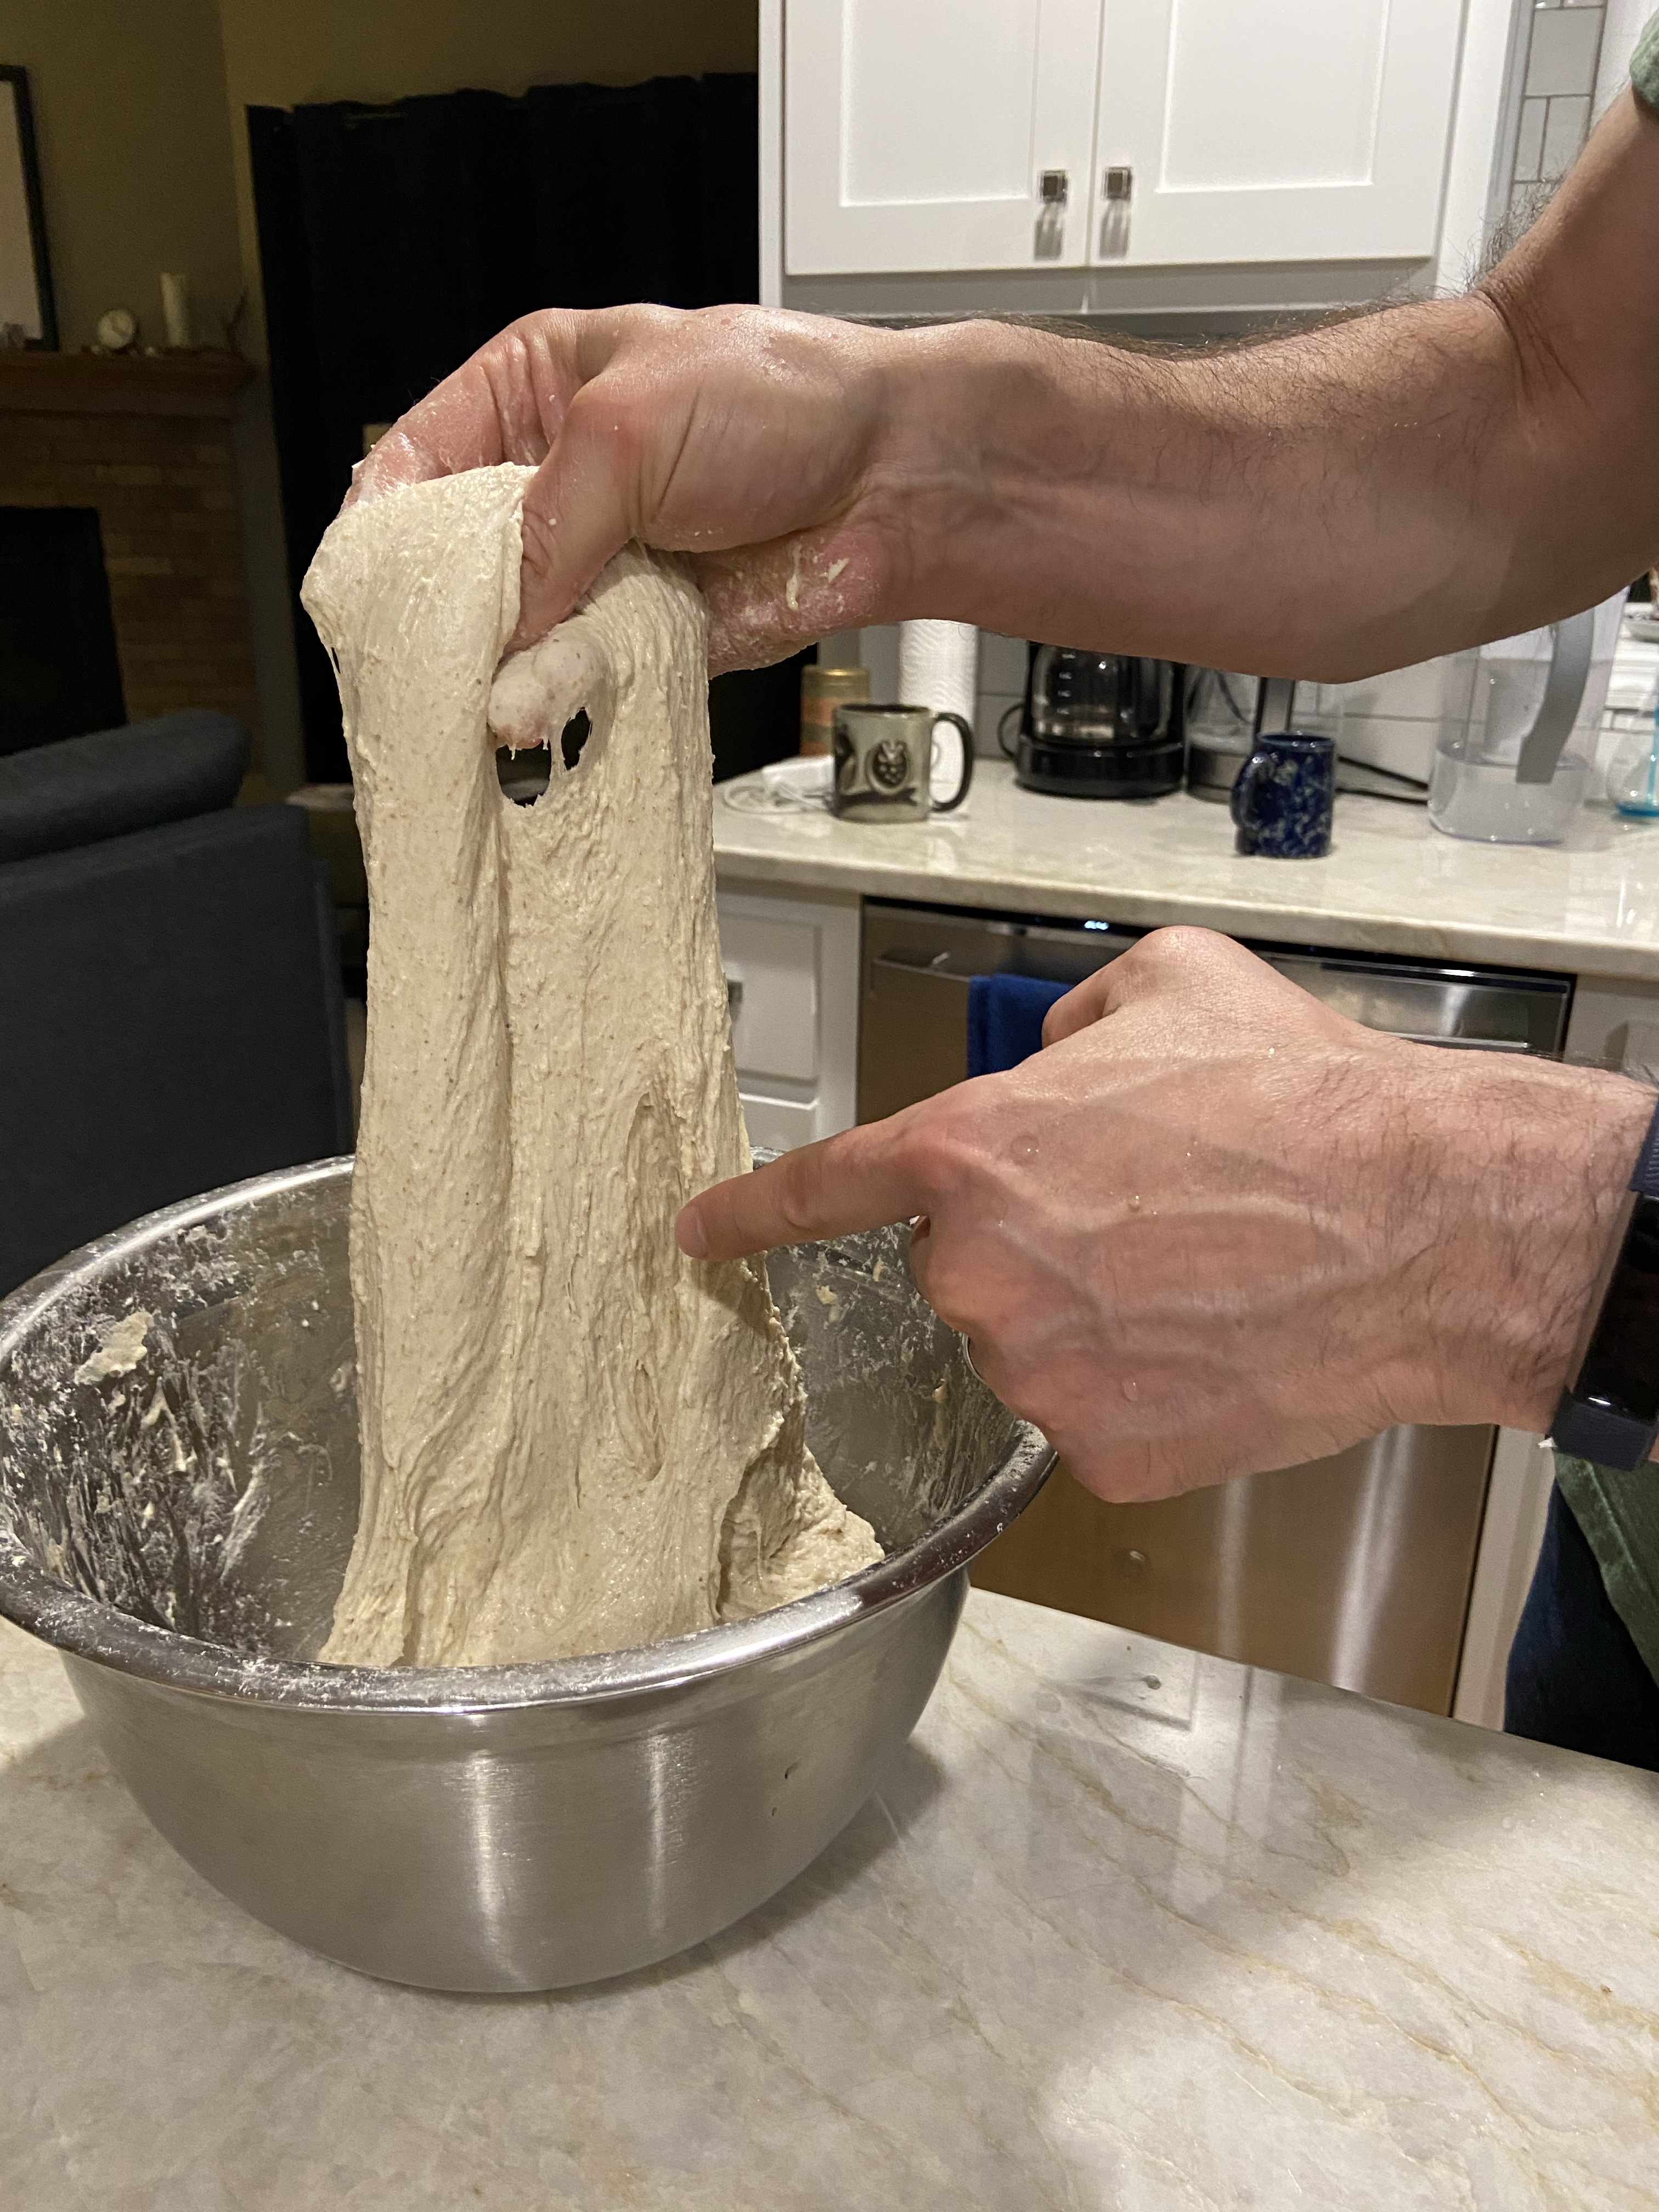
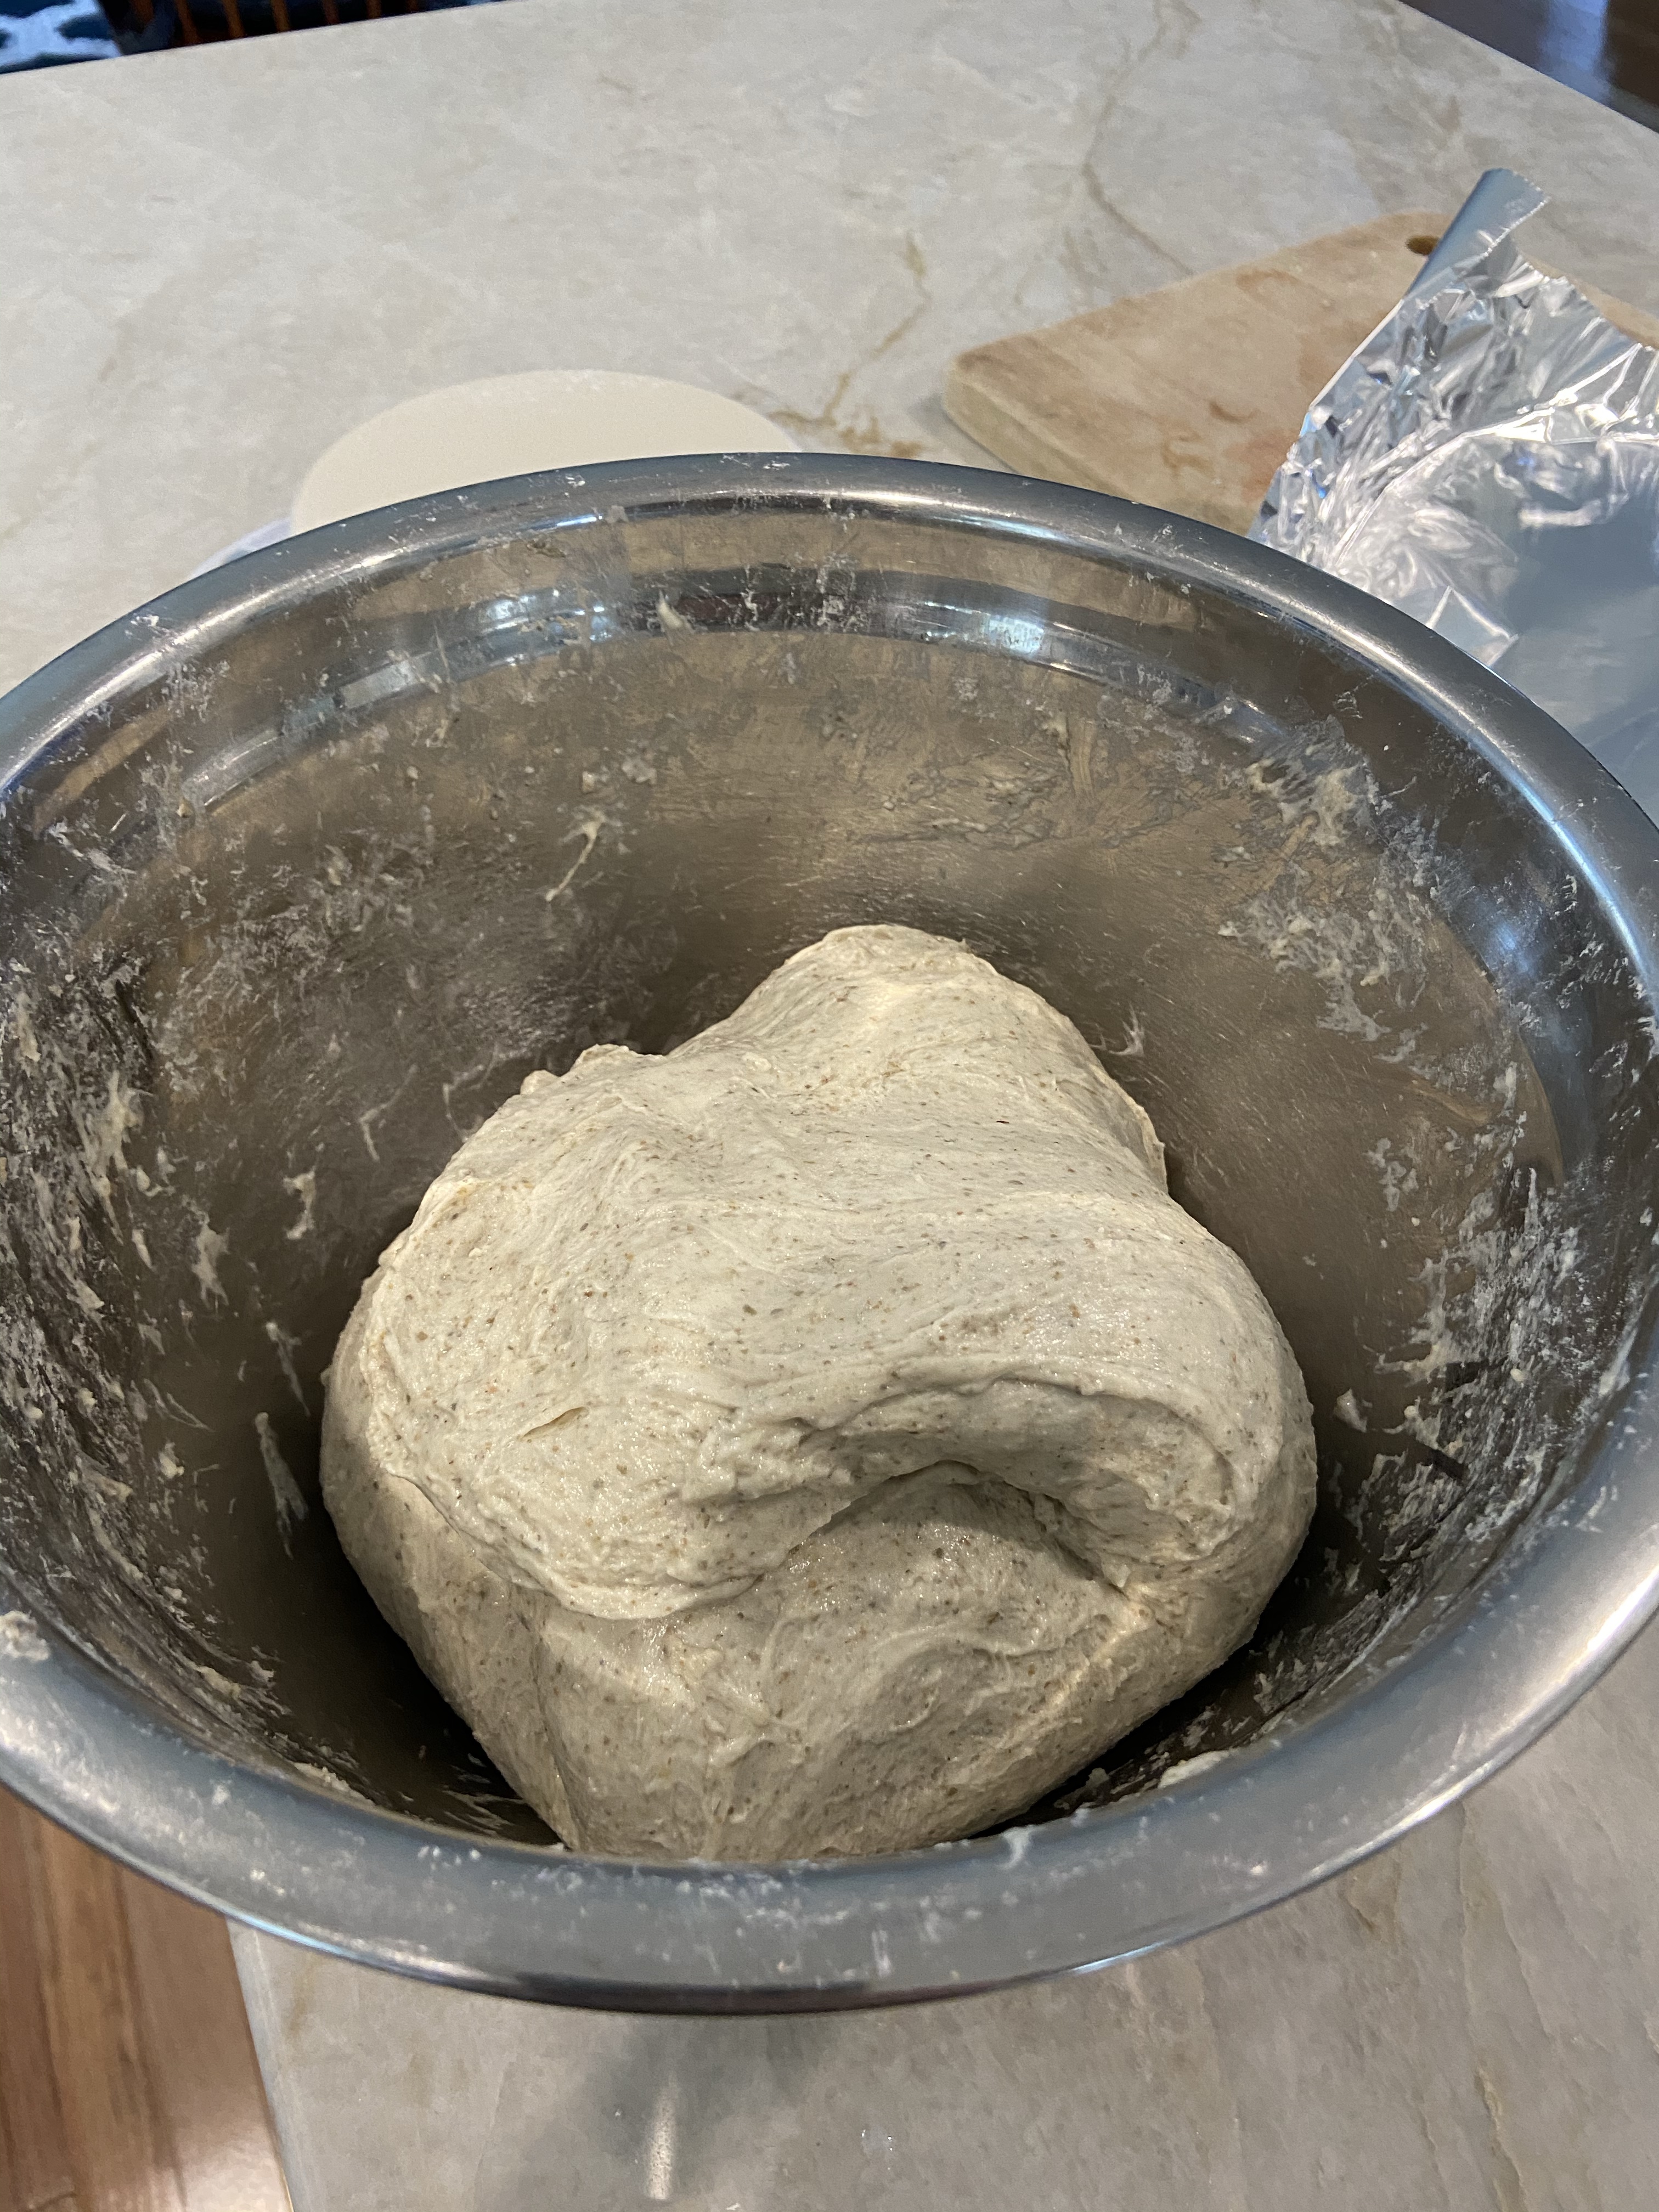
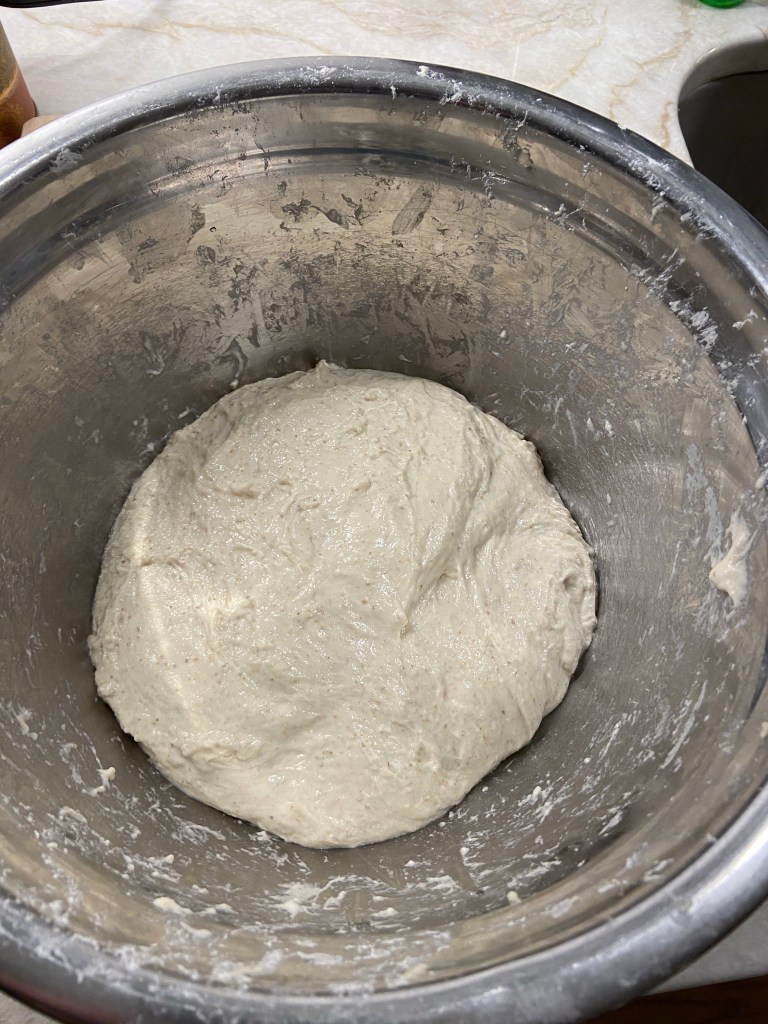
The dough was much more slack and sticky than higher-gluten versions, and required more stretch and folds to build up the gluten and smooth out the dough. As I stretched out the dough, it tended to tear, even later in the process. The difference was noticeable.
The dough will tear more easily as you stretch it. Keep on working it.
Sloppy Baker’s Tip: Even though the dough tears a little, don’t be afraid to stretch the dough and treat it a little roughly. You’ll need to really work the dough to build up the gluten.
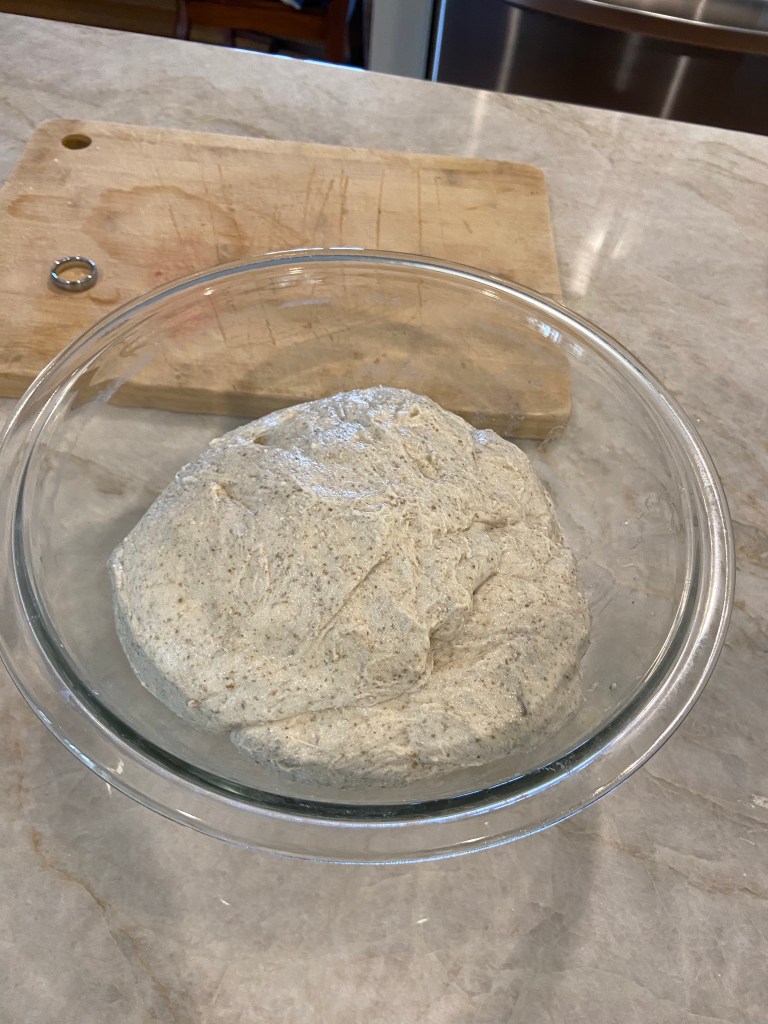
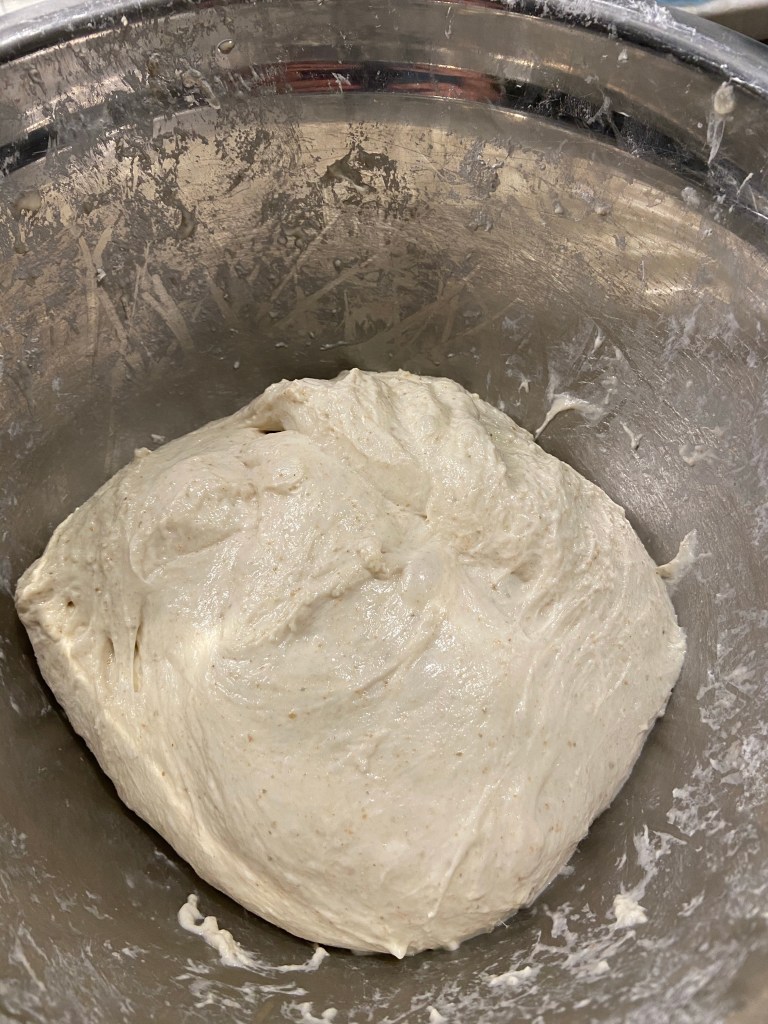
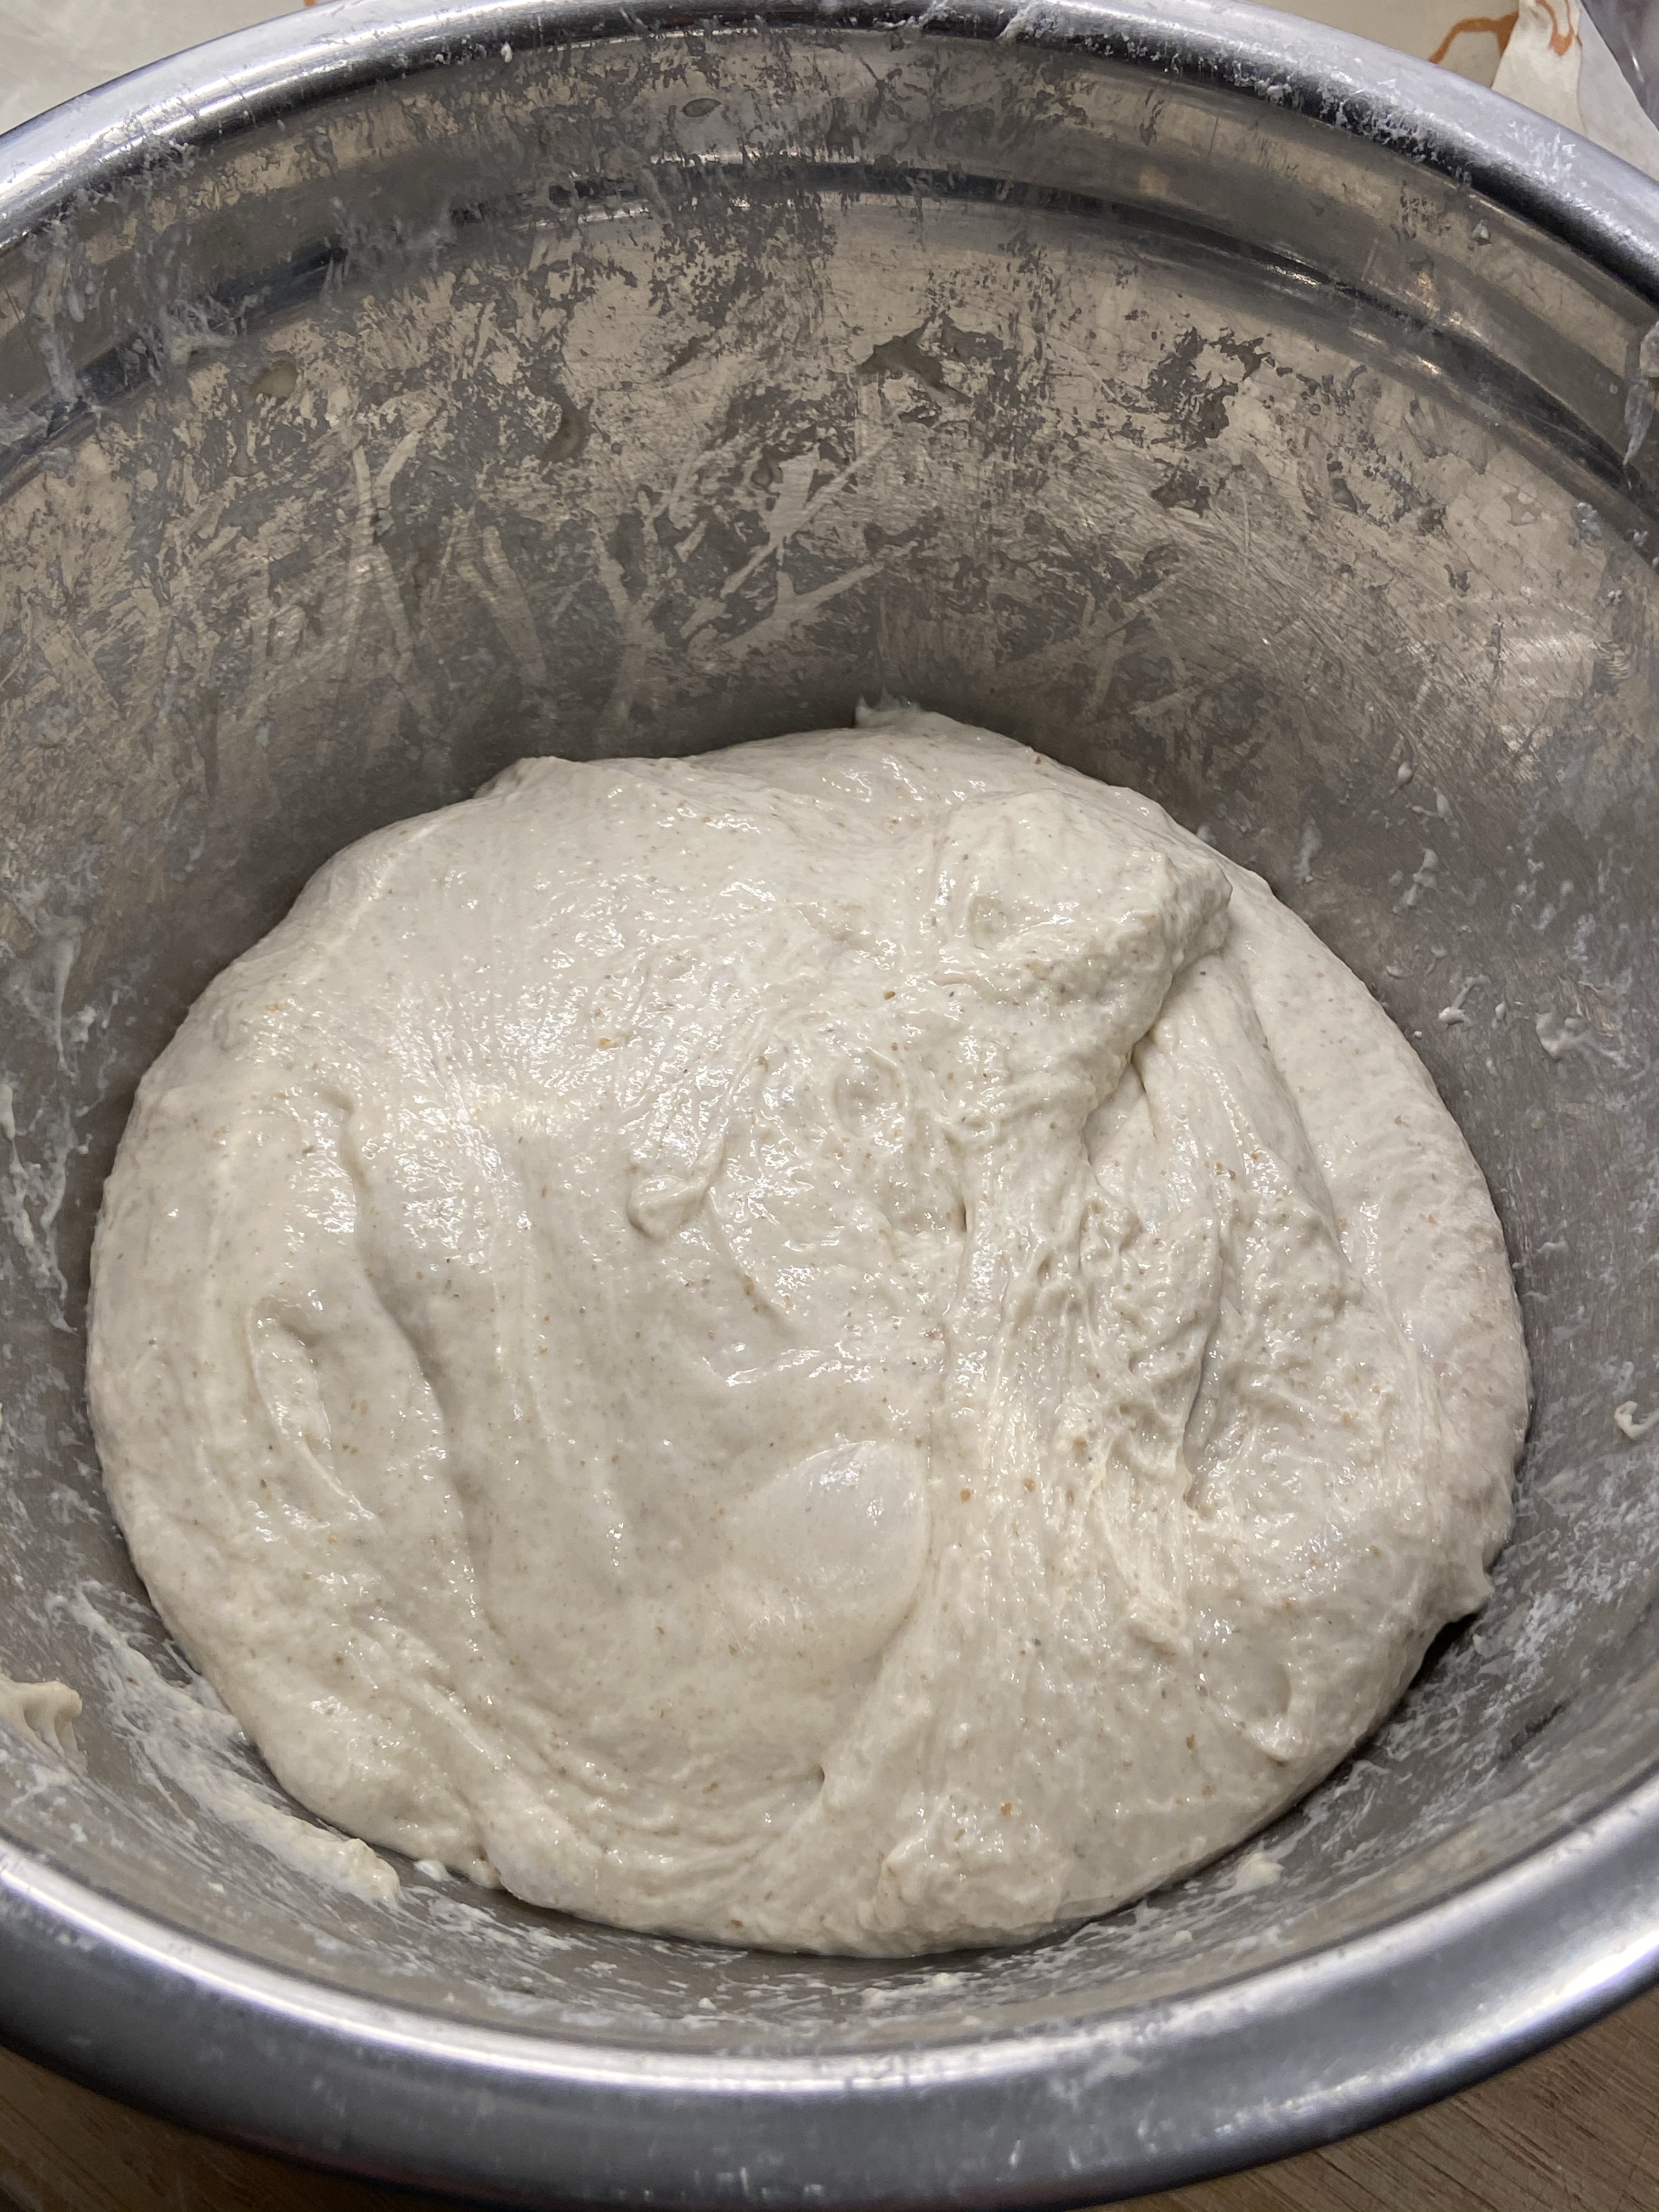
After the stretch and folds, I covered the bowl and let the dough ferment on the counter for a couple hours until small bubbles began to appear on the surface.
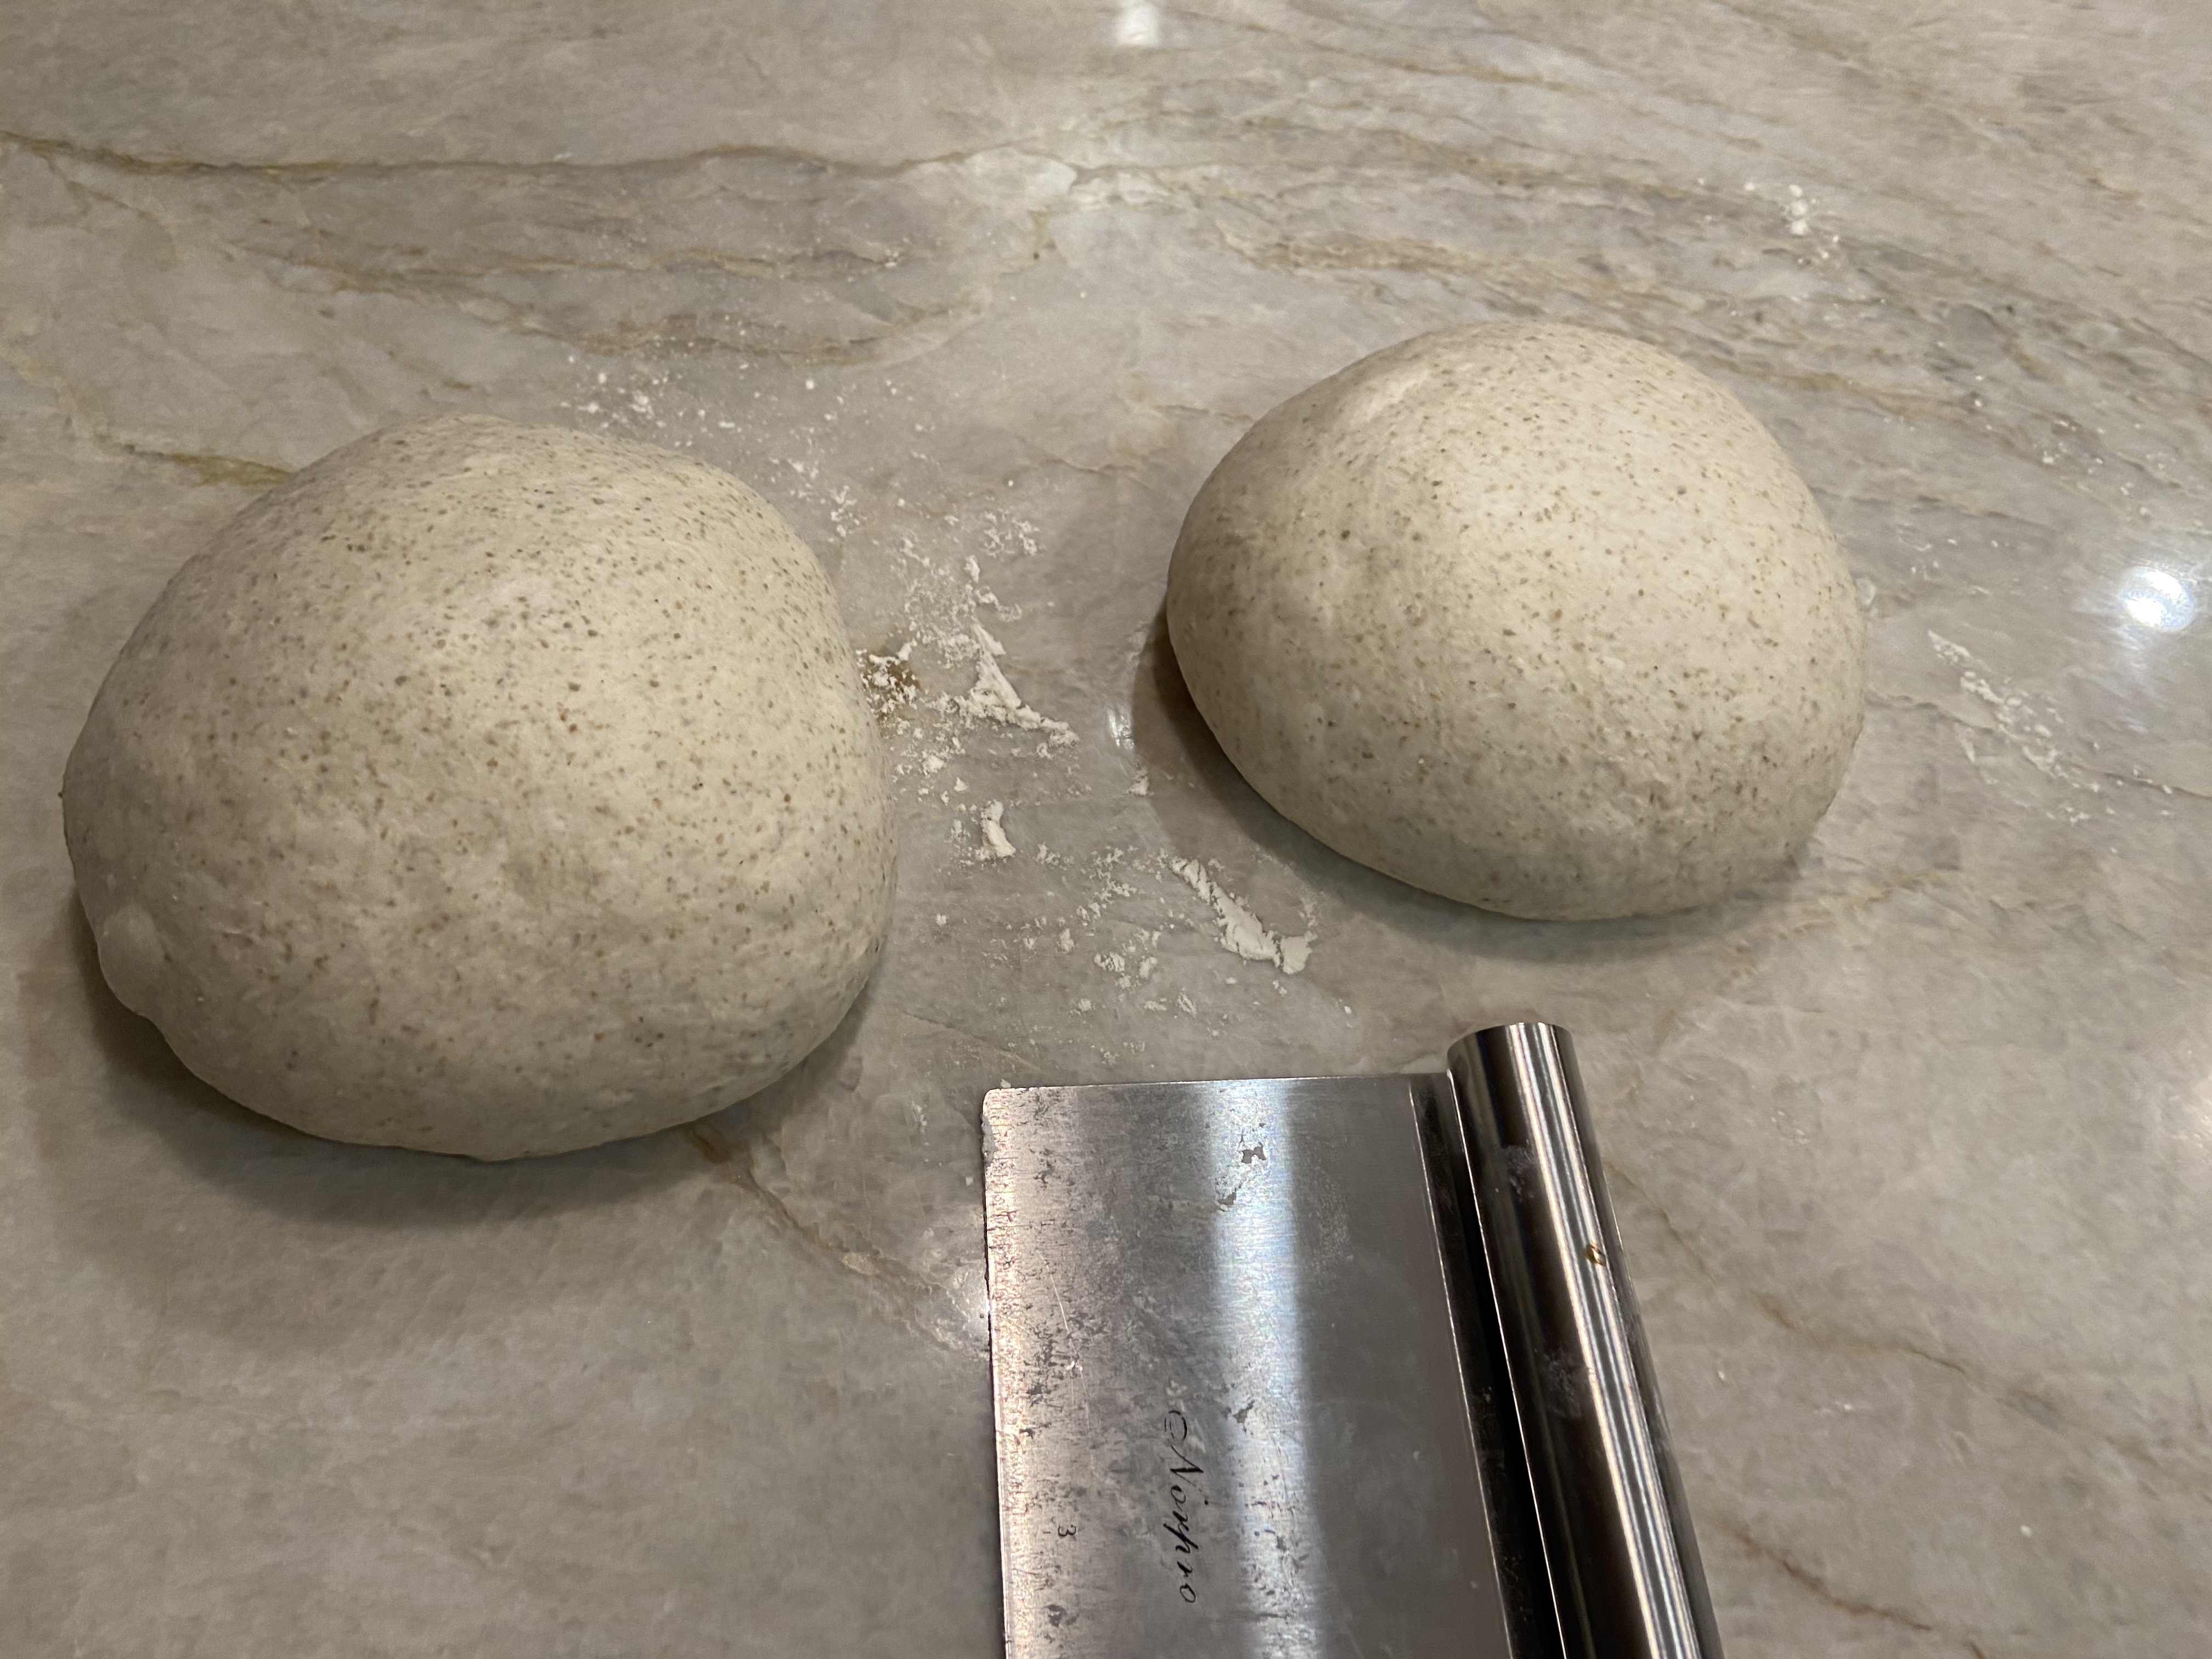
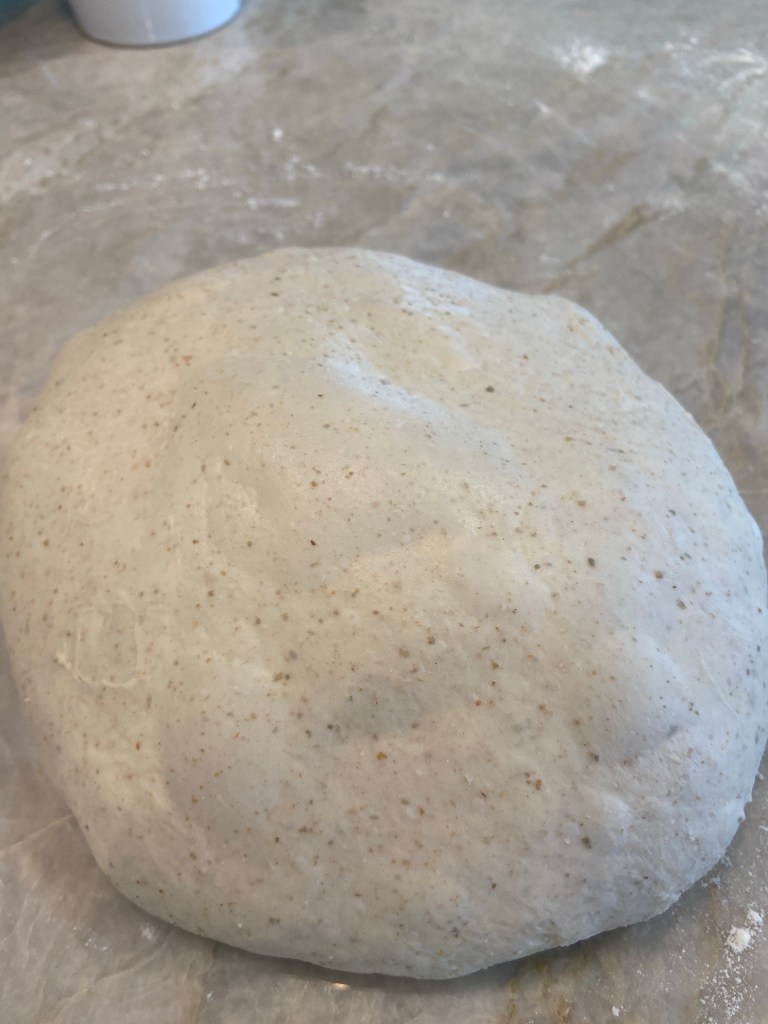
The preshape went as planned, at least initially. I poured the dough (which still seemed slack) onto the counter and did my preshape as normal. I was able to get nice domed loaves, but within about 15 minutes the domes flattened and spread. Everything seemed off and I figured the bread would fail. Still, I soldiered on.
The preshaped loaves flattened and spread quickly.
When I stretched the dough for shaping, it felt very loose with little elasticity. Normally, my dough feels like it wants to spring back to where it came from, but not this bread. Still, I shaped the dough as I normally would and made a nice boule, which I placed in a bowl, covered, and let prove overnight in the fridge.
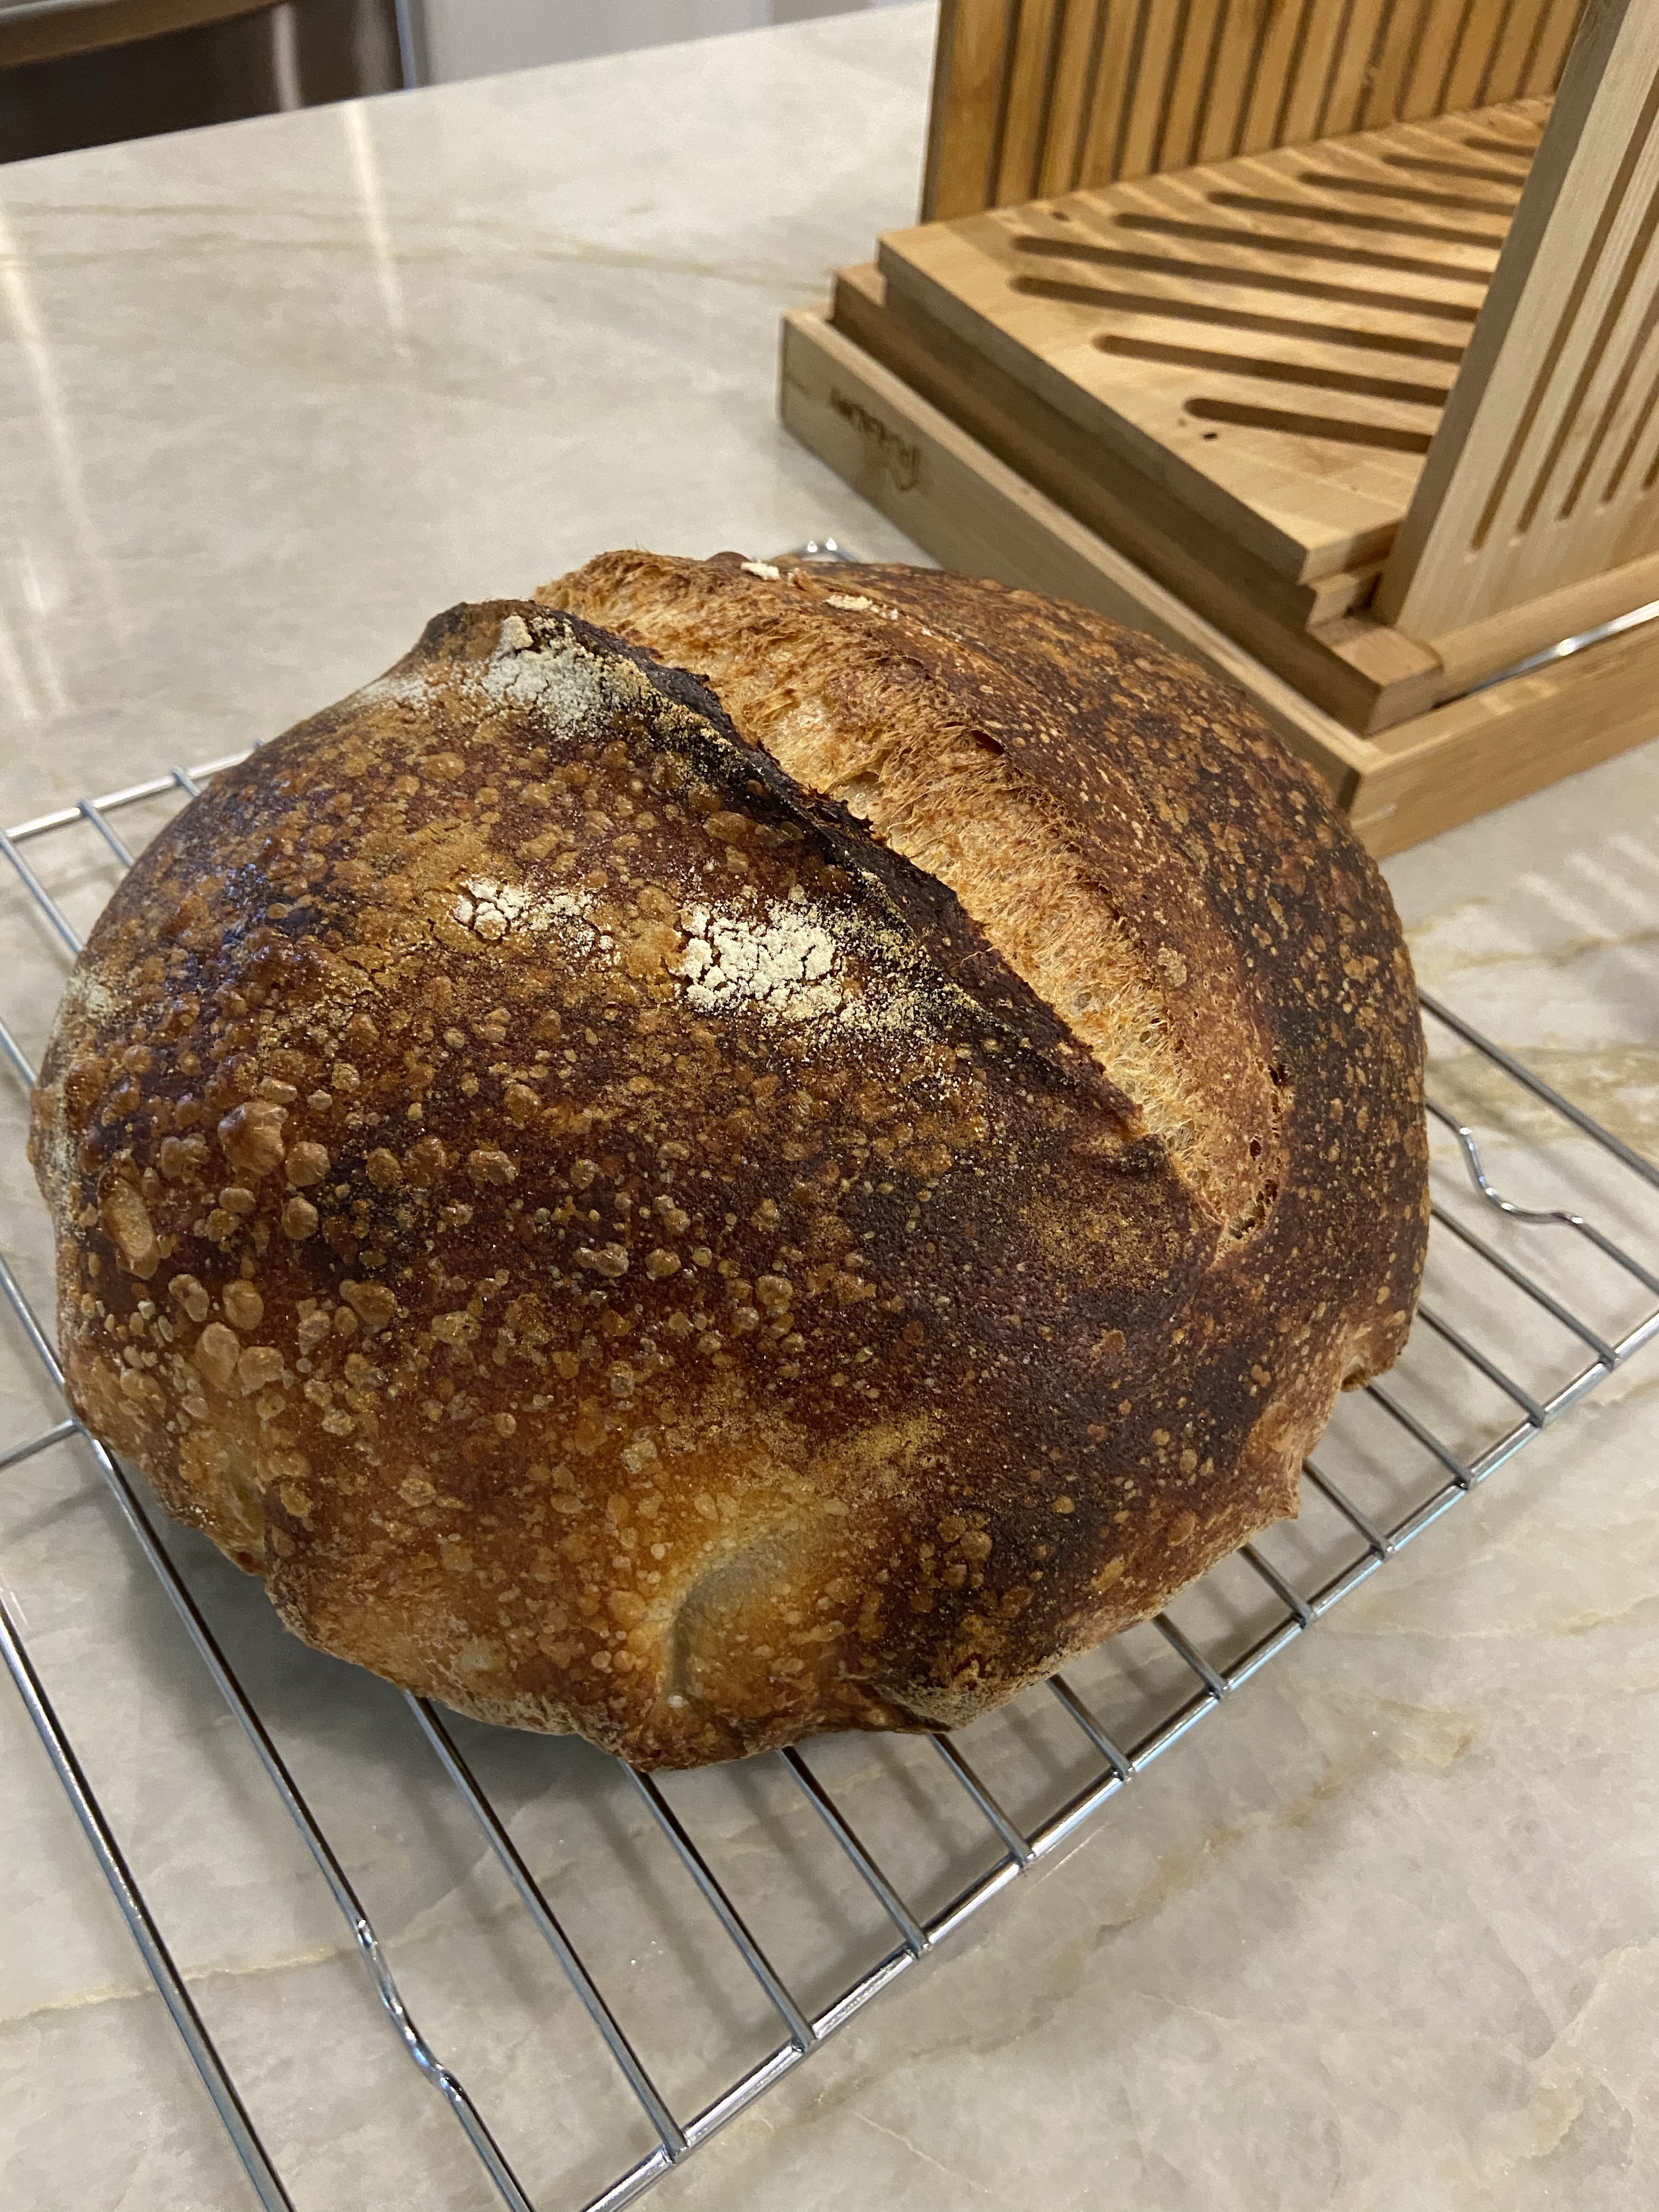
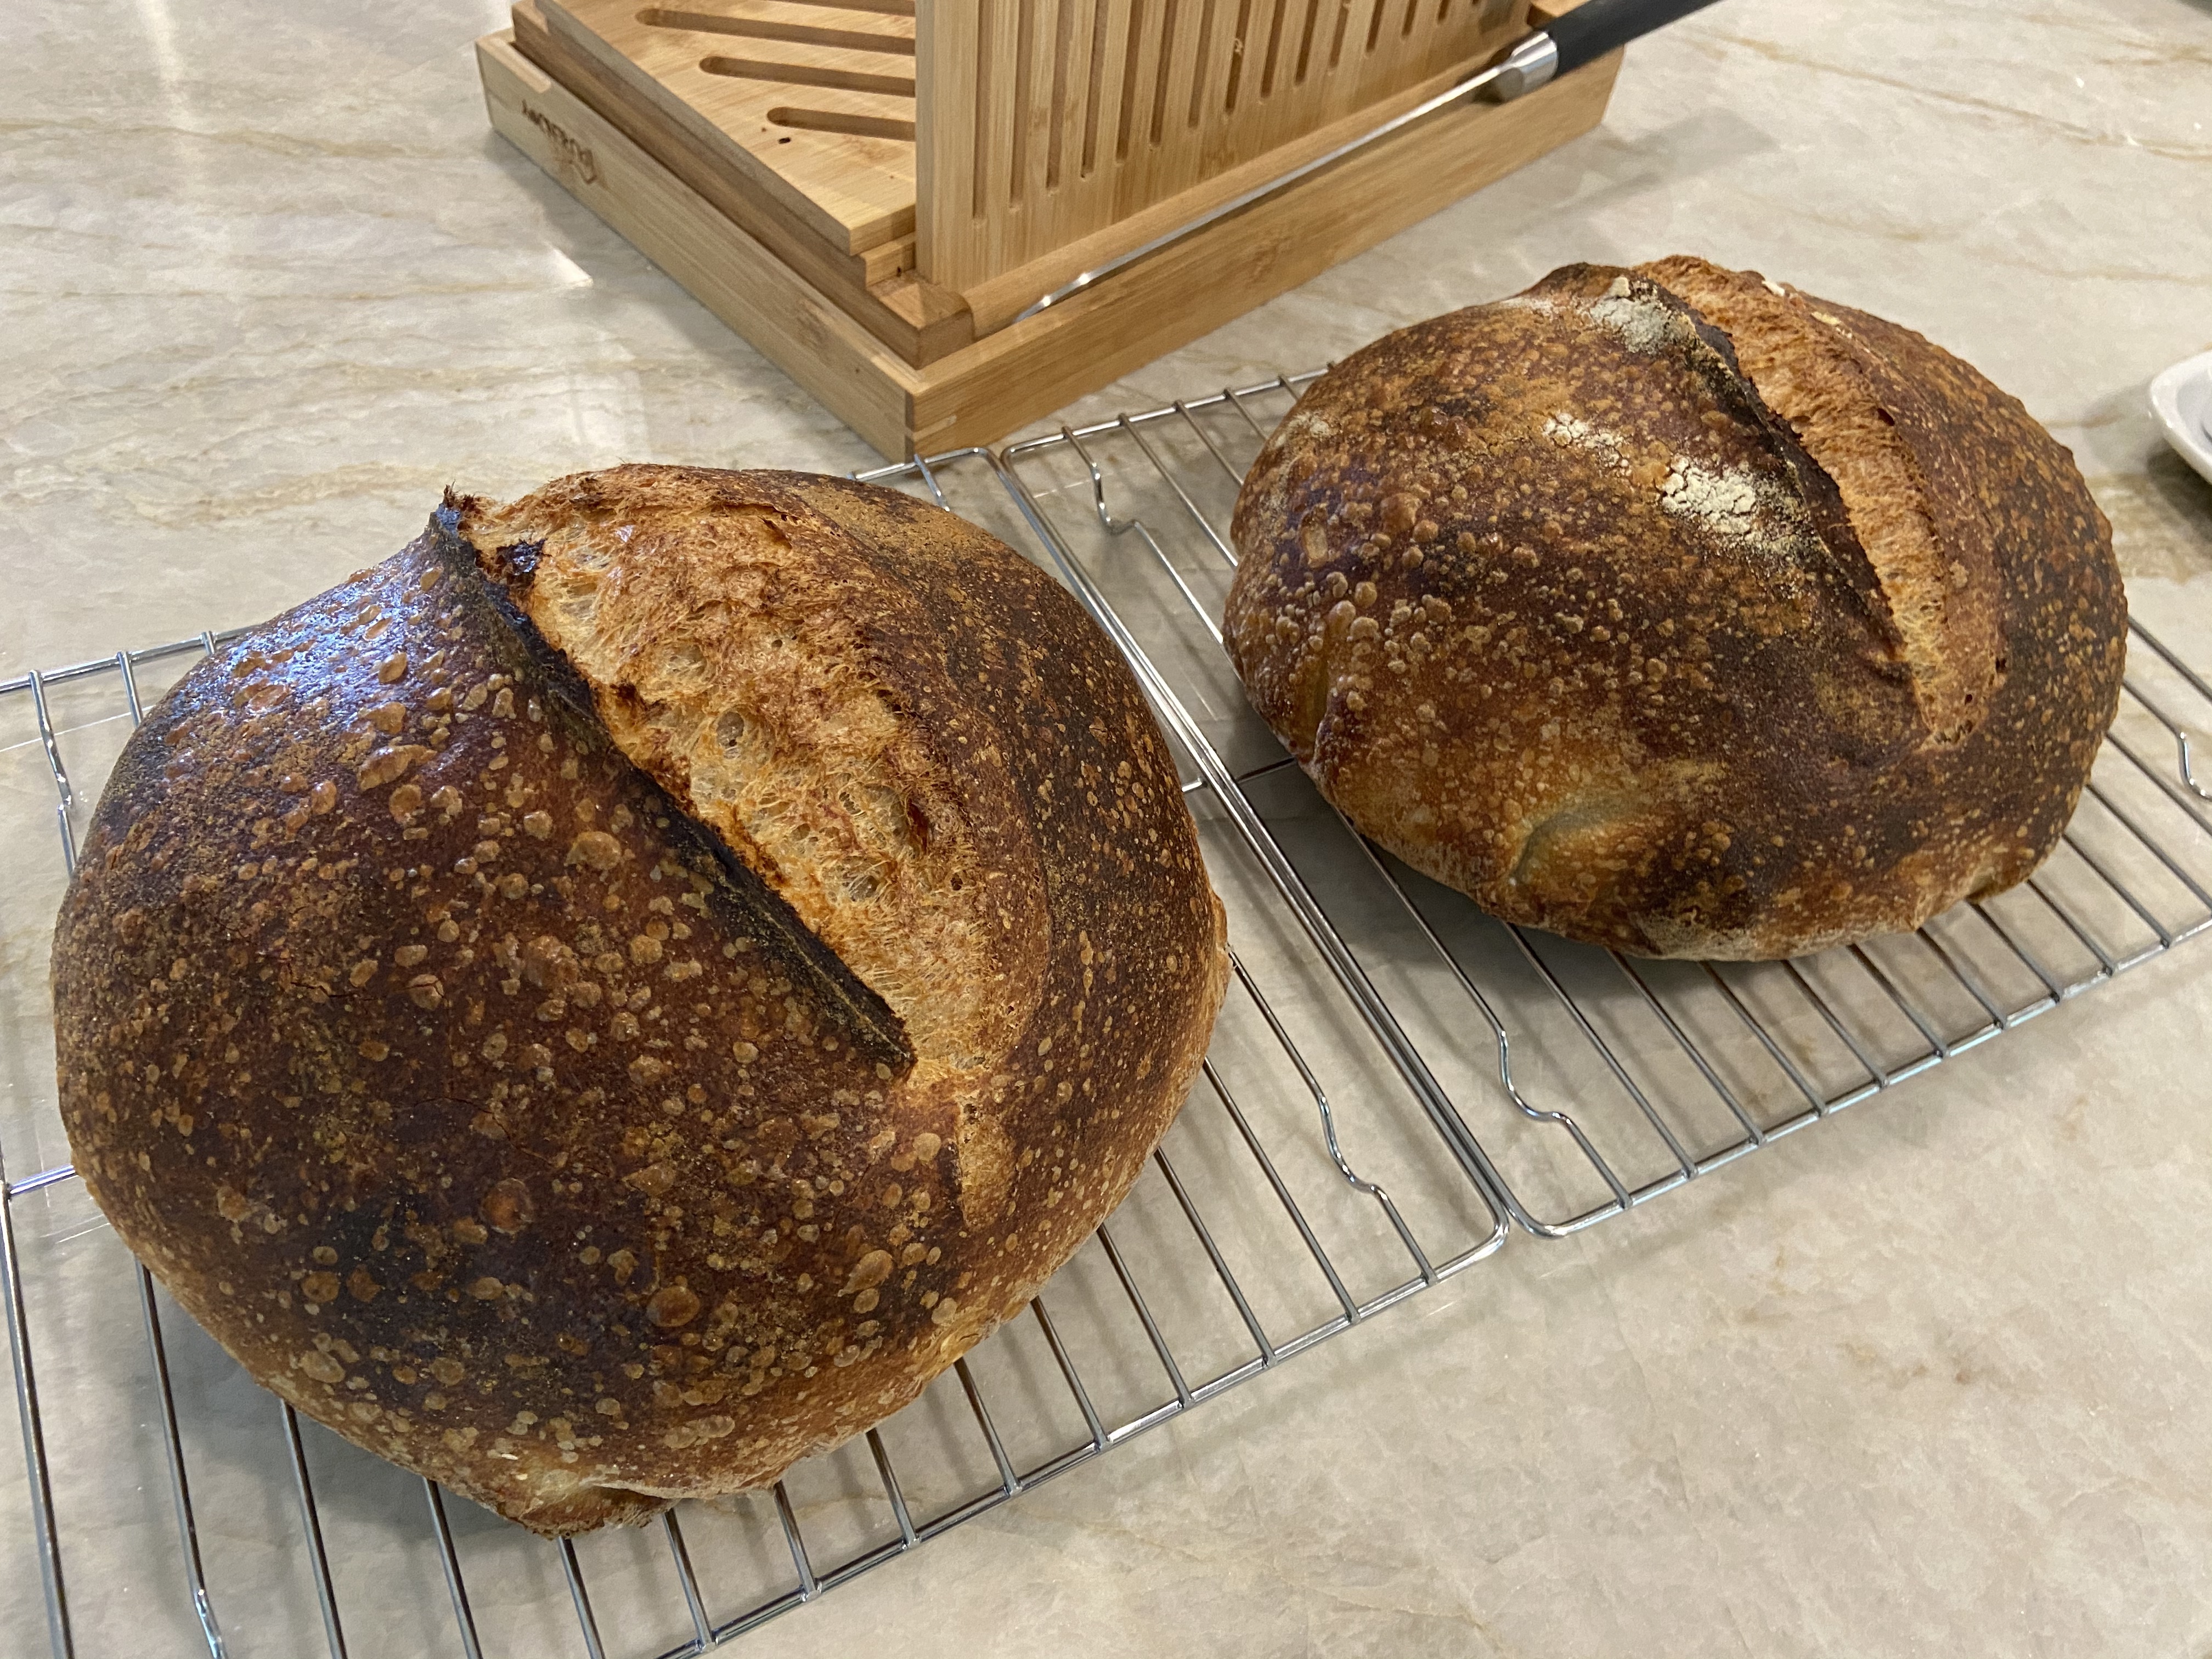
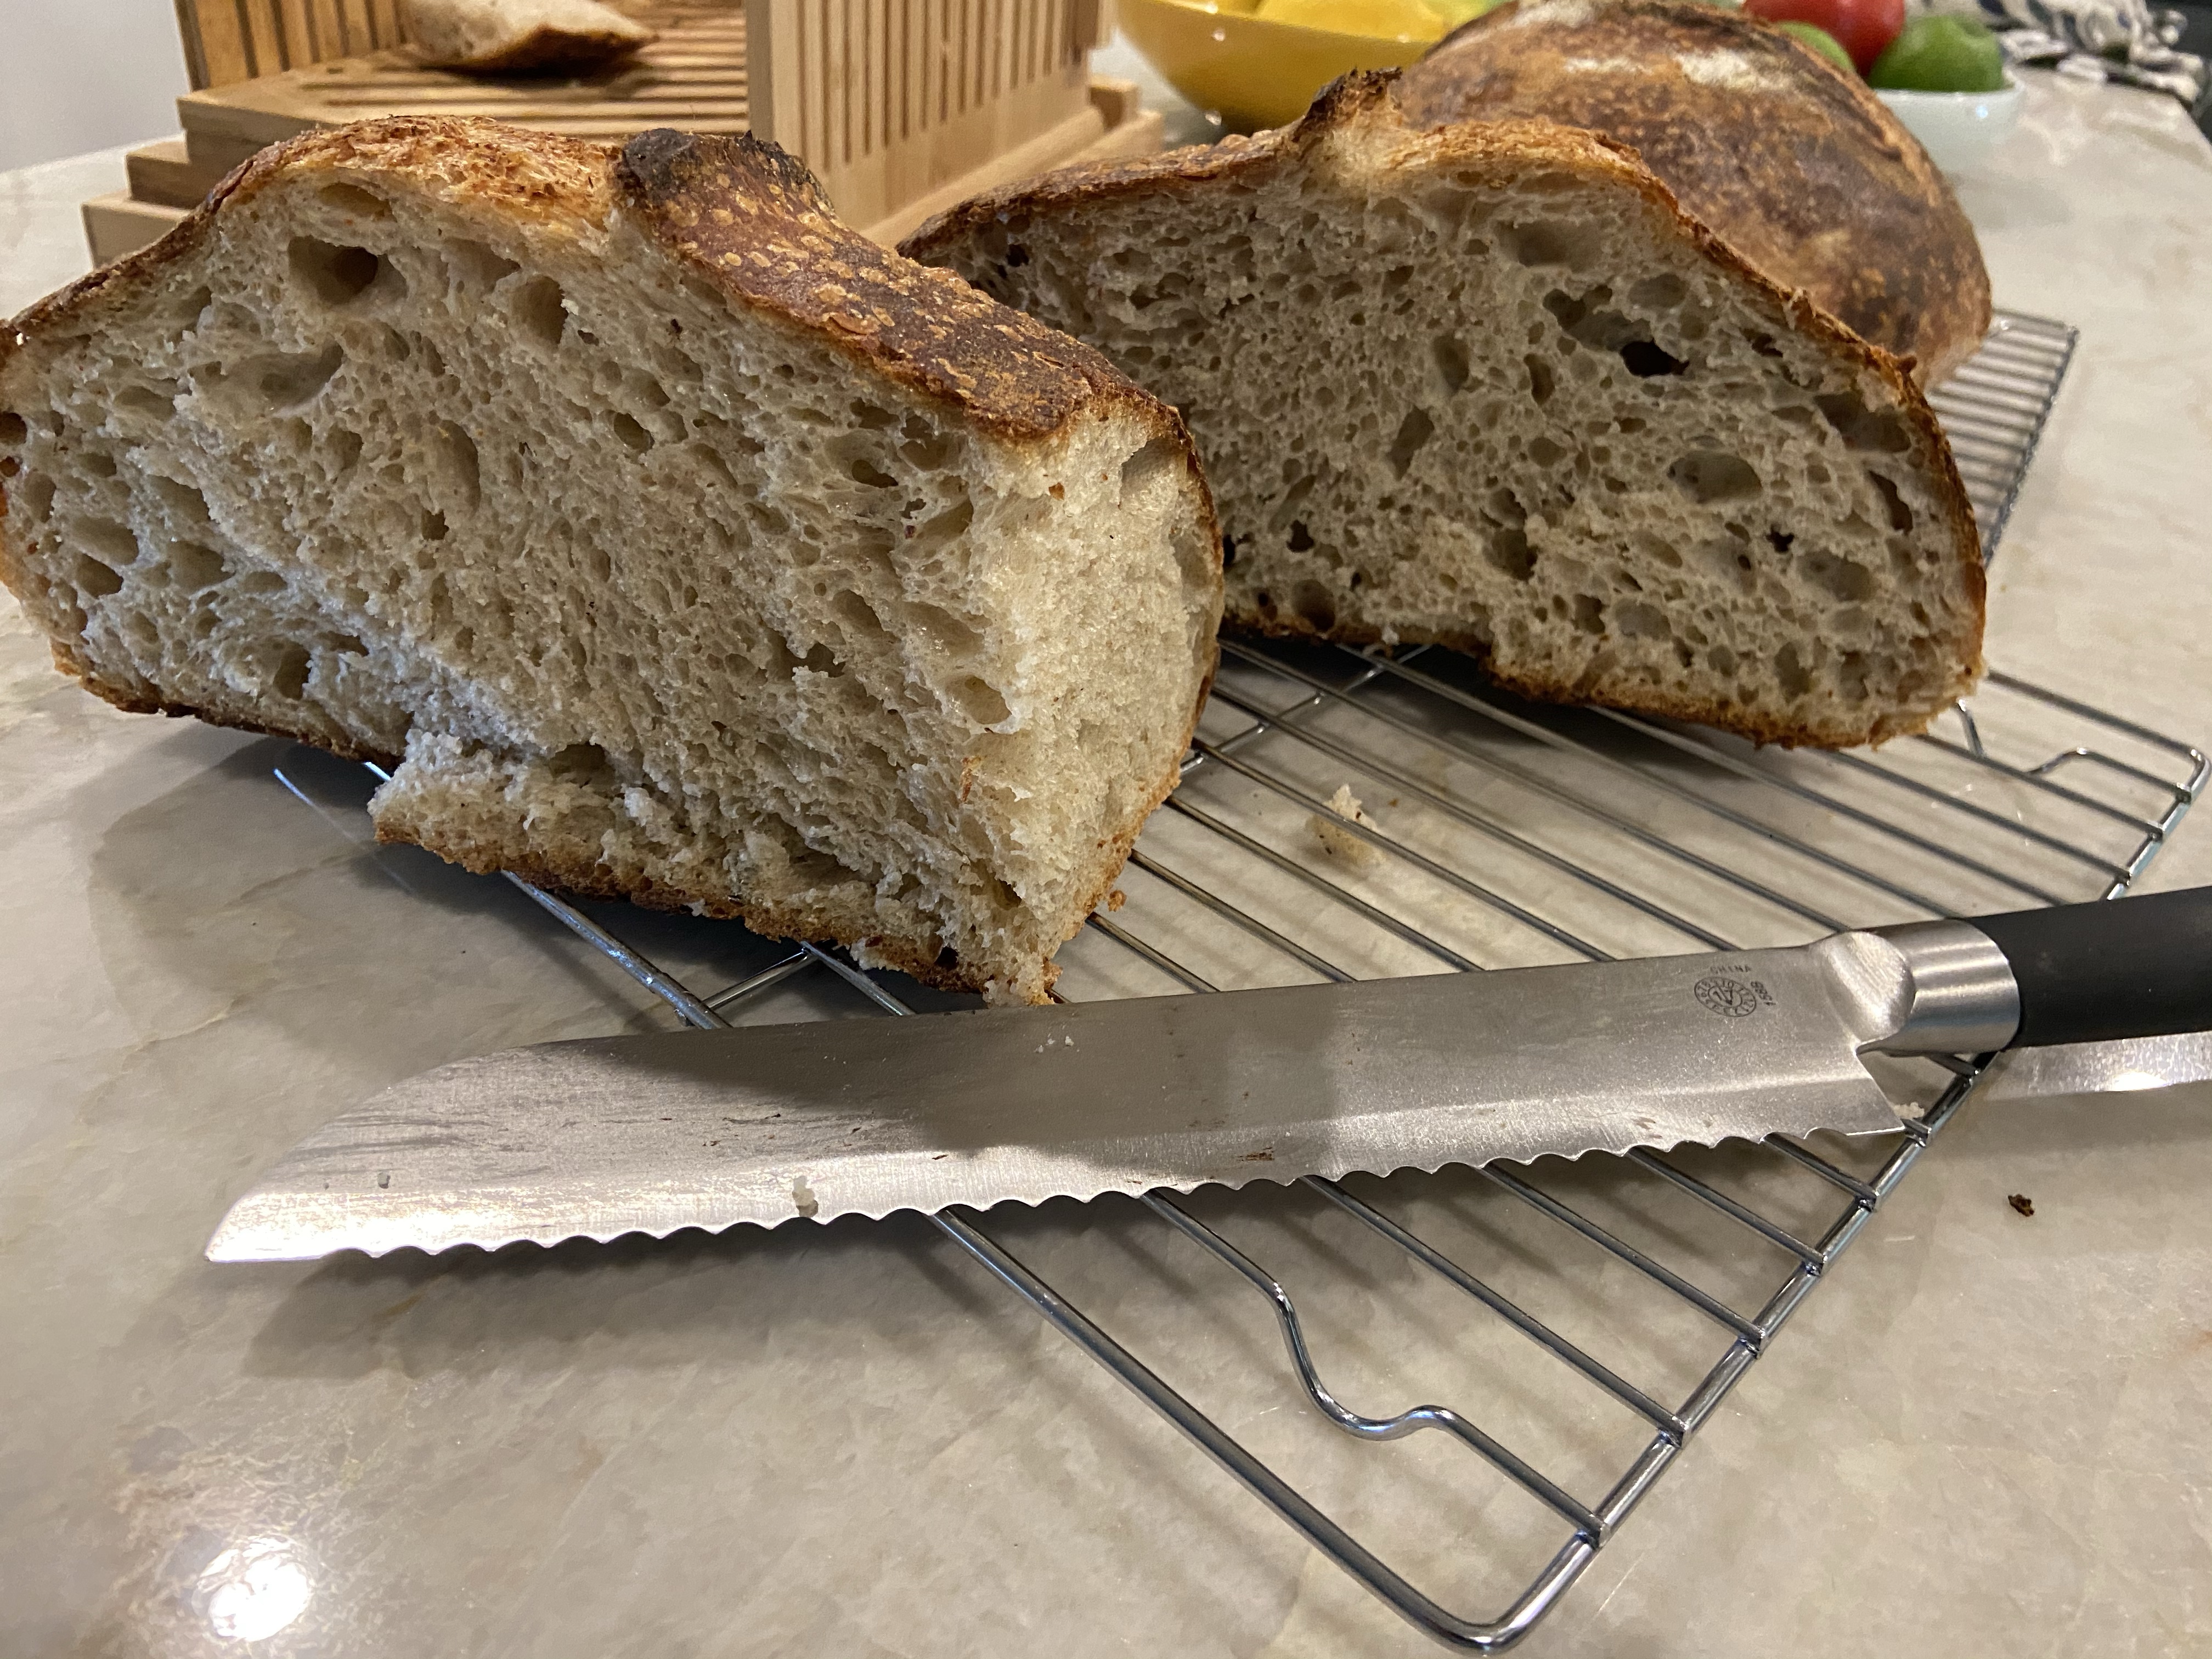
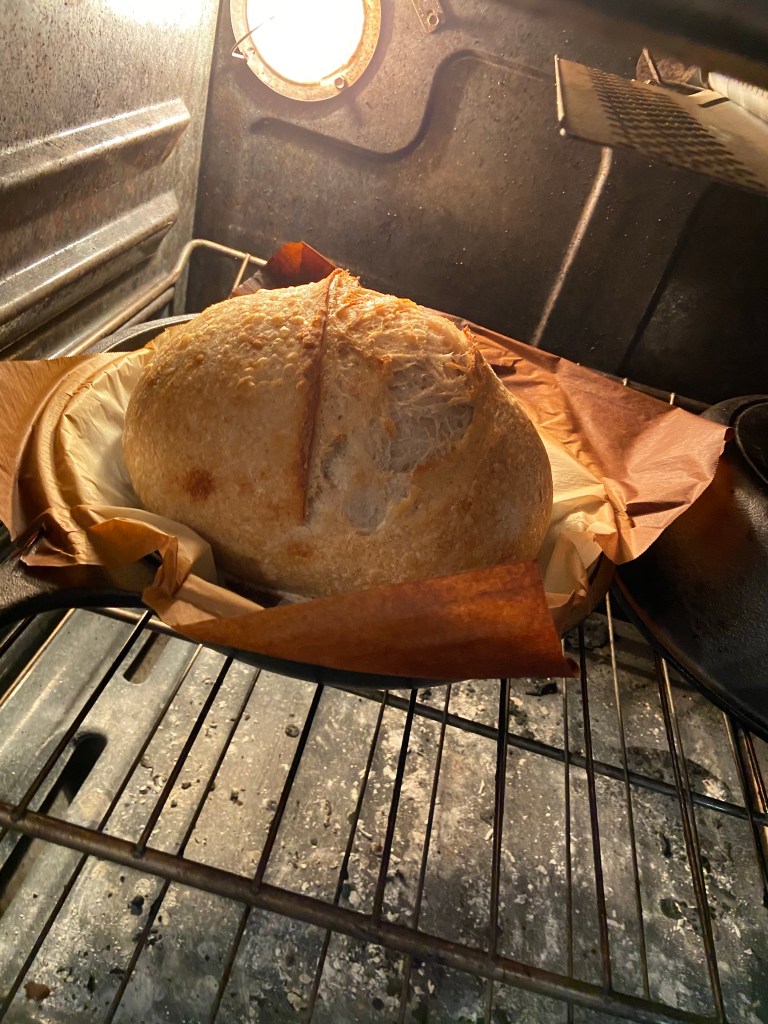
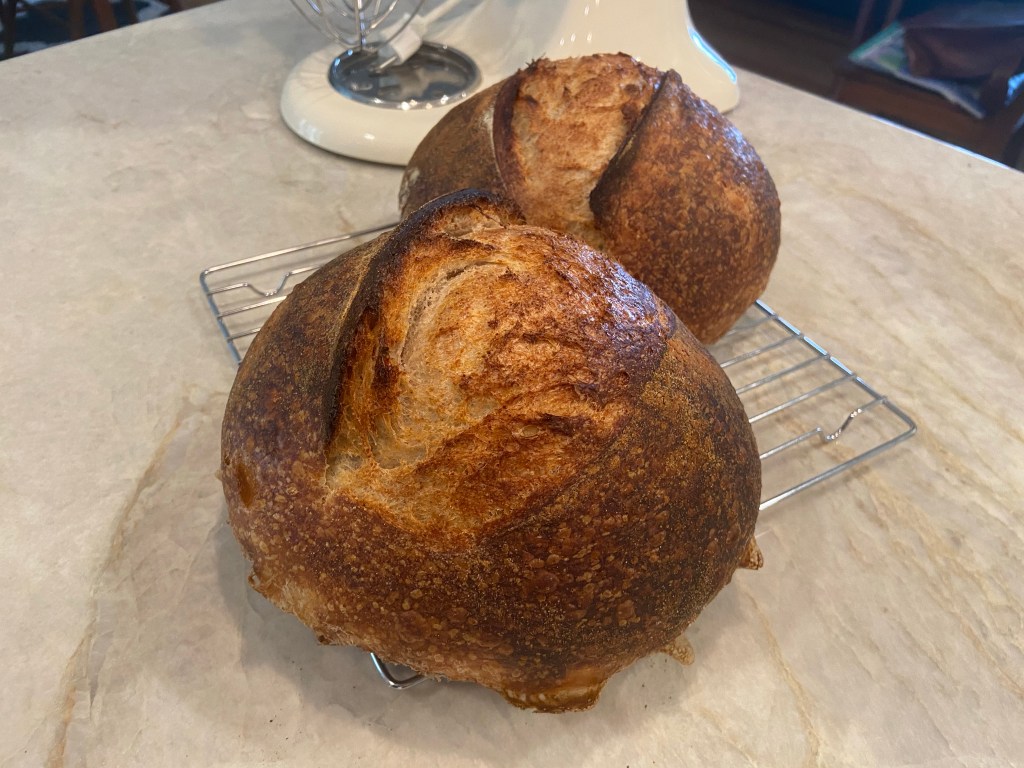
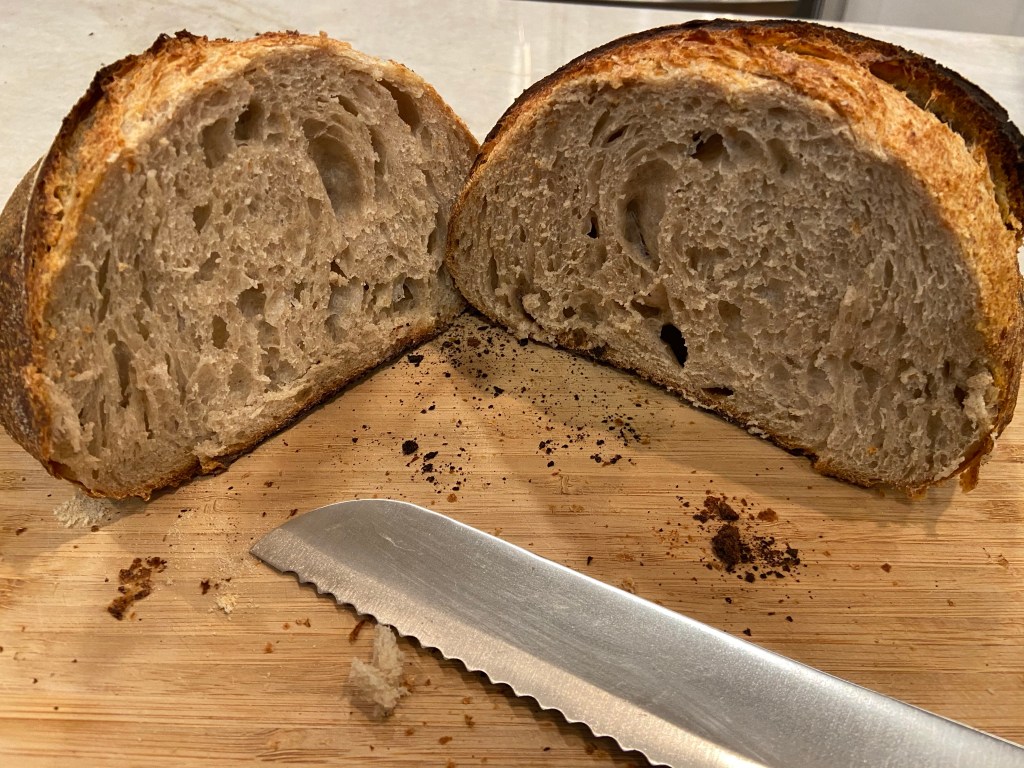
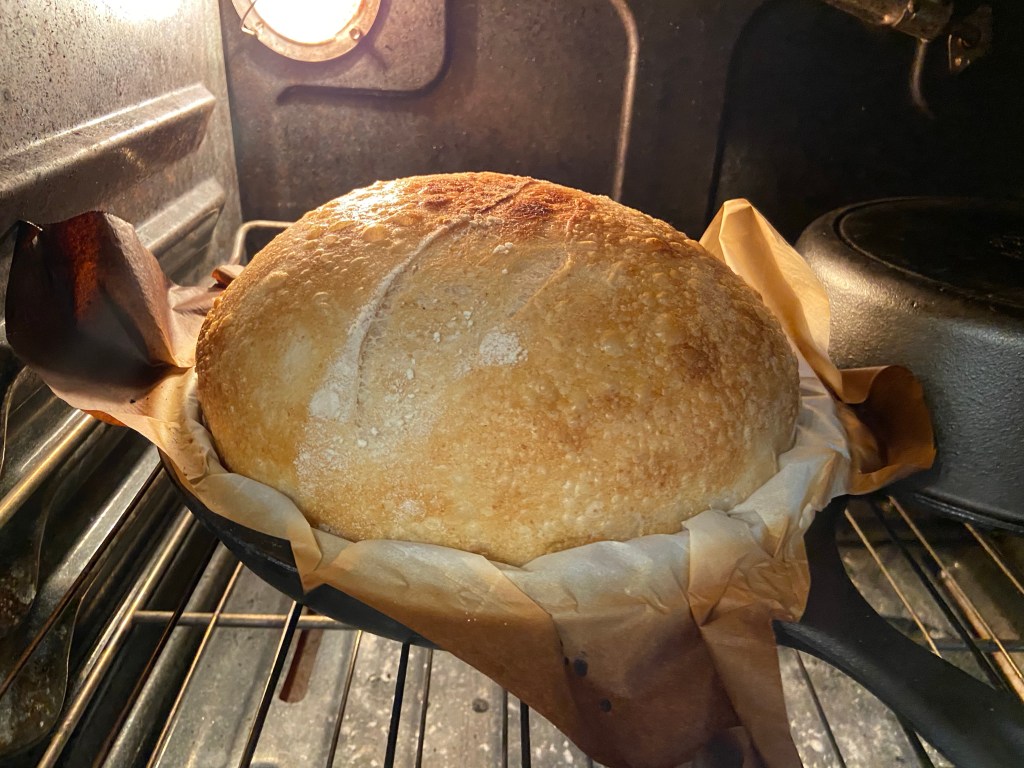
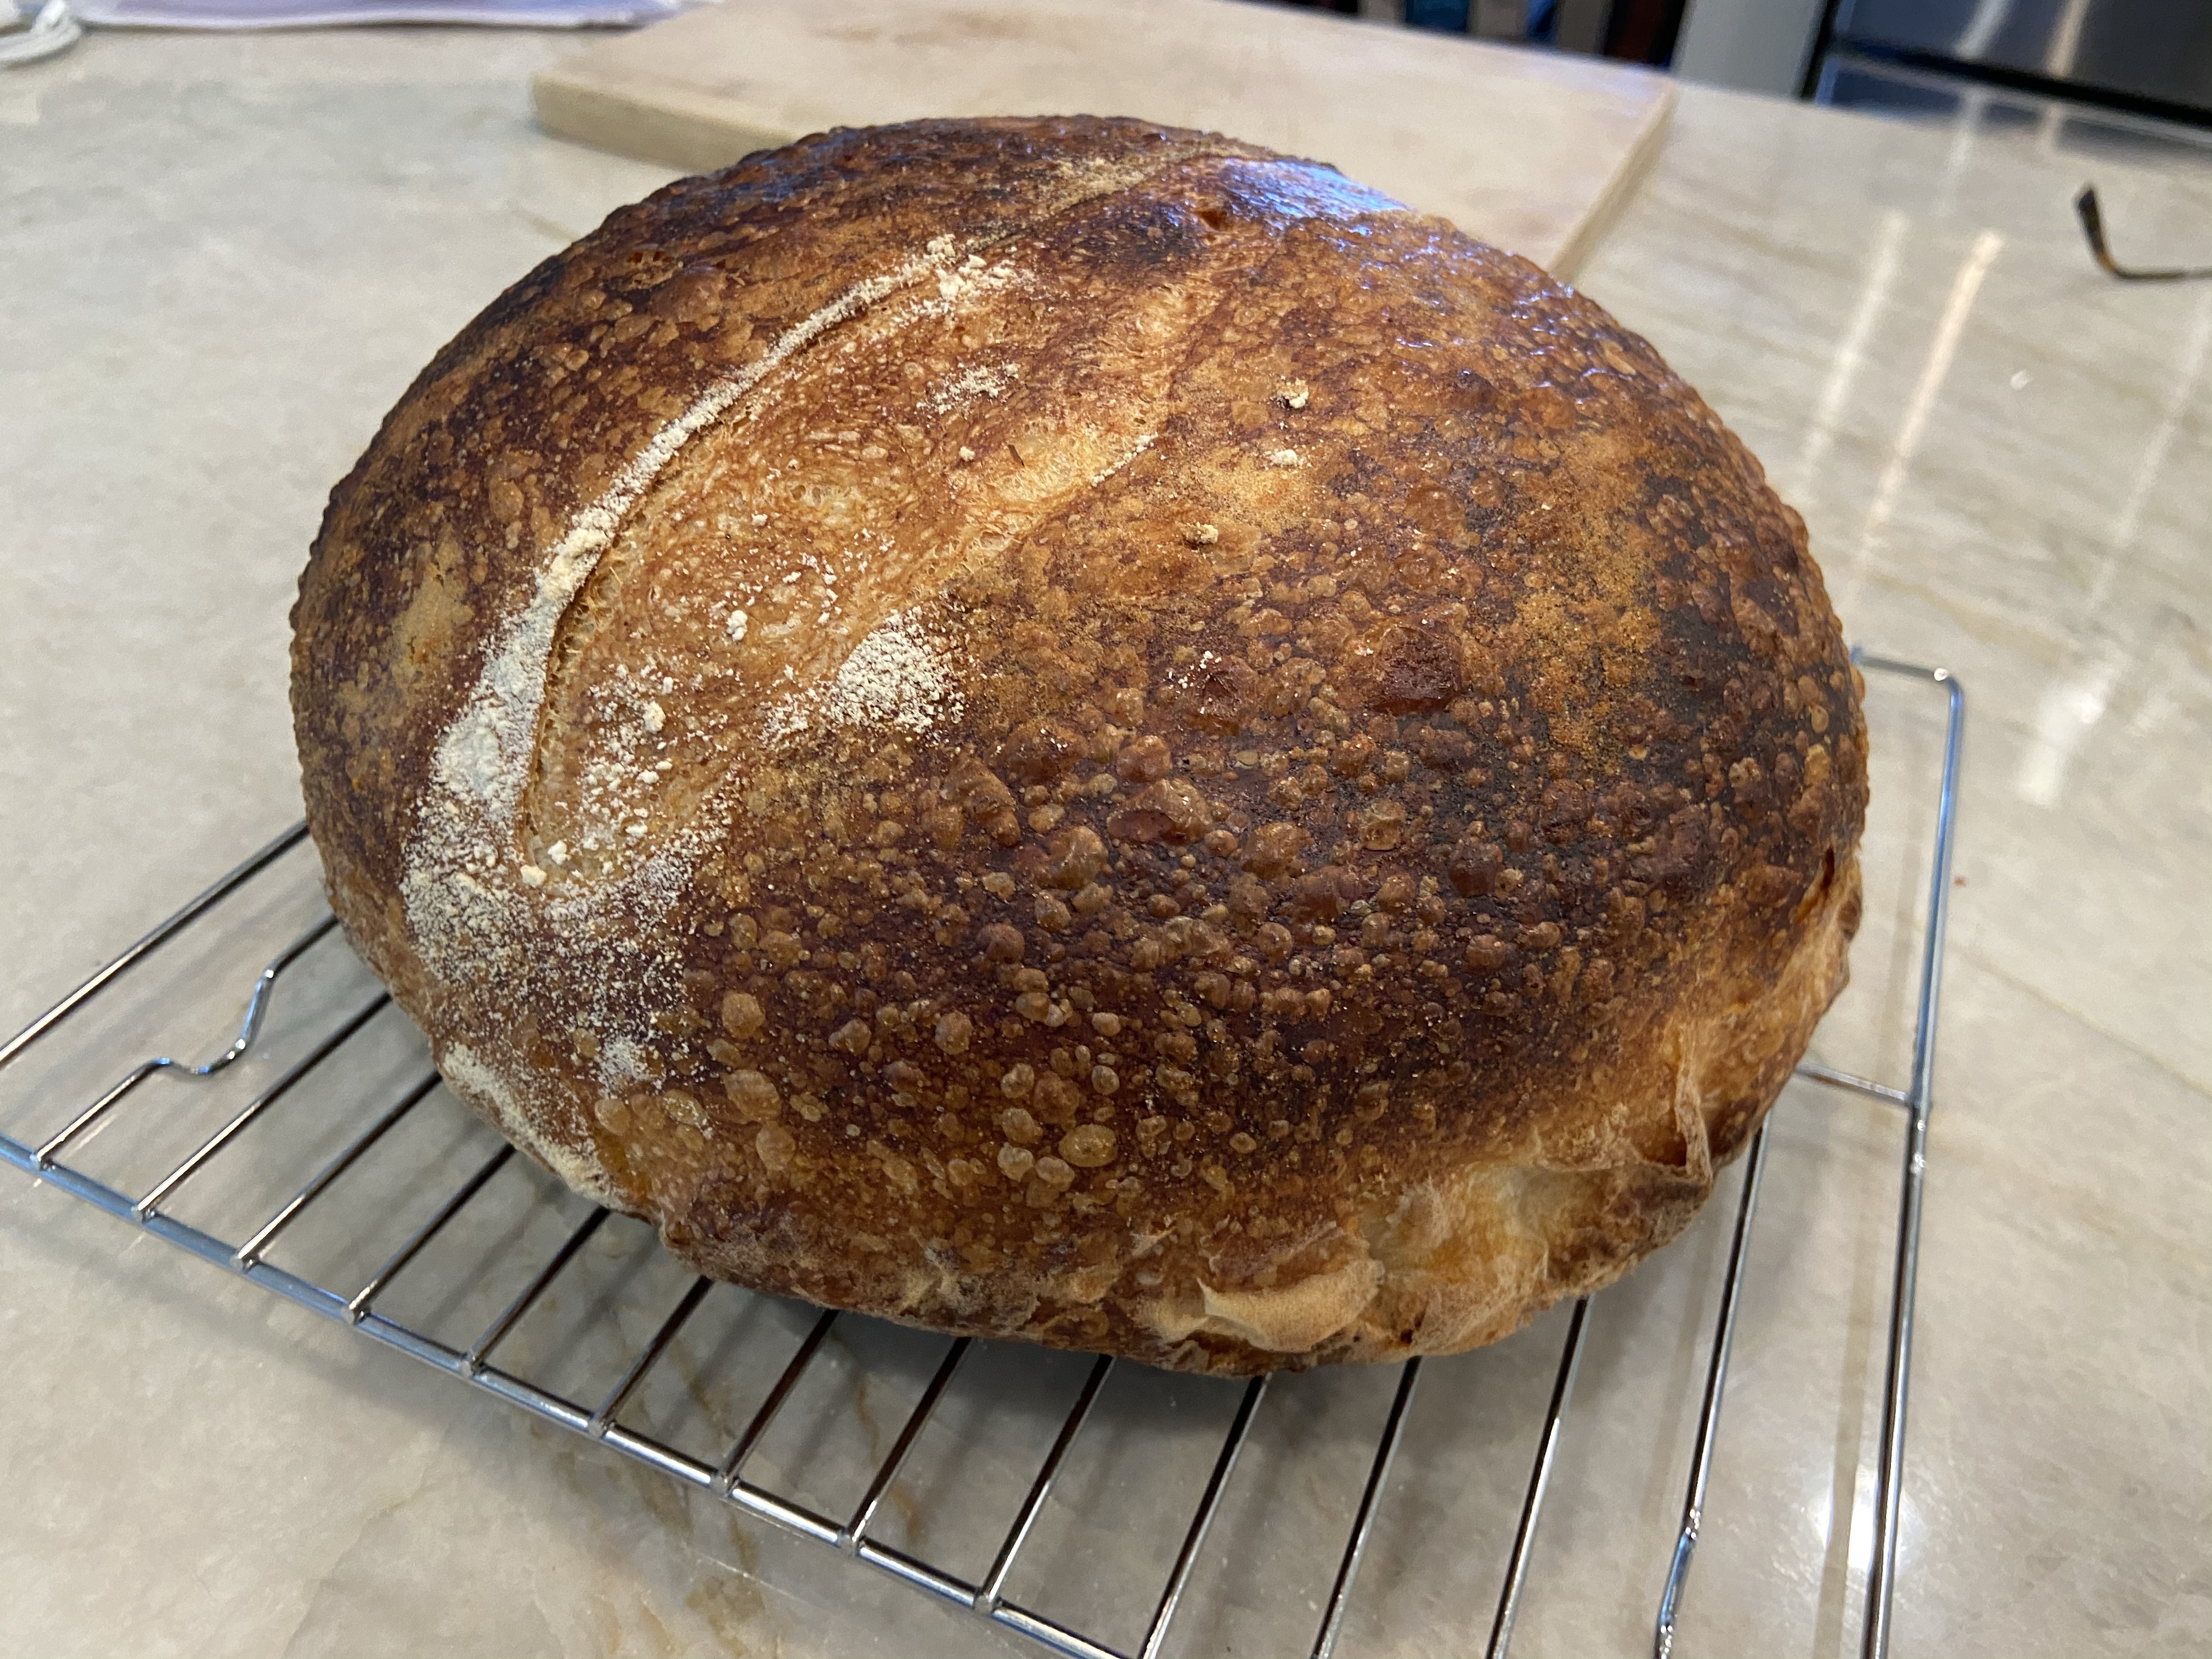
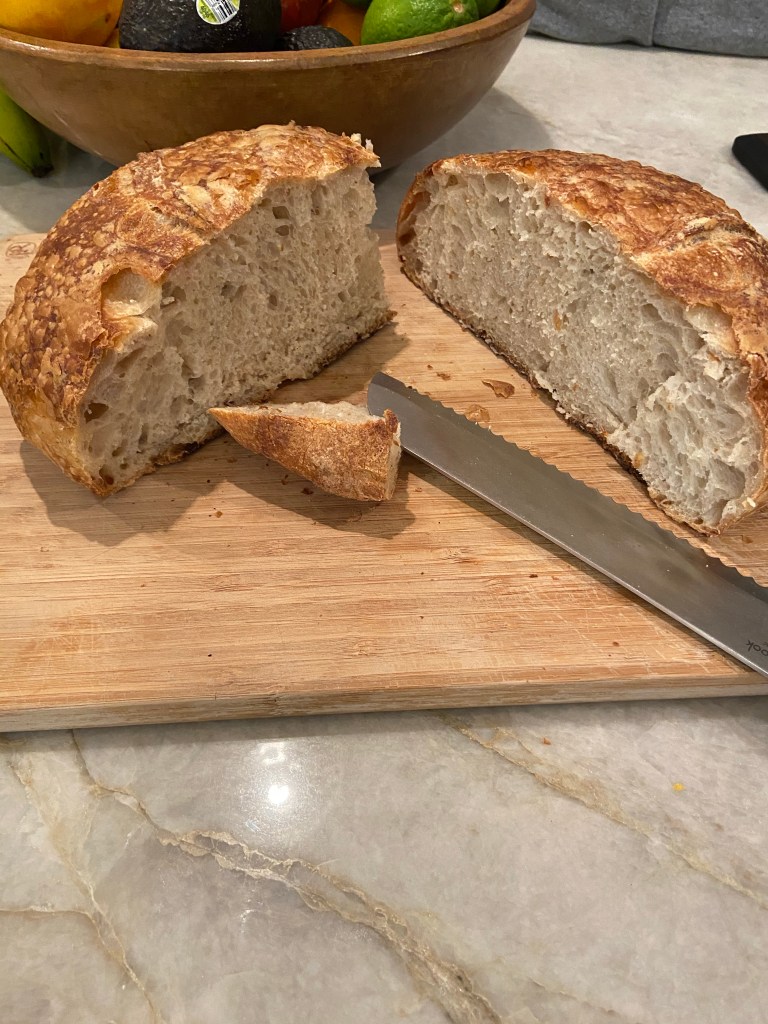
This morning, I preheated the oven and Dutch oven to 490 degrees, scored the bread, and baked as usual–20 minutes covered at 475 degrees, then uncovered and reduced to the temp to 450 degrees. The resulting loaves are pretty. They had a nice little oven spring and good color, but are a little smaller than sourdough made with bread flour.
Before and after the bake.
The crumb is soft and a little less chewy than other sourdoughs. All in all, a nice bread.
It seems they really mean it when they call all-purpose flour all purpose. No bread flour? No problem.
Cleaning up flour can be super easy if you use the right tool.
When my kids were small, I hated when they used Play-Doh. It created a mess that was a pain to clean up–little crumbs of blue, red, and yellow all over the kitchen counter and floor.
Baking was just as bad, except instead of flakes of primary colors it left a light haze of flour across the countertop that would eventually migrate to the top edges of cabinet doors and the floor. And if I tried to wipe down the counter with a damp cloth, it created a glaze of papier mache glue.
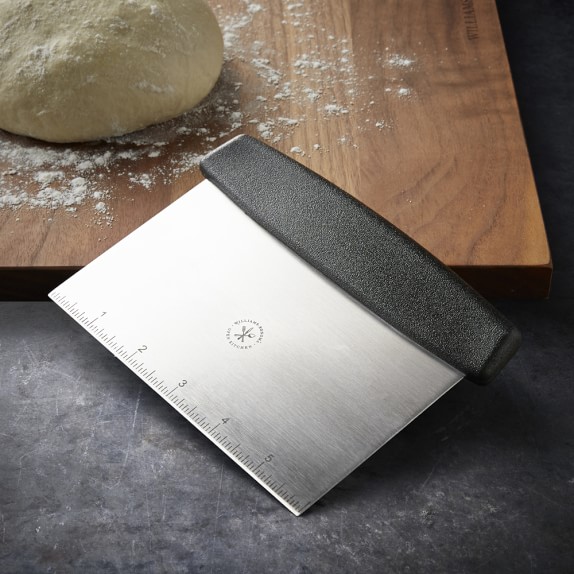
Once I started baking bread, though, I found a better way. All it requires is a bench knife (sometimes called a bench scraper), which costs about $5.00 on Amazon.
A bench knife is nothing more than a flat rectangle of steel with a handle. In spite of its name, it doesn’t have a sharp blade on it, so it’s safe for a countertop. I use it to scrape the flour into a neat pile and off the edge of the counter into my cupped hand. Then I wipe down the countertop with a damp cloth and dry it. No papier mache glue residue.
If you want to bake, but dread the flour clean-up, get a bench knife. I imagine it also works well on Play-Doh.
Recipes with a big time commitment, lots of ingredients, and many steps can intimidate. This recipe is the easiest I’ve tried.
Since I started this blog, a few folks have said that the recipes seem overwhelming, so I decided to try a simple bread with just two flours–bread flour and dark rye–and a short prep time. I started the prep work at 8:00 A.M., was done by 9:45, and then had the entire day to work on other projects before touching the dough again.
What you’ll need:
400 grams bread flour
100 grams dark rye flour
332 grams water
25 grams levain or mature starter
10 grams salt
COMBINE FLOUR AND WATER
Make your levain 4-6 hours prior to beginning, or to keep the recipe even simpler and just use 25 grams of mature starter.
Sloppy Baker’s Tip: You can tell starter is mature if it’s risen to its peak in its container. It usually has a slight dome on the surface. If you miss the perfect timing and use it a little before or after peak, it won’t have a dramatic affect on your bake.
In a bowl, combine 400 grams bread flour, 100 grams dark rye flour, 332 grams of water. Mix thoroughly with your hand until all the flour is incorporated. The result is a drier, stiff dough.
A lower hydration dough will look and feel stiff and dry.
Cover and rest for 30 minutes at room temperature.
ADD LEVAIN AND SALT
After 30 minutes, add 25 grams of levain (or mature starter) and 10 grams of salt to the dough. Squeeze and pinch the dough until the levain and salt are incorporated and seem evenly distributed throughout the dough. It will take about five minutes.
Pinch the levain and salt into the dough until completely incorporated.
Sloppy Baker’s Tip: This recipe’s dough is quite stiff; you may find it takes some effort to get the levain and salt incorporated well. The levain tends to roll off the dough and gather at the bottom of the bowl. Keep working at it.
Cover the bowl and let the dough rest for 15 minutes.
STRETCH-AND-FOLD FOUR TIMES
After 15 minutes, do a stretch-and-fold. Repeat three more times at fifteen-minute intervals.
After each stretch-and-fold the dough becomes more elastic and smooth.
COVER AND REST THE DOUGH
After four stretch-and-folds, shape the dough into a ball, put it back in the bowl, cover and let it rest for 10 hours at room temperature.
Sloppy Baker’s Tip: You won’t do anything with the dough during this time. Go for a bike ride, feed your chickens, or run errands. Do whatever you want. It’s one of the joys of this particular recipe.
Shape the dough into a ball and let rest covered at room temperature.
PRESHAPE AND SHAPE YOUR LOAF
After 10 hours of resting the dough, pour it onto a lightly floured surface. Preshape the dough into a boule, or round loaf.
Let the loaf rest uncovered for 15-30 minutes.
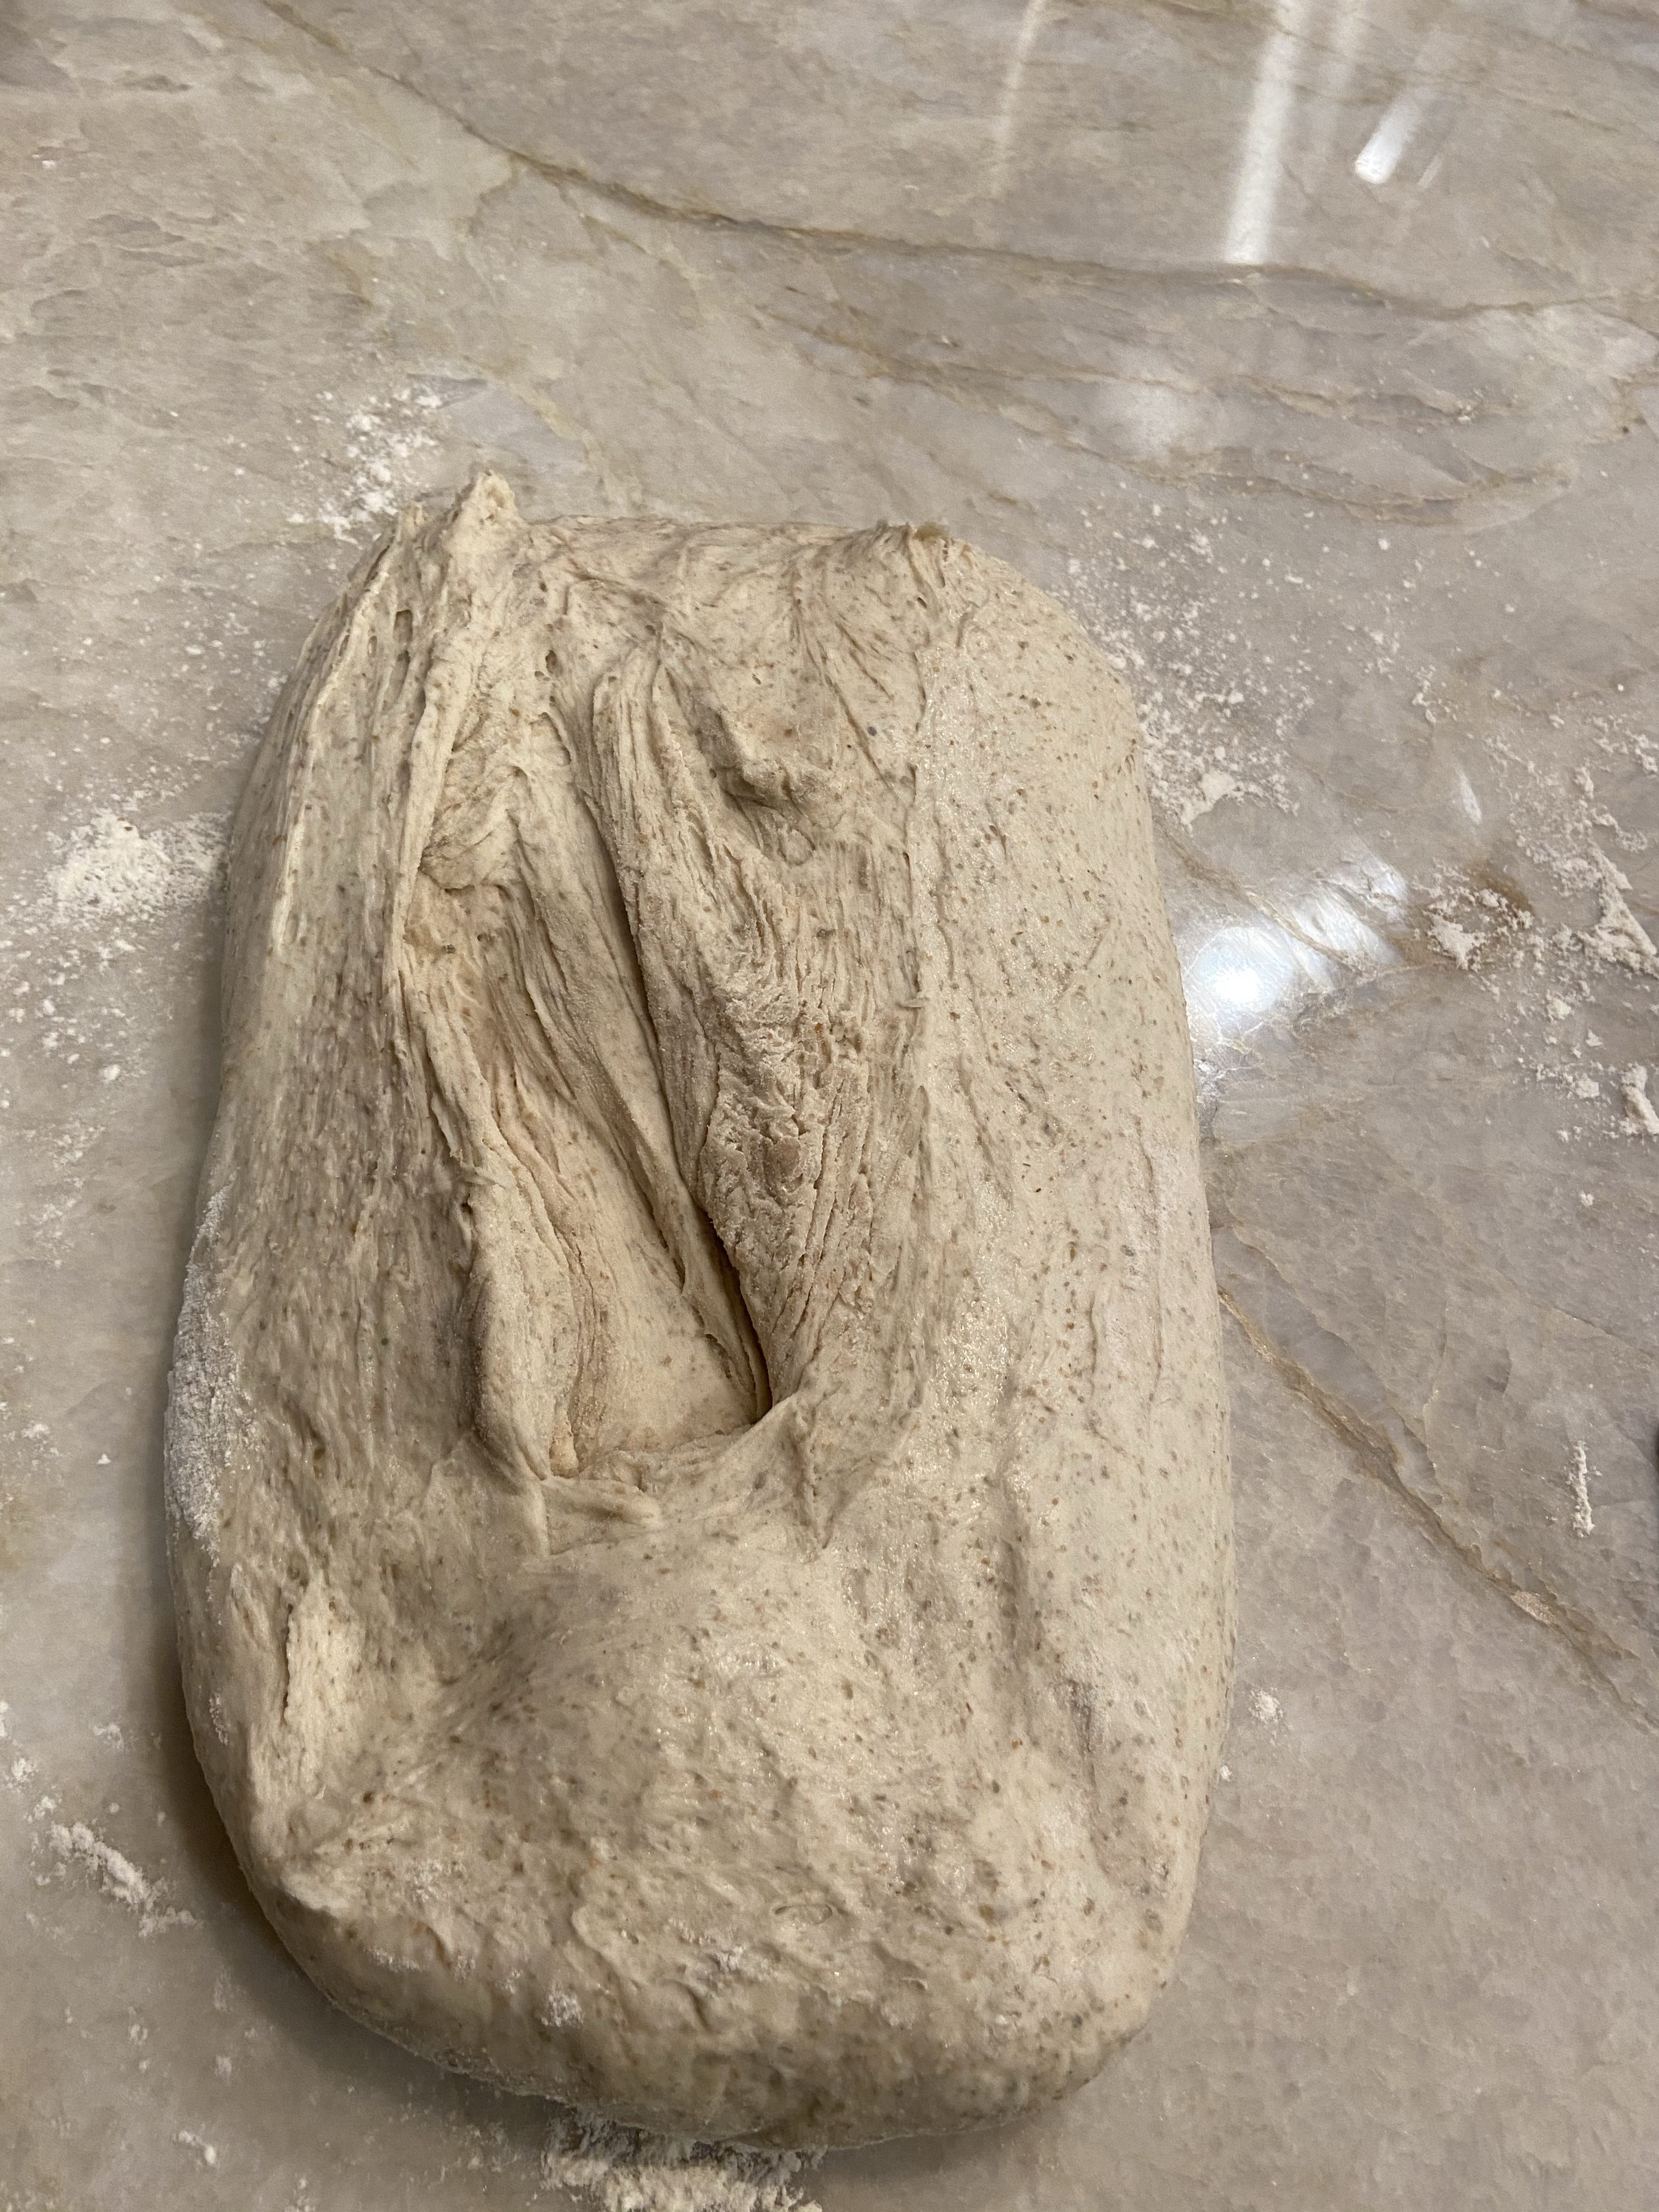
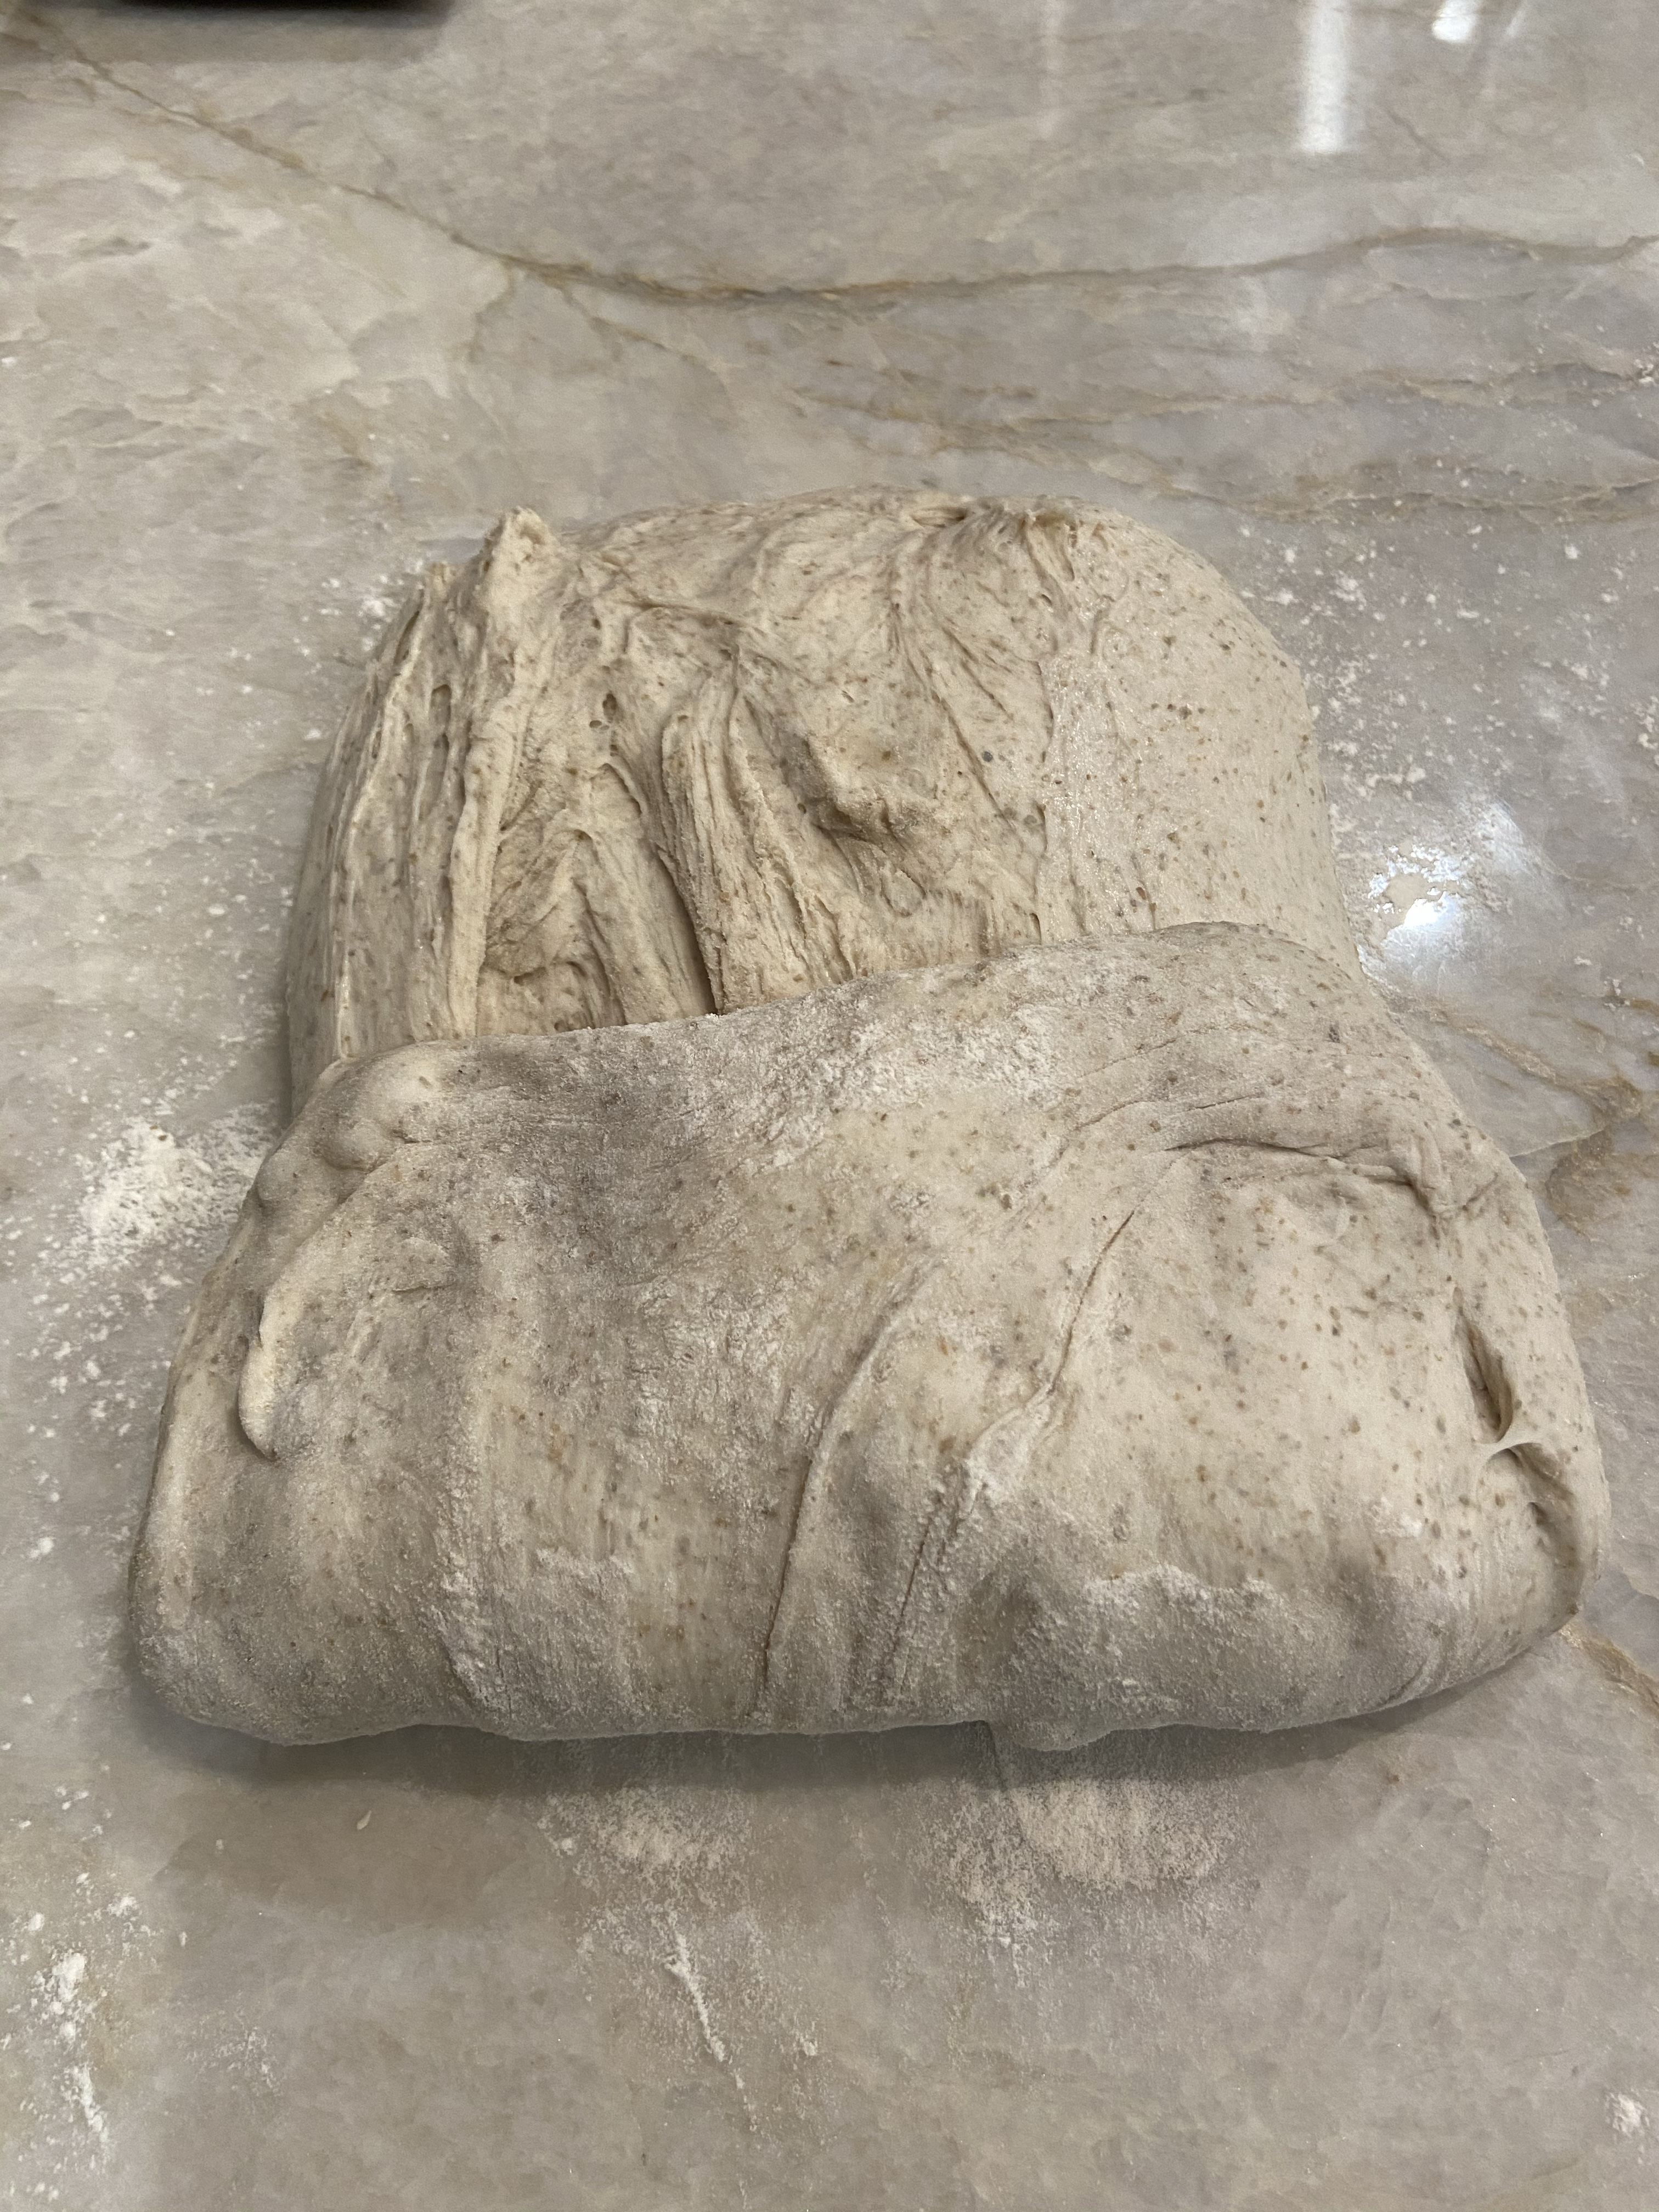
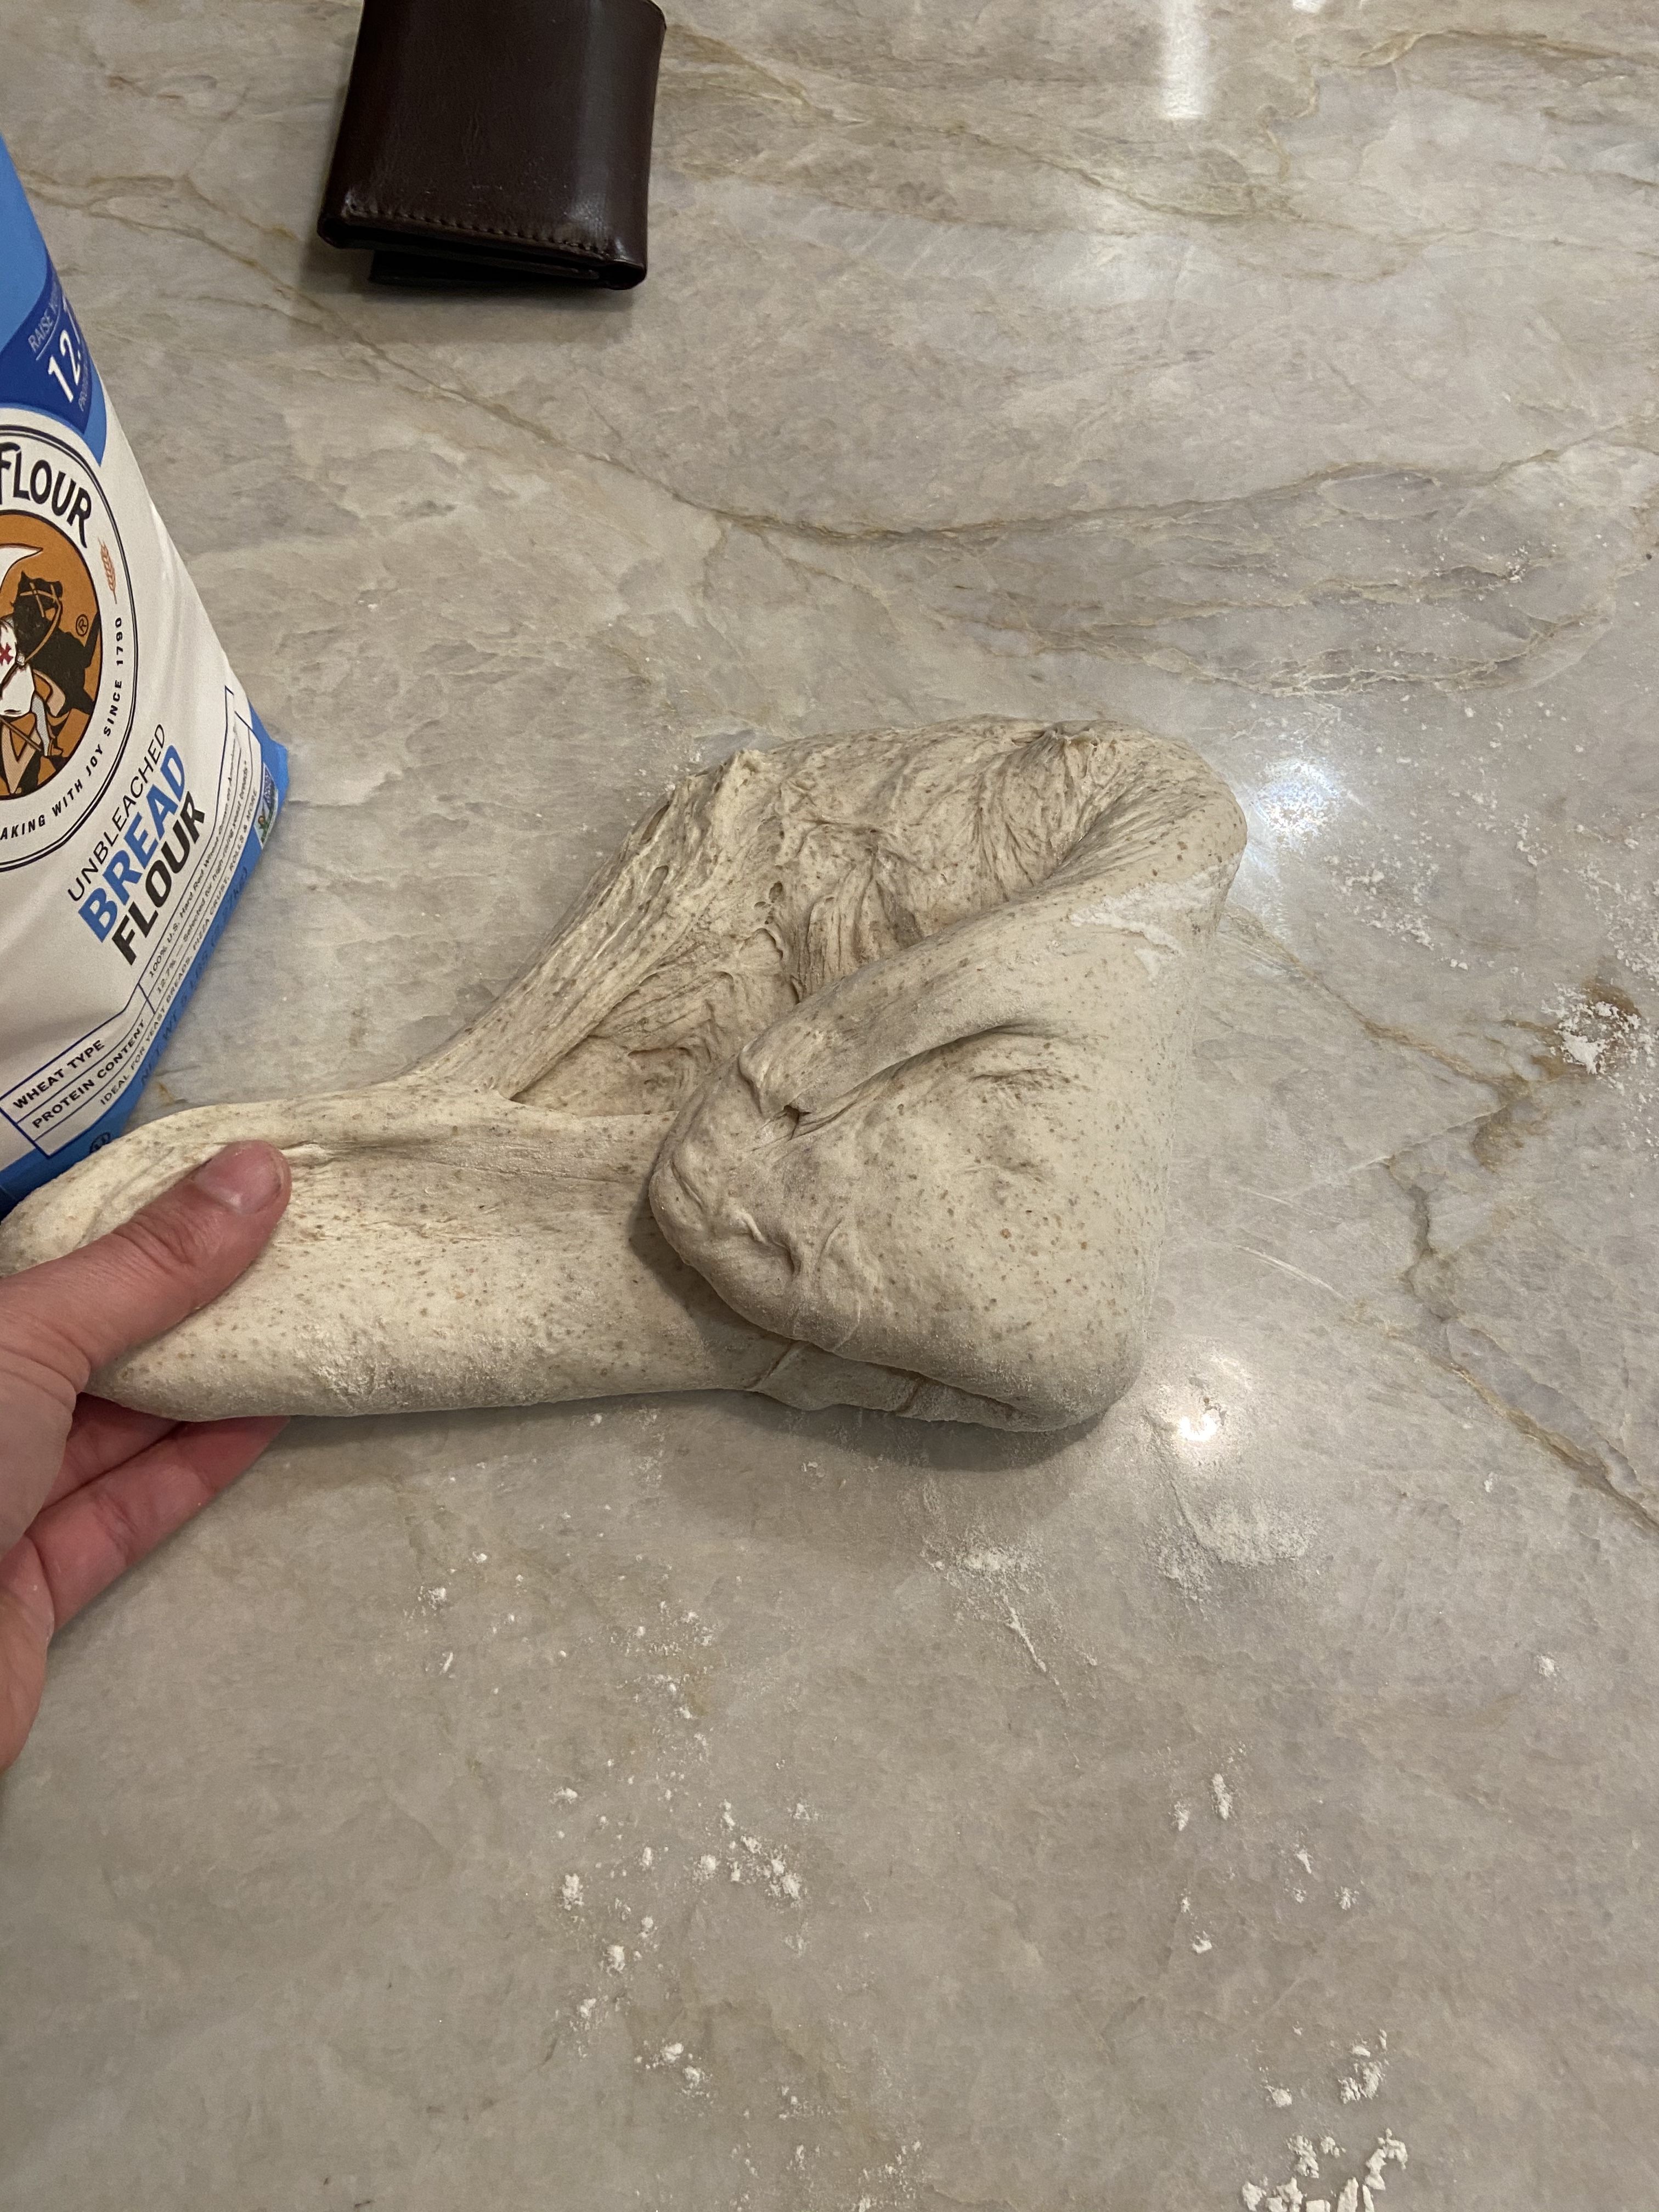
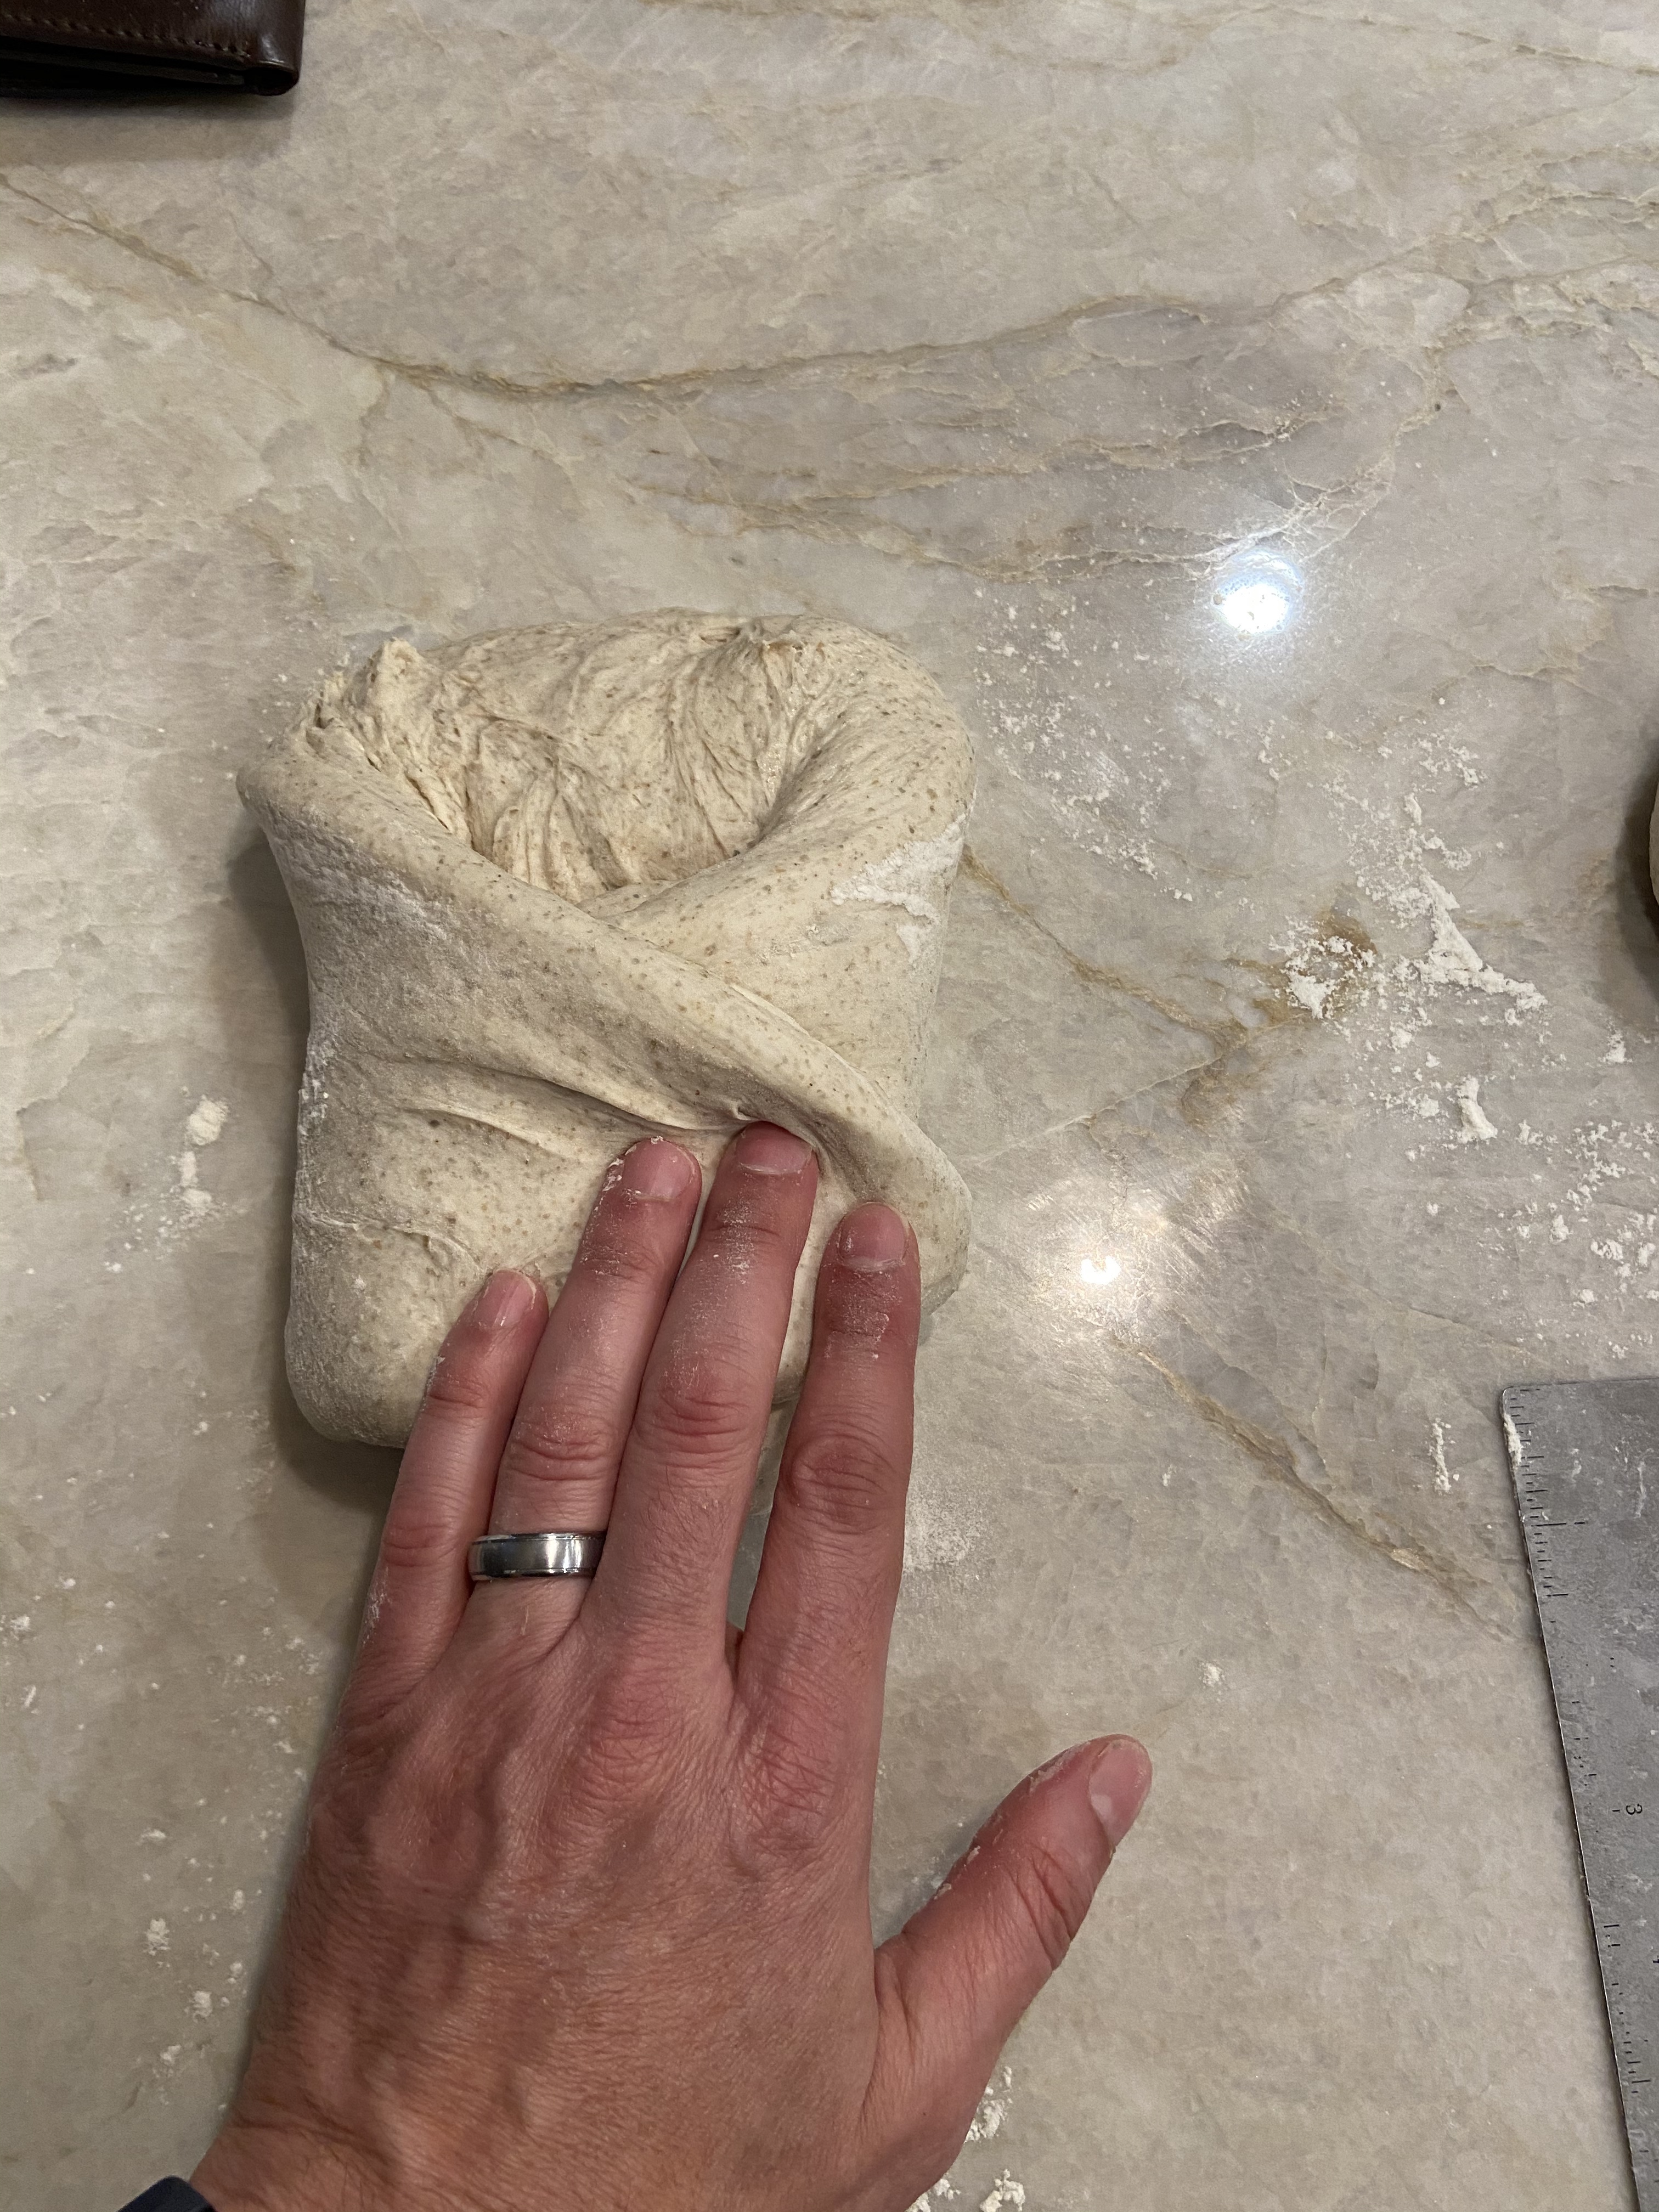
Lightly flour to top of the preshaped loaf and flip it so the flour side is down. Shape the loaf. Remember that this process is a little like forming an envelope. Grab the edge of the dough closest to you, gently stretch it toward you, and fold it up and over the loaf. Then stretch out the sides of the dough to make two wings. One at a time fold each wing over the top of the loaf. Then stretch the edge farthest from you, fold it over the top of the loaf, and then roll the loaf toward you so the seams are tucked underneath the loaf.
Using cupped hands, rotate the loaf on the counter to form a boule. As you rotate the dough, gently pull the dough toward you. The process will create a little tension across the surface of the loaf.
The shaping process
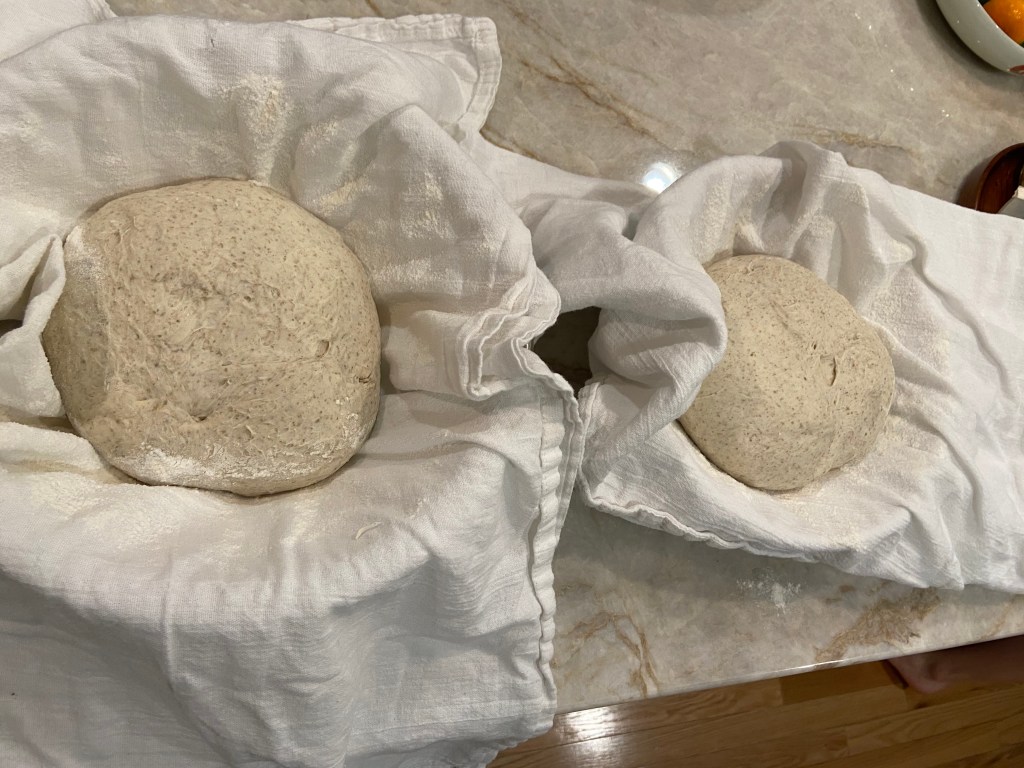
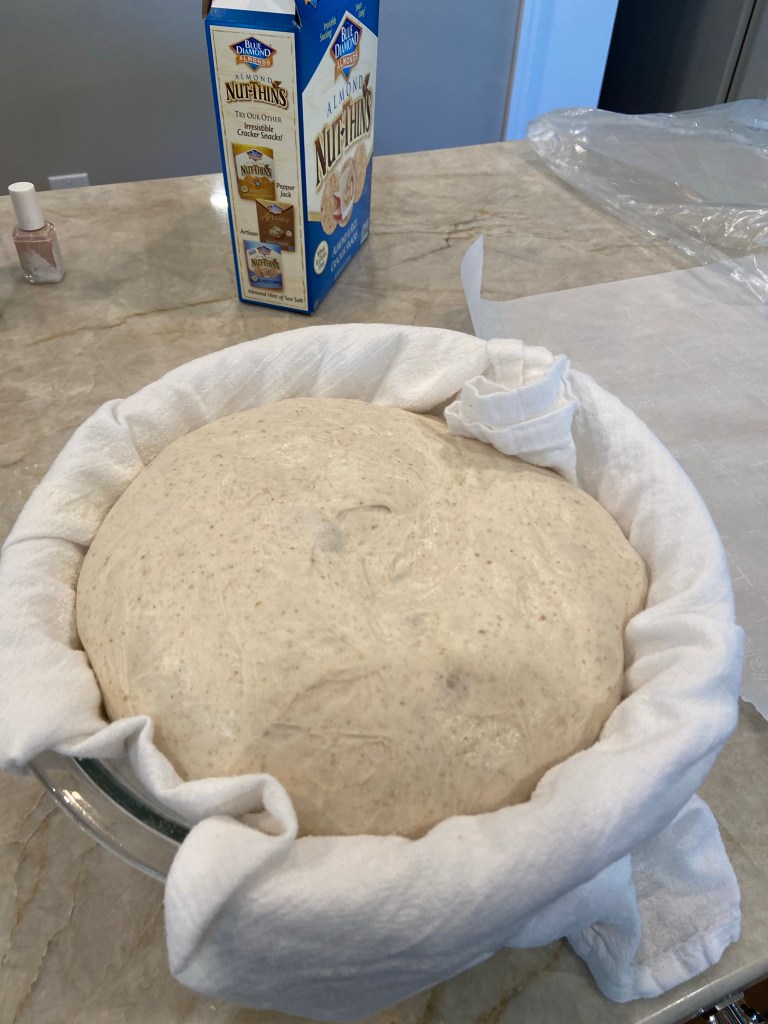
Leave the loaf on the counter for a moment. Line a medium (3 quart) bowl with a lint-free dish towel. Sprinkle a little flour or rice flour on the towel. Carefully pick up the loaf and place it bottom-side up in the bowl. Place the bowl inside a turkey roasting bag, making sure to keep enough air in the bag so it doesn’t rest against the dough.
Shaped loaves ready for overnight proofing.
Put the bowl with your loaf in the refrigerator to prove for 10-12 hours.
Since I started this recipe in the morning, I shaped my dough around 8:00 P.M. and then let the loaf prove overnight. The timing was perfect.
BAKE
Place your Dutch oven in the oven and preheat your oven to 490 degrees. Allow to preheat at least 30 minutes.
While your oven is preheating, remove your loaf from the refrigerator. Stretch a piece of parchment paper across the bowl and turn it upside down so the loaf is resting right-side up on the paper.
Sloppy Baker’s Tip: You will notice that your loaf is more compact than others you may have made. There is a higher percentage of rye flour in this recipe. Rye is lower in gluten than wheat flour, so dough made with it does not have the elasticity needed to rise significantly. However, with this loaf you should still see a nice “oven spring,” when you bake.
Score the loaf with a shape knife or lame, or make a few snips with a pair of kitchen shears.
Remove the Dutch oven from the oven. Carefully place the parchment paper with the loaf on it in the Dutch oven. Spritz or brush a little water on the surface of the loaf.
After 20 minutes, you can see the oven spring.
Cover and bake at 490 degrees for 20 minutes, then lower the temperature to 450 degrees and uncover. Bake for another 20 minutes.
When the loaf is a rich caramel color, remove the loaf and let cool on a wire rack for at least two hours before cutting.
EAT AND ENJOY
The crumb on your loaf may be a little more close textured than some other sourdough you’ve had due to the higher portion of rye flour. It will also have a more robust, earthy flavor than your typical white/wheat blend. Slice and enjoy, then maybe share with others.
It’s a good idea to follow recipes precisely, but messing things up a bit can still have good results.
I messed up. My timing was off. When I bake, I typically try to follow the recommended timing on recipes as closely as I can, with minor changes based on weather and our upper-Midwestern climate. But this week, I started my levain at the wrong time of day and realized I wouldn’t be able to use it to make my dough while it was at its peak unless I began making my bread at 3:00 AM. (Nope, not gonna do it.)
I had three options: 1.) Discard the levain and start again 2.) Use my levain early while the yeast was still developing;or 3.) Get up a little early and use the levain, even though it was past its prime.
With a current flour shortage, I didn’t want to waste my supplies, so option 1 was out. With option 2, I was concerned that less active yeast would result in a flat loaf. I made this mistake on the first sourdough loaf I ever made and it came out looking more like a flying saucer than a boule. So I chose option 3.
I started making my einkorn dough early in the morning, probably three or four hours past the time I should have used the levain. You can see that the levain had fallen from its peak, but was far from its low point.
A few hours past prime.
I followed my recipe as I typically would, forming the dough, adding salt and water after 20 minutes, and conducting stretch-and-folds every 30 minutes for the first 4 hours.
The dough came together nicely, but also rose faster than normal. By the time the four hours was up, the dough had risen by a third and had huge gas bubbles on the surface. I wasn’t sure what the final loaf would look like.
Look at those big gas bubbles on the surface.
After shaping, I put the loaf in a bowl, covered it, and let it proof at room temperature for three hours. In that short time, the loaf rose past the rim of the bowl. It was time to bake.
High rise.
When I tipped the dough out of the bowl, the loaf spread a little, but still held its shape. I scored and baked it covered at 390 degrees for 20 minutes, then reduced the temp to 350 degrees, uncovered, and baked for another 20 minutes.
Mid-bake
The resulting loaf was huge, but with not much of an oven spring. You can see in the image that the line where I scored the loaf spread a little, but didn’t really pop, which indicates that the bread didn’t rise much in the oven. The crumb is a little more close textured than normal, but there are large gas bubbles on one side of the loaf. I’m guessing those are signs that the loaf is overproved.
Not my normal crumb
Most important, though, is that I don’t care and neither does my family. I got the timing wrong, the loaf spread, and the crumb is imperfect. The bread is still delicious and will be gone in couple days.
When you’re baking bread, don’t fret over perfection. Bake, eat, enjoy, and share with others.
If you learn anything about me from this blog, it’s that I am not a bread purist. If it tastes good, it’s good. That’s true for this naan recipe too–not traditionally made, but delicious. That counts.
Naan is a leavened flatbread, traditionally made in a tandoor, a cylindrical clay, open-fire oven. I love naan, but unfortunately don’t own a tandoor. I could make one, but my family would likely think I’m nuts, so I’ve settled for a modified naan cooking method instead. Here’s what I did.
The ingredient list is simple:
1/4 cup warm water
1 Tbsp sugar
2 1/4 tsp active dry yeast, or one packet
3/4 cup warm milk
4 cups all-purpose flour
3/4 cups plain yogurt (more on this later)
1 tsp kosher salt
1 stick butter, for brushing
ACTIVATE THE YEAST AND COMBINE WET INGREDIENTS
In a glass measuring cup, combine the warm water, sugar and yeast and let it sit until foamy. This will take about 10 minutes.
After the yeast mixture is foamy, add the warm milk and yogurt and whisk until well incorporated.
Sloppy Baker’s Tip: Ingredient substitution idea… When I first made this recipe, I realized all our plain yogurt had been used for smoothies. I used sour cream instead with great success.
MAKE AND KNEAD THE DOUGH
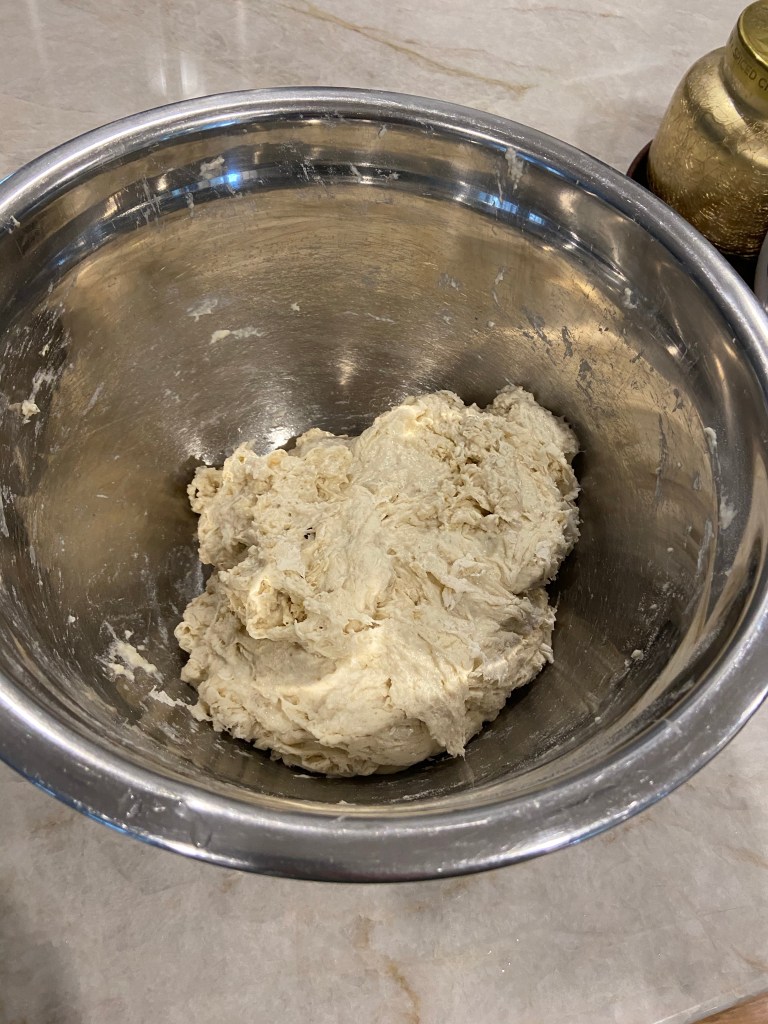
In a large bowl, whisk together the flour and salt. Create a well in the center and pour in the wet ingredients. Mix the ingredients together with a well-washed hand. The resulting dough will feel a little dry, but keep mixing until all the flour is well incorporated.
The dough will feel a little dry until kneaded.
Turn the dough out onto a lightly floured surface and knead until it’s smooth, which should only take three or four minutes.
PROVE THE DOUGH
Place the dough in a lightly oiled bowl and cover. Let the dough rise at room temperature for about an hour, or until it about doubles in size.
Place the kneaded dough in a large bowl to prove.
Sloppy Baker’s Tip: If you’re not quite prepared to cook your dough when it’s doubled in size, you can place it in the refrigerator for a couple hours until you’re ready. The cool environment retards the yeast’s activity and prevents the dough from over-proving.
DIVIDE AND COOK
When you are ready to cook, turn the dough onto a lightly floured surface and lightly knead it into a disk-shape. Divide the dough into 12 equal pieces and roll them into balls with your hands, just like you probably did with play-doh when you were a kid.
Sloppy Baker’s Tip: I don’t care if all my pieces of dough are exactly the same size, but it is helpful to have them pretty close to ensure they cook evenly. I use a digital kitchen scale to help ensure each piece of dough is between 70 and 80 grams.
Begin heating a heavy bottomed skillet over medium-high heat. I used my Lodge cast-iron skillet. Also, melt a stick of butter in the microwave.
While the skillet is heating and the butter is melting, use a rolling pin to roll each ball until it is about 1/4 inch thick and 6 inches diameter. I don’t worry too much about the shape; some naan are round, some are oval, and others are modern art. They all taste good.
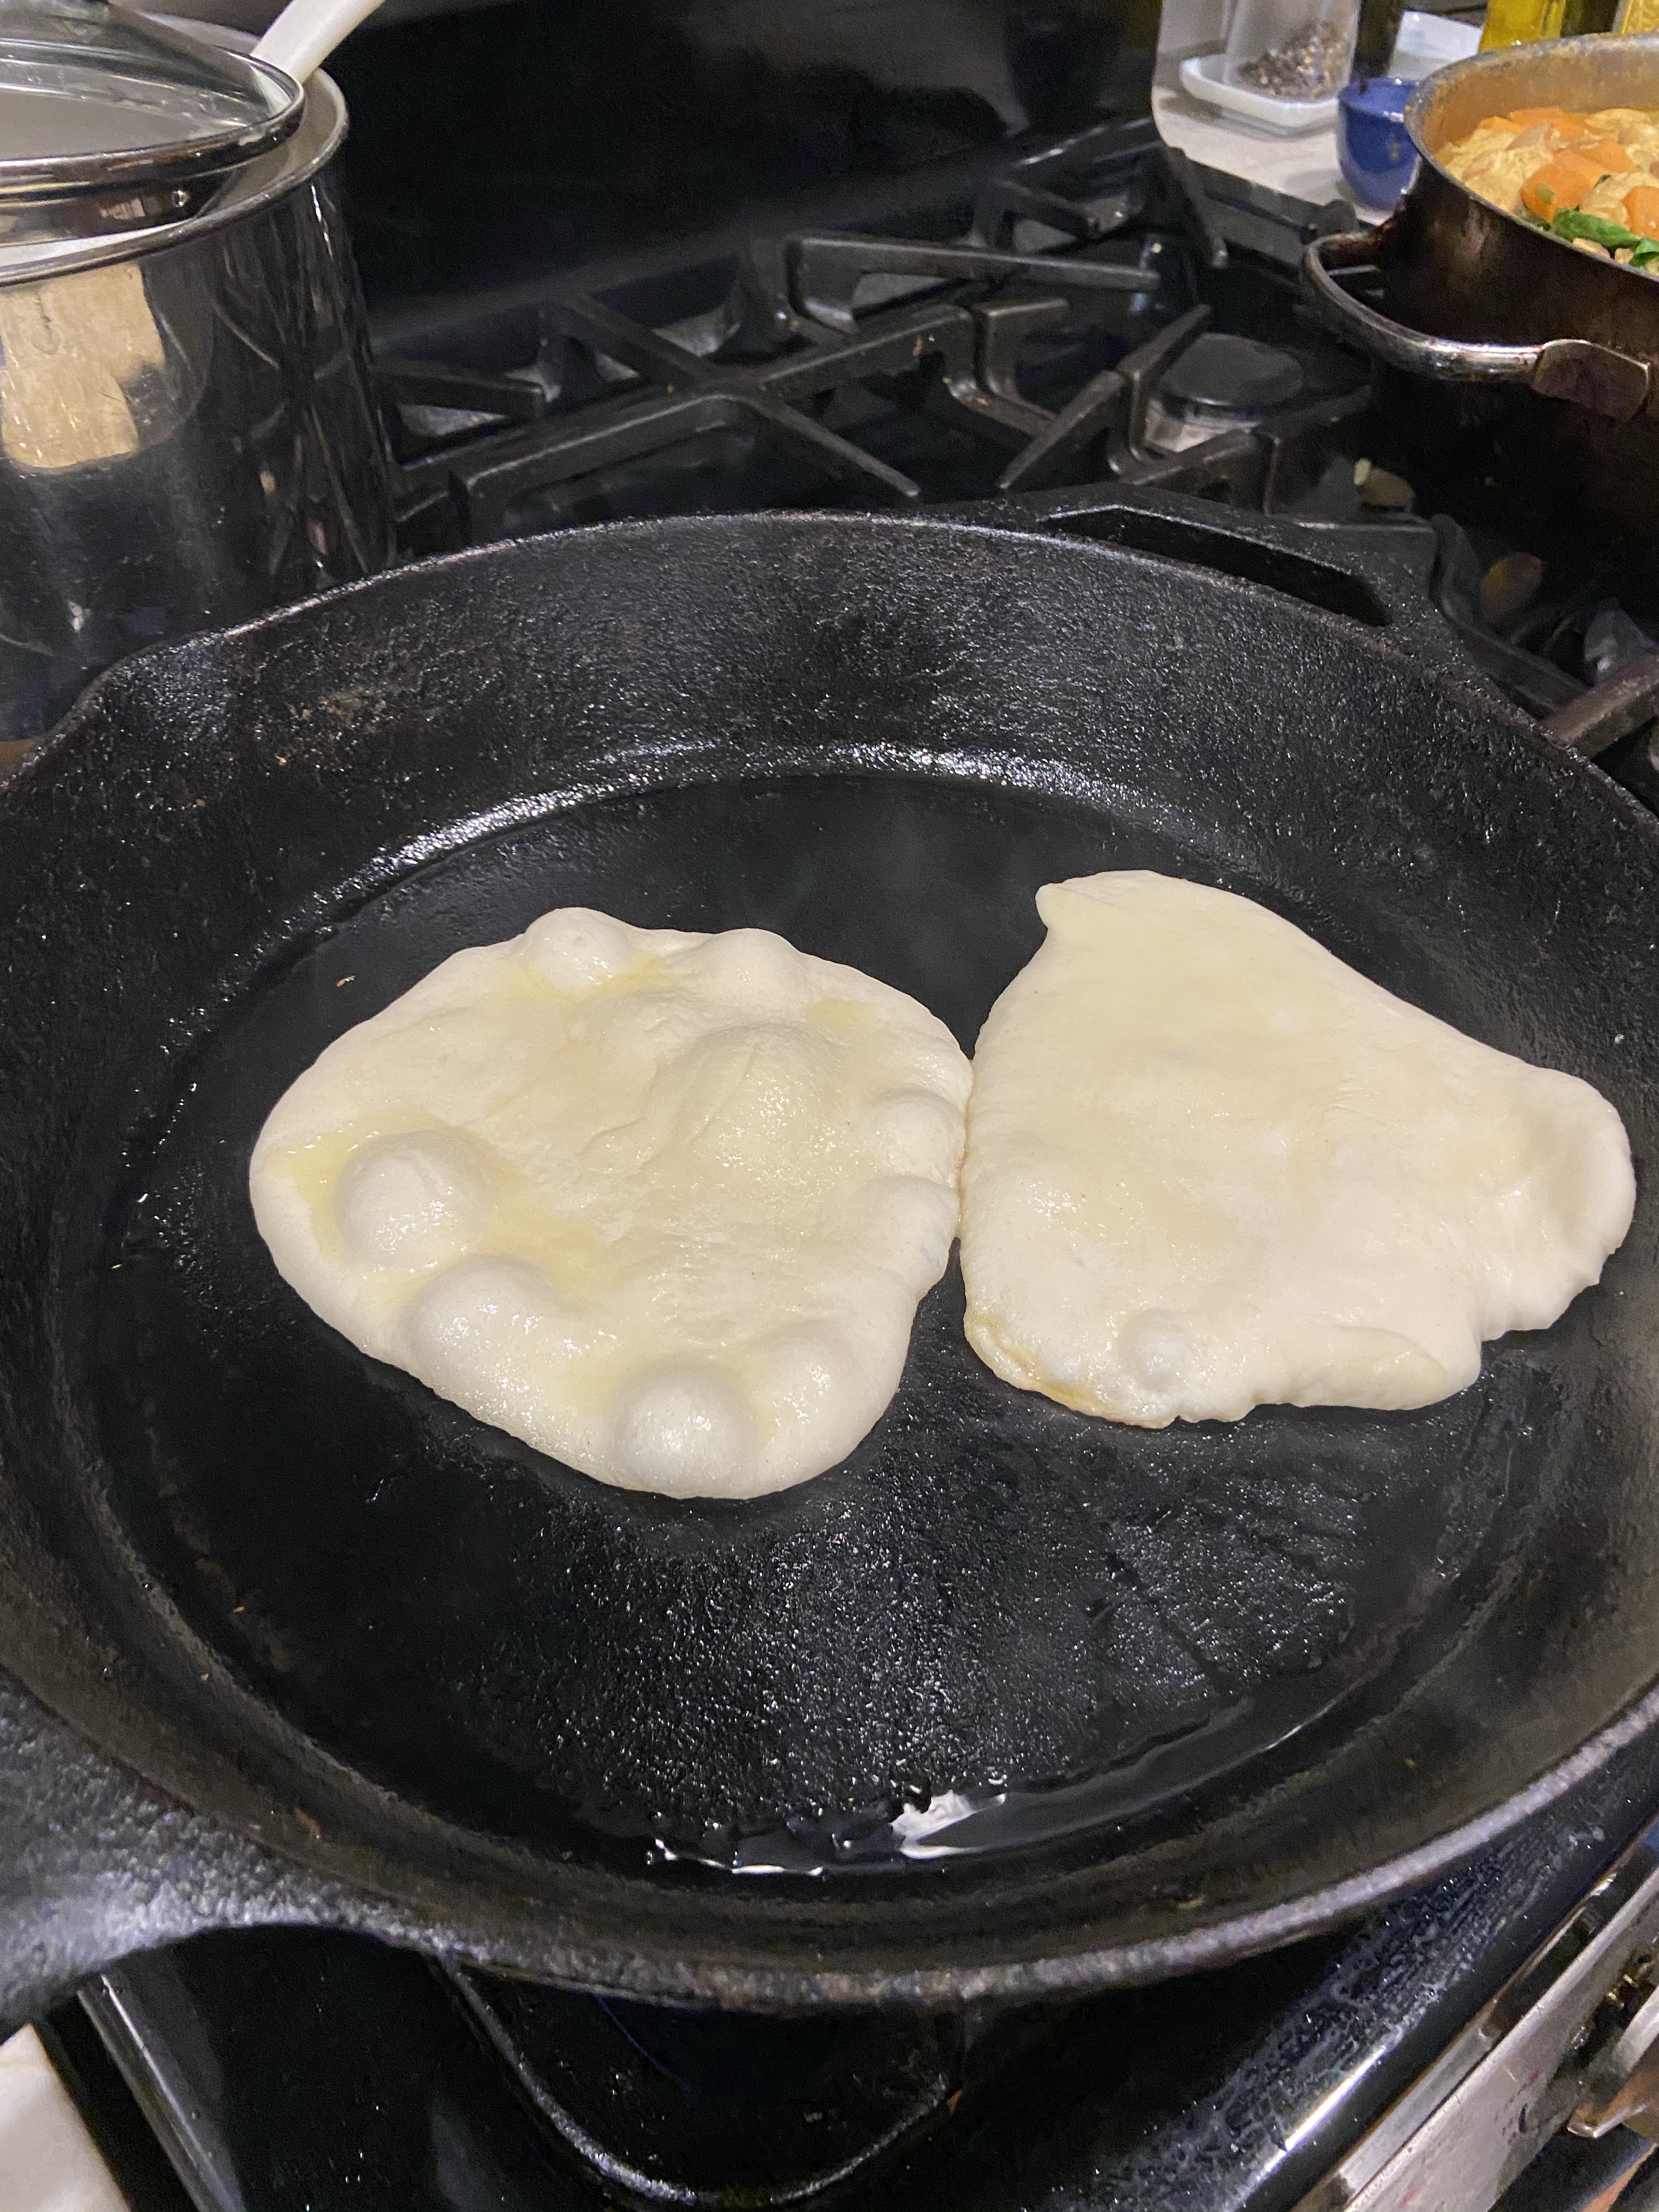
Brush the surface the dough with melted butter and place one or two in the hot skillet, butter-side down. Cook until large bubbles form on the surface, about two minutes.
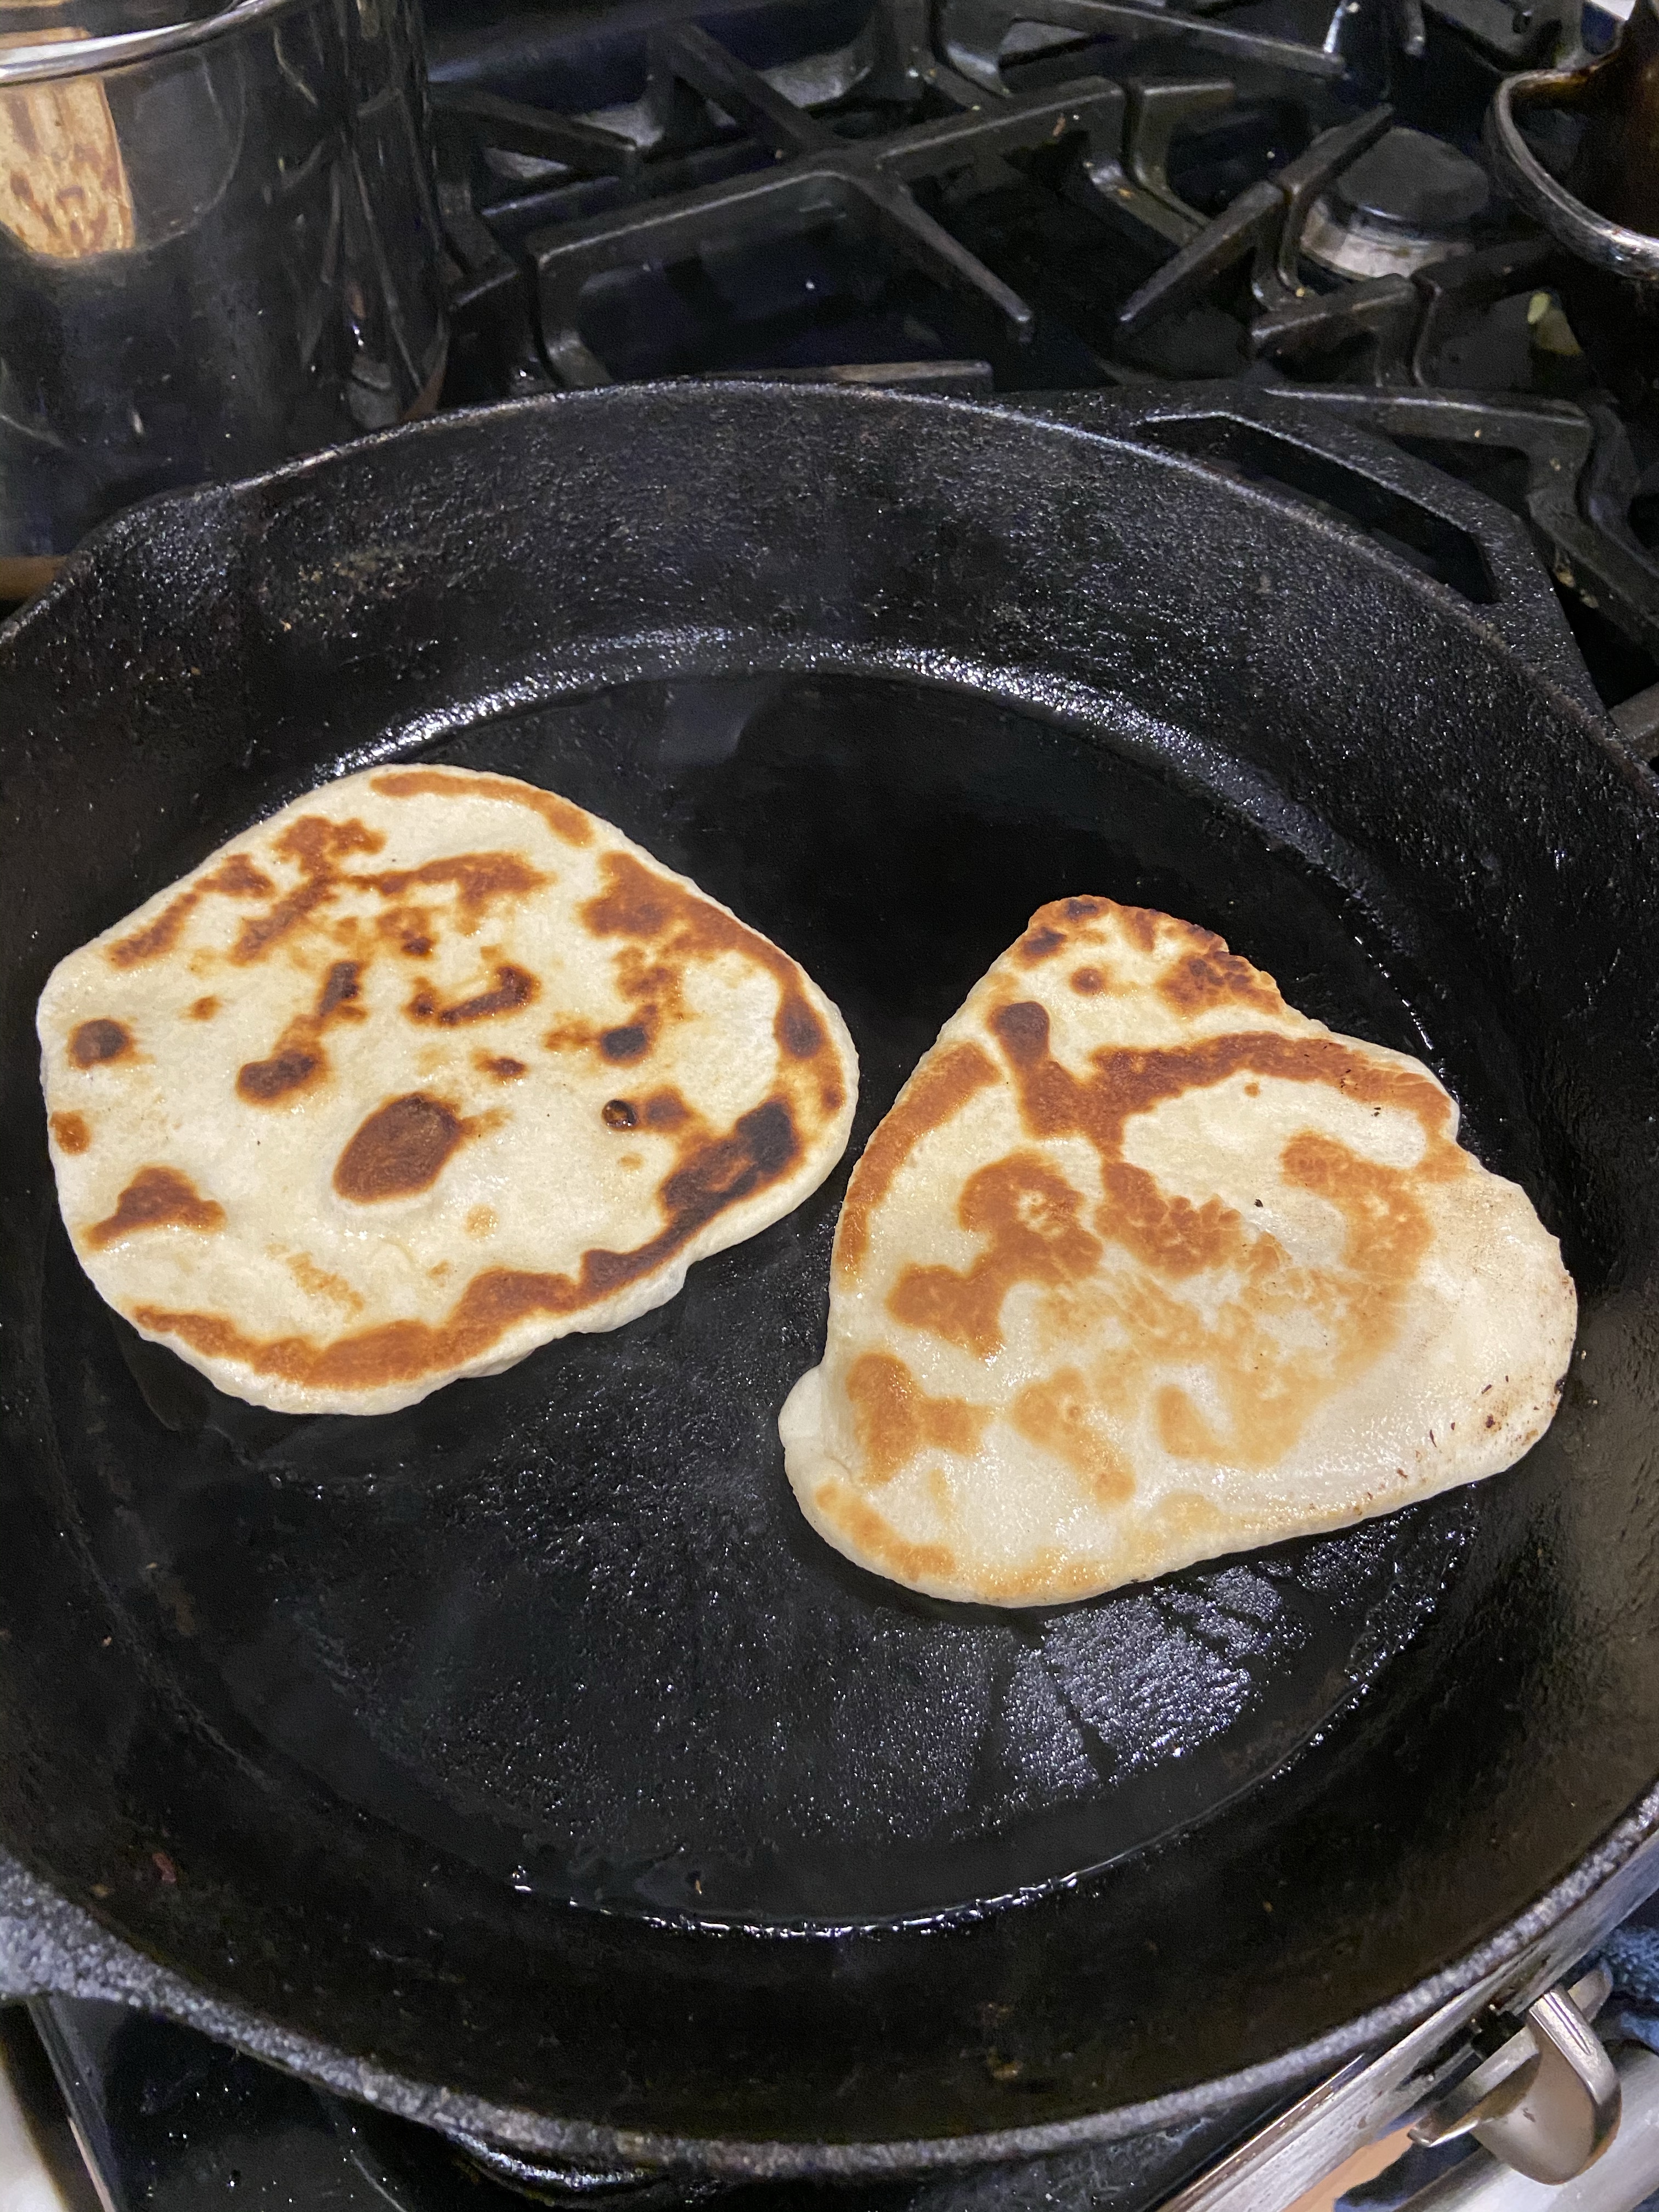
Brush the other side with butter and then flip the dough and cook for another minute or two.
Sloppy Baker’s Tip: Watch you skillet closely. The butter can smoke and burn easily. Turn on your ventilation fan and lower the heat as needed.
Remove the naan from the skillet and repeat until all 12 naan are cooked.
SERVE WARM AND ENJOY
We ate our naan with a chicken cauliflower coconut curry and jasmine rice. It’s a perfect tool for scooping and eating curry. Tear and eat.
Once you bake a few loaves, you may decide to explore other recipes. Mix and match flours to explore which flavor profiles you like best.
My go-to bread recipe is a basic, lower hydration (read less water) dough that’s easy to work with. Every once in a while, I get the urge to experiment with other recipes just to see what they’ll taste like.
Last night, I made a loaf with 400 grams of bread flour, 25 grams of dark rye flour, and 75 grams of einkorn flour. You’re familiar with bread flour and rye, but you are less likely to know einkorn, which is the oldest known species of wheat. The flour is soft and silky and imparts a rich, nutty flavor to bread. It’s also supposed to be easier to digest by people who are sensitive to wheat. (It’s not gluten free, though.)
Here’s the ingredient list:
100 grams levain
400 grams bread flour
75 grams einkorn flour
25 grams rye flour
15 grams sea salt
375 grams water
A Slightly Different Process
The process for this loaf is a little bit different from the foundational sourdough. There are four important differences, but they’re all pretty simple.
Instead of waiting to mix in your levain, which is the medium by which you introduce yeast from your sourdough starter into your dough, you will add it right away when you combine the flour and water.
The amount of time you will let the dough rest, called the autolyse, before adding salt is shorter–just 20 to 30 minutes rather than an hour.
After adding the salt, you will stretch and fold the dough every 30 minutes until you preshape the dough. Typically, you will stretch and fold the dough only three or four times, but with this recipe you will do it seven or eight times before preshaping.
The initial baking temperature will be higher than my other recipes–500 degrees Fahrenheit.
That’s it. With those changes in mind, let’s get started.
MAKE YOUR LEVAIN
Start building the levain about eight hours after feeding your starter, after it has gotten bubbly and risen to its peak. The surface of the starter will have a slightly domed shape to it.
In a clean wide-mouthed jar, plastic container, or bowl, mix together:
40 grams of starter
40 grams of whole wheat flour
40 grams of bread flour
80 grams of water
Stir it up until the flour is all mixed in. Cover and let sit on the counter.
Sloppy Baker’s Tip: A chopstick is an ideal tool for stirring up your starter or levain.
It will bubble and rise just like your starter. I typically let the levain rest for 6-8 hours, but some bakers use it in as short as 4 hours. Keep an eye on it. When the surface is slightly domed, just like your mature starter, it’s ready to use.
MIX TOGETHER FLOUR, WATER, AND LEVAIN
Mix together three kinds of flour with water and levain. Combine:
400 grams bread flour
75 grams einkorn flour
25 grams dark rye flour
100 grams levain
350 grams of room temperature water
Mix the dough with a well-washed hand until all the flour is incorporated. It may take a few minutes of mixing. Don’t leave any flour on the bottom of the bowl. The result will appear more moist than some other sourdoughs you may have made; this is due to a slightly higher percentage of water in the recipe, but also because einkorn doesn’t absorb water as easily as modern wheat flours.
Let the dough rest 20 minutes. I like to set a timer so I don’t lose track of time.
ADD SALT
After 20 minutes of resting, add 15 grams of salt and 25 grams of water. Use your hand to incorporate the ingredients, repeatedly squeezing or pinching the dough until the salt and water are incorporated.
WORK THE DOUGH
Once you’ve squeezed and pinched the dough to incorporate the salt and water, it’s time to start activating the gluten in the dough.
Reach down the side of the bowl, grab a bit of dough from the bottom, pull it up, and fold it over the top of the dough. Think about it as giving your dough a wedgie.
Turn the bowl a little, reach into the bowl, grab a bit of dough from the bottom, pull it up, and fold it over the top of the dough.
Turn the bowl a little and repeat.
Repeat this process until the dough is smooth and elastic. After 30 or 40 wedgies, the dough will feel thicker and smoother in your fingers.
The dough will ferment, letting the yeast do its work, for four hours.
Einkorn produces a smoother, less ropey dough than my traditional recipe.
STRETCH AND FOLD THE DOUGH EVERY 30 MINUTES
After 30 minutes, complete a stretch and fold. Then repeat every 30 minutes throughout the 4 hours. You’ll notice the consistency of the dough changes as you go. It will be less sticky and feel thicker in your hands each time you stretch the dough because the gluten is developing. After the last stretch and fold, the dough will look smooth and pillowy. You may also see a few small air bubbles on the surface.
When it’s ready, the dough will have domed edges and a few gas bubbles on the surface.
PRESHAPE YOUR LOAF
Spill the dough onto the bench and preshape it into a round. Flour your hands. Using slightly cupped hands, turn the dough without lifting it from the surface. As you turn the loaf, pull it gently toward you across the counter. The goal is to shape the dough into a round loaf shape with a little tension across the surface of the loaf.
The preshaped loaf. It will spread out a little as it rests.
Let the loaf rest on the counter uncovered for 30 minutes.
SHAPE THE LOAF
Once your loaves have rested on the counter for 30 minutes, lightly sprinkle the top of the preshaped loaves with flour. Flip the first loaf so the floured side is down.
To shape the loaf, gently grab the edge of the dough closest to you and pull it toward you. Fold it up and over so it covers about half the dough.
Grab the right and left edges of the dough. Stretch the sides out. Fold the right side over the top. Then fold the left side over the top.
Finally grab the edge farthest from you. Stretch it away from you and the up and over the top, like you’re sealing the envelope. Gently roll the dough toward you, as if you’re rolling the envelope over so it is seams down.
Using cupped hands, turn the loaf in the same way you pre-shaped the loaf–turning it and gently pulling it across the counter toward you to create tension along the surface of the loaf. The resulting loaf will be smooth on top, but have a bit of a navel on the underside.
PLACE LOAF IN A MEDIUM BOWL
Line a 3-quart bowl with a lint-free dish towel. Sprinkle a little flour or rice flour on the towel to keep the loaf from sticking when you place it in the bowl.
Sloppy Baker’s Tip: Even with a floured towel, when I baked this loaf, the dough was sticky enough that it clung to the towel a little bit. Be a little more generous when sprinkling the flour.
Very carefully, pick up the loaves and place them navel-side up in the bowls. Place each bowl inside a turkey roasting bag, making sure to keep enough air in the bag so it doesn’t rest against the dough. Seal the bag with a twist tie or rubber band.
Put the loaf in the refrigerator for 12 hours to prove (ferment and rise).
BAKE
Place your dutch oven or other oven-safe covered pot in the oven and preheat to 500 degrees. Let it heat for 30 minutes.
When the oven is ready, remove your loaf from the refrigerator.
Stretch a sheet of parchment paper tight over the bowl and turn it over on the counter so the bread is resting on the paper.
Using a sharp knife or lame, cut a line across the top of the loaf. This slice will act as a vent for the bread as it rises.
Spritz or brush a little water over the surface of the loaf.
Remove your pot from the oven and carefully place the parchment and bread in it. Cover with tight fitting lid.
Bake 20 minutes covered.
Lower the oven temperature to 450 degrees.
Uncover the pot and bake another 20-30 minutes.
After 40 minutes of baking, check your bake. When the loaf is a dark caramel color, remove it from the oven and pot and allow to cool on a rack for at least three hours.
SLICE AND EAT
Using a good serrated knife, cut a healthy slice for yourself. The crust and crumb are more delicate than some other loaves we’ve made. The crumb is soft and tastes creamy and slightly nutty.
This recipe is a new favorite for my family. Even as I tried writing this blog, they’d interrupt to ask me to slice another piece for them.
You don’t have to waste your excess starter. Use it to make a pleasantly sour treat.
I’ve taught a number of people how to make sourdough, including creating and sustaining a starter. When they learn that feeding their wild yeast only requires 20 grams of their starter, often they ask if they have to throw away the excess; its seems like such a waste. (Personally, I think there is a little part of each one of us that laments discarding anything we’ve raised and cared for, even if it’s just a microscopic fungus.)
There are better things to do with our remaining starter, including making a really simple and delicious sourdough fry-bread.
Ingredients
Oil
Excess starter
Chopped green unions
Salt and pepper
Heat a tablespoon of oil in a non-stick pan over medium high heat. Let it get good and hot and then pour your excess starter into the pan. It will look like a big pancake. Sprinkle some green onion on the bread and salt and pepper to taste.
When the edges of the fry-bread start to dry out, flip and cook for a few more minutes.
Sloppy Baker’s Tip: We use green onions a lot in our home. We chop them up, put them in baggies, and freeze them. They last forever in the freezer and can be used whenever we want a mild sharpness to our recipes.
The resulting fry-bread is pleasantly sour and delicious. I like to slice it into wedges and serve with eggs.
Next time you feed your starter, give sourdough fry-bread a try. It’s worth it.
A starter left on the counter for a week came back to life.
After I wrote Don’t Worry Too Much About Your Starter, I did an experiment. I left a jar of my sourdough starter on the counter for a week and neglected it. No flour. No water. It just sat there while its yeasts ate away the sugars in the flour and produced hooch.
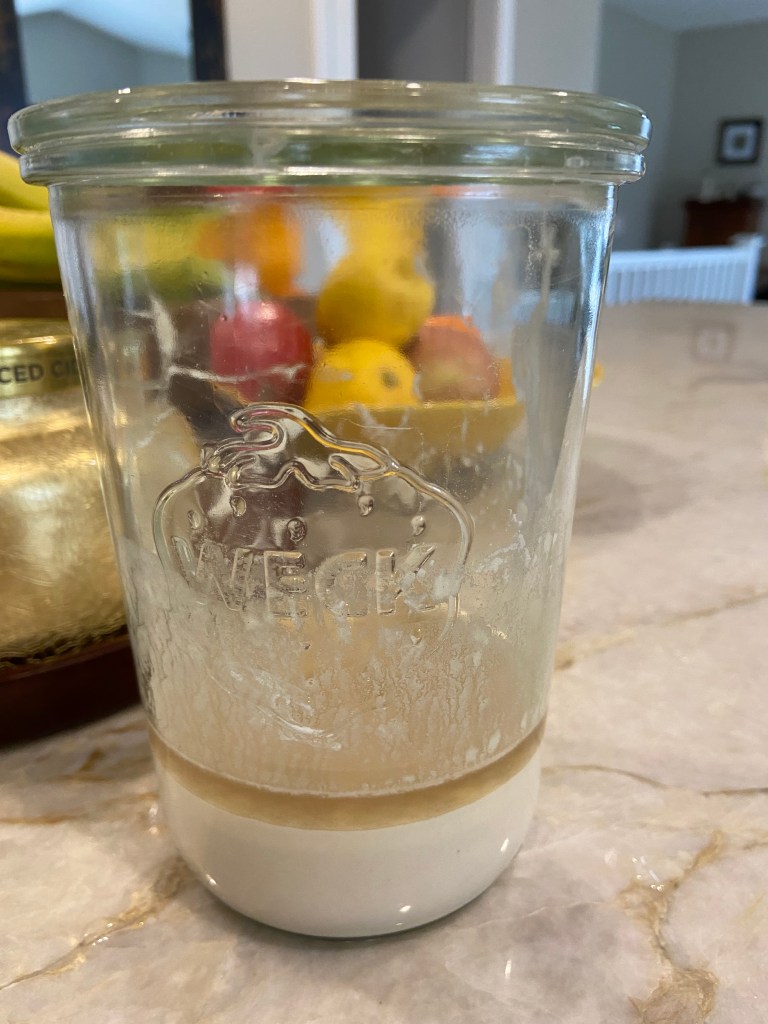
The results look pretty rough. All the gas bubbles have disappeared and there is a quarter-inch pool of alcohol on the surface. This starter could never be used for bread in its current state.
This sourdough starter is in a sad state, but don’t throw it away.
It’s not too late to recover, though. The yeast is weak…starving, really. A yeast barely alive. We can rebuild it. We have the technology. Better than it was before. Better…stronger…faster.
The process is simple. Pour off the hooch and follow the normal feeding schedule for the starter. As a reminder, the recipe is easy: 20 grams starter, 100 grams all-purpose flour, 100 grams of water, and stir it all up. That’s it.
Here is what it looked like the morning I fed it.
Freshly fed and ready to rise.
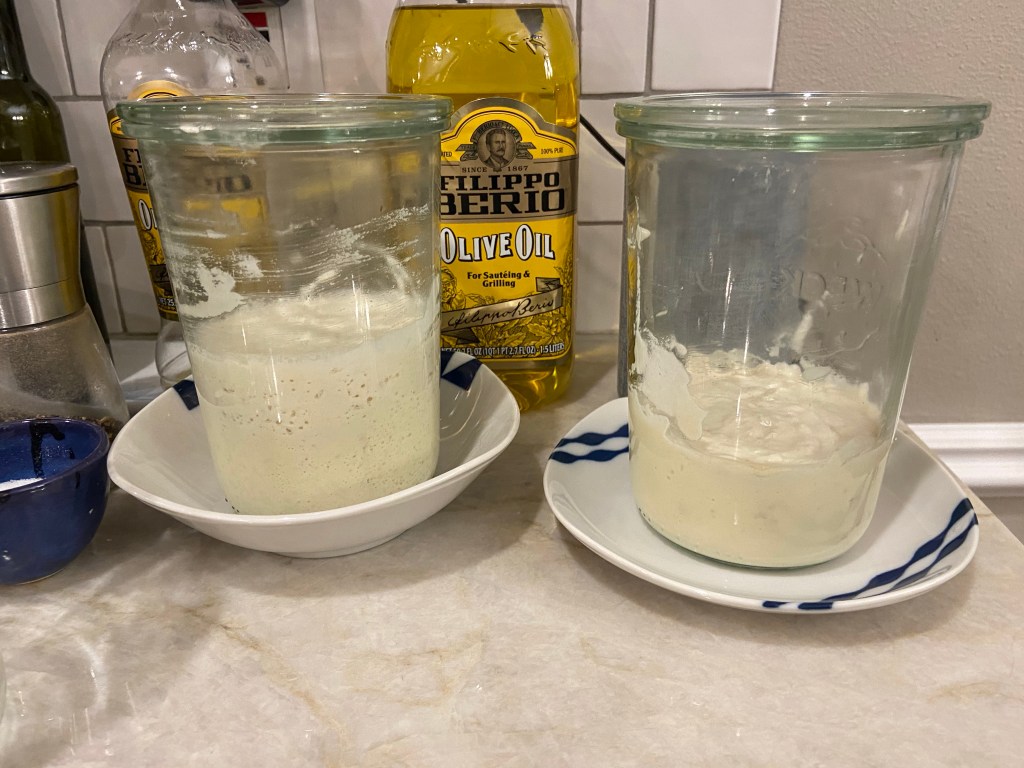
Later that day, you can see the starved starter on the right compared to a well-fed starter on the left. The weak yeast is slow off the starting blocks; it’s not rising much and doesn’t show the gas bubbles of the healthy starter.
Contrast the weak starter on the right to the well-fed starter on the right.
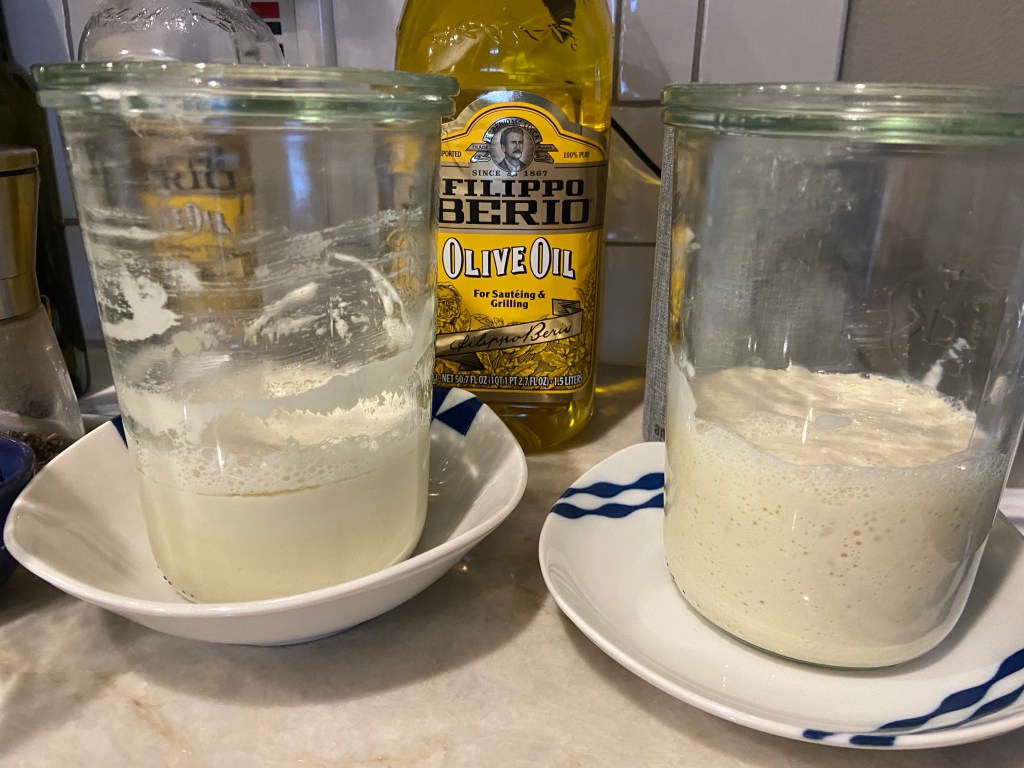
The next morning, you can see that the unhealthy starter is beginning to show some signs of life; it’s rising and showing a few bubbles. It’s just a little slow to rise, like it had a rough night out on the town the evening before. But the life is there.
Life returns, albeit slowly.
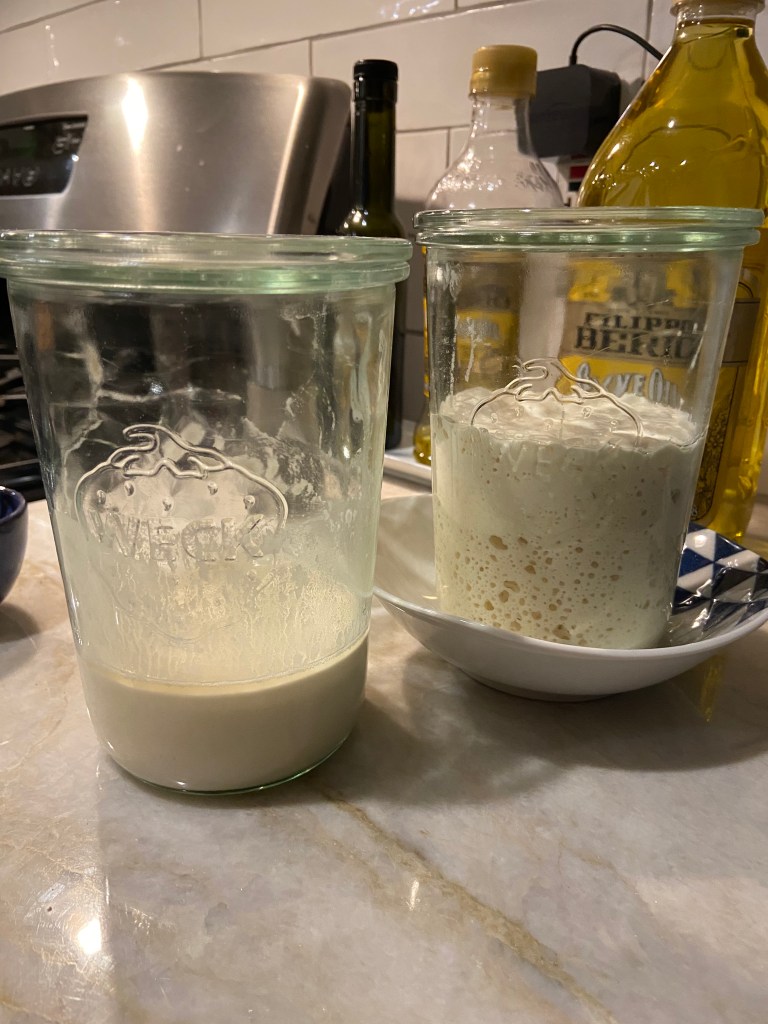
After one more feeding, the starter is really springing back. The rise and bubbles are on par with the consistently well-fed yeast. You might never know that the yeast on the right was neglected for a week.
And it’s back!
A word of caution though. Don’t expect the neglected yeast to be great for baking just yet. It has been weakened and will need to be consistently nurtured for a few days before it will provide the results you are looking for from a loaf.
Feed it each morning, or even in the morning and evening for three or four days. It will again become well-established and strong for baking.
Sourdough starter is easier than many people think. Try to feed it consistently, which is the best way to achieve good baking results, but if you forget or get busy, take solace is knowing that your starter is forgiving.
If you get this one right, you and your family can enjoy fresh baked bread anytime. Fancier recipes are just gilding the lily.
Once you have an established sourdough starter, you’ll be ready to bake your first loaf. It’s not hard, but it takes several steps and patience. This recipe (my favorite) comes from The Perfect Loaf, a great bread blog, but I’ve simplified the language and removed most of the technical jargon. Each of the major steps is shown on a separate page of the post, as well. The goal is to create short, easy steps.
Once you get comfortable baking, I encourage you to go to The Perfect Loaf. The author has many amazing bread recipes to try and terrific guidance on the more advanced elements of baking.
Ingredients you’ll need:
40 grams sourdough starter
788 grams bread flour
150 grams wheat flour
49 grams dark rye flour
18 grams fine sea salt
Water
Each step will be described in detail in this post. What you’ll do:
Make your levain and let it sit at room temperature for approx. 8 hours. Levain is just a fancy name for the yeast you’ll mix into your bread dough; it looks and feels very similar to your sourdough starter.
Add the levain, a little salt, and a little more water to the dough and mix it in with your hand.
Work the dough to activate the gluten.
Stretch and fold the dough every 30 minutes. You will stretch and fold three or four times, then let it sit at room temperature for a couple more hours.
When I first started baking, I read all kinds of things about the importance of caring for your starter. Feed it the same time everyday. Carefully measure your flour and water. Use complex mixes of all-purpose, whole wheat, and rye flours. Some posts even said to never use tap water.
I’m here to say most of that advice is goofy.
I tried to abide by the baking snobs’ advice for a couple months, but then I got busy. I’d forget to feed my starter for a few days or run out of special flour. And what I found was that my starter still sprang back and worked just fine for my bread.
It’s best to feed your starter on a regular basis–daily if you’re not refrigerating it–but once it’s established and healthy, it can survive for a few days without feeding.
The starter on the right was fed today. The starter on the left is hungry; there are no bubbles and a little alcohol on the surface.
If your starter starves for a bit, you’ll notice a few things. It will become more fluid and there may be a bit of dark liquid on the surface. To revive it, just pour off the dark liquid, which is the alcohol byproduct of the fermentation, and then feed the starter as you normally do.
Pro Tip: If you plan to bake in the next few days, be sure to feed your starter on a regular schedule beforehand to keep your yeast active and healthy. That will result in the best possible bake.
Don’t mess with mixing flours. Just use all-purpose or bread flour to feed your starter. They work just fine. You may not get the nice color or as many bubbles as you see in pictures online, but that doesn’t mean your starter is any less effective.
As far as water goes, I’ve never had a problem using plain tap water in my starter. However, it’s possible that the chlorine used to treat water in your community could hinder the growth of your wild yeast. If that’s the case, simply leave the tap water on the counter for a few hours before using or use bottled water.
Your starter is tougher than you’ve heard. It’s really hard to mess it up too badly. And if you do kill your yeast, it’s not hard to start over.